Showing posts with label book class. Show all posts

Sunday, June 20, 2010

Felting + Dying + Book Making = FUN!!!!

Chad Alice Hagen, hand-made wrap-style book, detail
Just returned from a 3-day workshop taught by Chad Alice Hagen... Had a great time learning about felt and how to dye it using resist methods. Wanted to make more (many more) pieces of dyed felt to use in my various beading and collage projects. But after a day of dying, we moved on to book making, which (of course) was also way fun even though much of it was not new to me.

The reason I signed up for the class is because of the luscious, gorgeous, fantastically beautiful pieces of resist-dyed felt made by Christi C. (Sweetpea Path), two of which I've used for Bead Journal Project pieces (here and here).

I LOVE, LOVE the way Chad embellishes bits of dyed felt and creates books and pins with them. Below are a few of her pins... Notice the stitching details and bead embellishments, carefully chosen to enhance the dyed designs on the felt.

Chad Alice Hagen, hand-made felt pins
Some of her pins were for sale... I couldn't resist (ha! pun intended)... bought the one on the top left in the second picture. Difficult choice... I liked them all!

Below is one of her little Coptic-bound books... Ooooh, again, the stitching and beading makes it extra specially precious, don't you think?! Knowing we would be making one too, I just about couldn't contain myself!

Chad Alice Hagen, hand-made Coptic book with embellished felt covers
The first day we felted two large "sheets" of wool, needle-punched, pre-felt bats. Imagine the din as twelve of us literally THREW wads of wet felt onto our tables! When the wool was felted, we cut it into pieces and started up the dye pots (4 baths, 3 color choices each bath).

For each dye bath, we clamped various things on our felt pieces (hair clips, paper clips, metal parts, Popsicle sticks, clothes pins, etc. etc. etc.) and then tossed the pieces into the dye pot. After their 45-minute dye bath when the clips, etc. were removed, the piece would be the dyed color except where the clips were pressing on the wool and resisting the dye. Here are the 11 pieces I dyed that first day.

Robin Atkins, resist-dyed felt
Chad Alice Hagen reviewing resist-dyed felt made by students
Above, Chad is giving some feed back to students about their felt pieces. I'm a tad, just a tad, disappointed in my results. Maybe some of them look a little too much like 60s tie-dyed t-shirts for my taste. I really wanted to spend a second, less rushed, day... further experimenting with this method. However, we moved on.

Day-two, we chose one of our larger pieces of felt and constructed a small, hand-bound, wrap-cover journal. Here's mine... the felt, the bound spine and the finished book...

Robin Atkins, felt used for hand-mand book, wrap style
Robin Atkins, hand-mand book, wrap style with felt cover, binding detail
Robin Atkins, hand-mand book, wrap style with felt cover
At the end of day-two, we selected felt from our stash to make an embellished mini-book with Coptic binding, like the one Chad made pictured above. That evening our home work was to complete the thread embroidery and beading on both the front and back covers of our books. Here is the felt I chose.

Robin Atkins, resist-dyed felt for making cover of Coptic book
Two other students joined my roommate and me in our room... beading, stitching and talking until well past midnight. That was the most fun of the whole workshop for me!

Below are my two embellished covers ready to bind into a book.

Robin Atkins, embellished felt for book covers
Below are all the embellished, felt cover-pieces made by the students in our class.

embellished felt for book covers made by students in Chad Alice Hagen class
Below are pictures of my book, which I finished on the late ferry home just last evening!

Notice that the covers have a hand-stitched edging. We did this with the same waxed linen cord that we used for binding both books. This took longer than any of the other steps and was quite difficult. None of the students finished their edging or had time to bind their books in class. Fortunately, we received good handouts with excellent illustrations which I was able to follow for the binding.

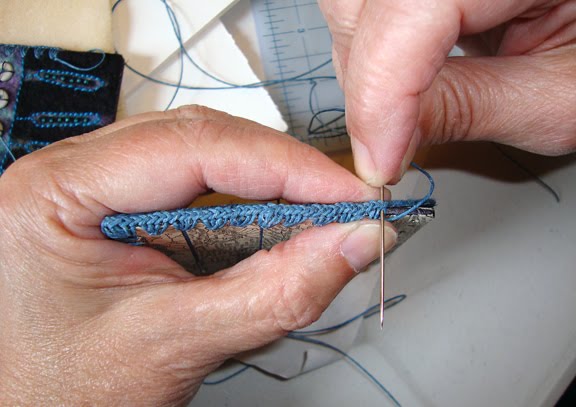
Robin Atkins, hand-mand Coptic book, binding detail
Robin Atkins, hand-mand Coptic book, detail edging stitch
Robin Atkins, hand-mand Coptic book, front cover
Robin Atkins, hand-mand Coptic book, back cover
I love constructing hand-made books!!!! And I love working with hand-dyed wool felt. I'm not so sure I love the dying process, especially the chemicals, the need to carefully monitor time, temperature, water-acidity, etc. I don't think I'll be buying any dye... but I would happily join a dye party at the studio of one of the other students!

Friday, April 30, 2010

Felting, Dyeing, Beading, Stitching ~ Exciting Workshop in June!!!

June 17, 18 and 19, yours truly will be on lovely Lopez Island to learn all about making and embellishing hand-bound blank books with resist-dyed, felt covers. Oh be still my heart!!!

handmade books by Chad Alice Hagen, hand bound, resist-dyed felt covers
This intensive workshop, taught by nationally-recognized felt artist, Chad Alice Hagen, is brought to 12 lucky students through the efforts of Jan Scilipoti, a felt and quilting artist who lives on Lopez Island (one of the San Juan Islands in NW Washington state). Thank you Jan!

handmade book by Chad Alice Hagen, hand bound, resist-dyed felt cover
Just in case you're starting to get that itchy feeling (the way I did when I first heard about this event from Sweetpea, who also will be attending), yes, there are still a few openings!!! Contact Jan to get all the information (she'll email you a pdf flyer), ask questions and register. But don't wait too long...

handmade books by Chad Alice Hagen, hand bound, resist-dyed felt covers
The first day will be all about resist dyeing on needle-punched prefelts... Imagine, 15 dyebaths and oodles of ideas for creating uniquely patterned felt!!!

handmade book by Chad Alice Hagen, hand bound, resist-dyed felt cover
The next two days are all about creating at least two books each, using our dyed felt for the covers. I've made and Coptic-bound a few books and done a bit of beading (LOL) in the past, but never with felt. I'm looking forward to the feel of the felt in my hands as I work the embellishments and binding! We should have lots of delightful hours surrounded by color, texture, and the companionship of like-minded, wool-dye-bead-book-crazy gals. (OK, men too, if any dare to join us!)

If you'd like to join us, for sure, Lopez Island, mid-June is the place to be! You can see more pictures on Chad's Flickr photostream. And here is Chad's blog, which is waaaay fun!

Friday, June 09, 2006

Lisa's Beautiful Hand Made Book

Today we're taking a look at the 9th of 10 books made in my recent 4-day class in Wisconsin. Before getting into it, here's a link to a page of pictures on the Valley Ridge Art Studio site (taken during the class); I'm the one with greying brown hair, black painting shirt and red apron. There are some really neat closeup pictures of some of the painted papers we made, many of which remind me of fabrics.

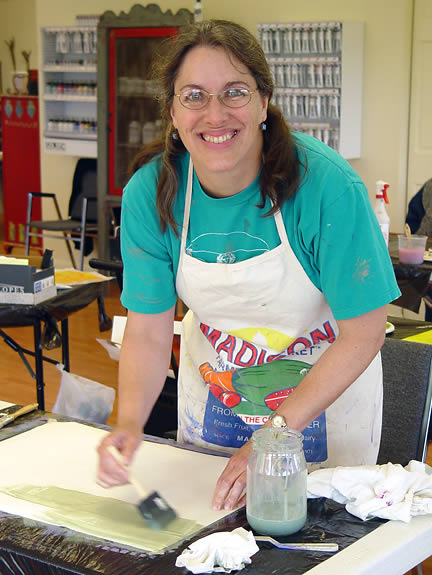
Now back to Lisa! Here she is, painting a wash on the back side of her painted papers. Each of the signatures in this book design is wrapped with a painted paper. A color wash made with watered-down acrylic paint gives a pleasing look to the insides of these signature wraps. One can rubber stamp, write or draw over the color wash.

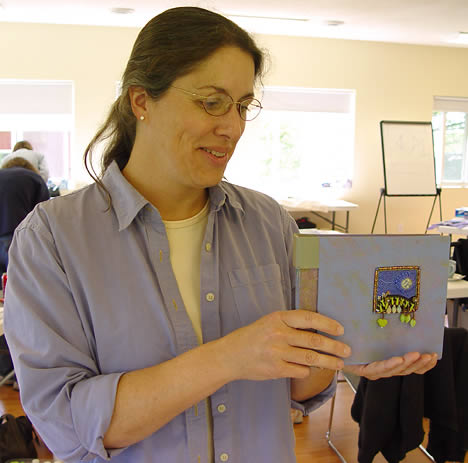
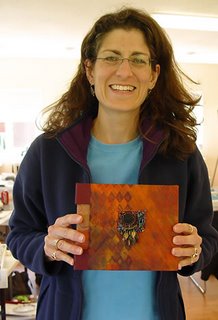
Lisa had taken a bead embroidery class from me prior to this class, and so whizzed right through the beaded piece made to inset into the cover of her book. I'm going to feature one of her other pieces in a post sometime in the next few days. It's an amazing portrayal of a turtle. I mention it now, because it's theme is "Going In"... going into the water, the place where land and water meet. To me, it seems that she may be exploring that same theme in her book... green and blue... sky and water. What do you think? By the way, she wrote to say that she is using her book to transcribe some of her favorite poems.

I love the soft colors of Lisa's painted papers. She achieves a lovely harmony between her beadwork and painted papers. The colors of her beads are bright enough to stand out, but don't completely overpower the gentle nature of her cover paper. By her smile, I'm guessing she's pretty pleased with her finished book!

Reminder: check back in a couple of days to see some detail shots of Lisa's amazing turtle piece!

Sunday, June 04, 2006


Beads & Long-distance Friends


I just love it when beads string across many miles and bring people together because of their common interest! Bead conferences are like that. Bead traders in all parts of the world are like that. You and I can relate to a villager in South Africa or Siberia because of that - a common bead bond, a bead language.

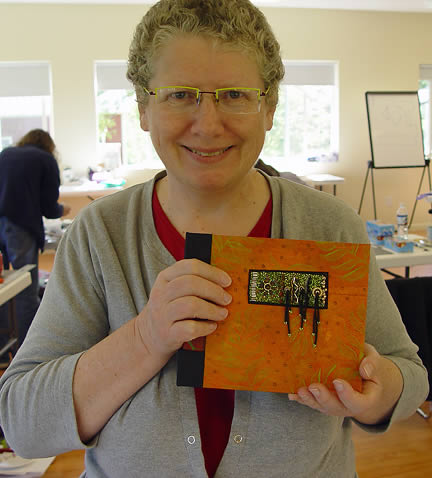
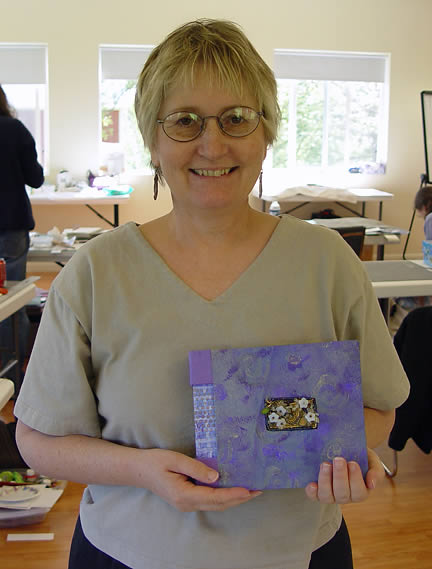
Susan and Phyllis are a great example. They both used to live in Texas and work at the same quilt shop. A few years ago, Susan and her family moved to southern California. For some, this might have been the end of a wonderful friendship. But not these two. Once a year they meet somewhere to indulge their passion for quilting and beading, and to renew their friendship. This year it was Valley Ridge Art Studio in Wisconsin where they took my 4-day workshop "Beads, Books & Paint!"

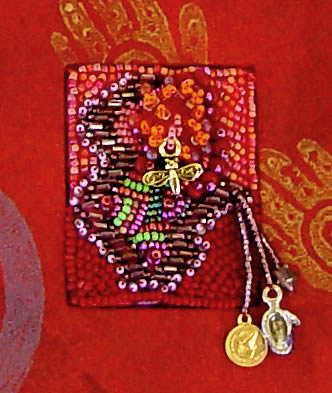
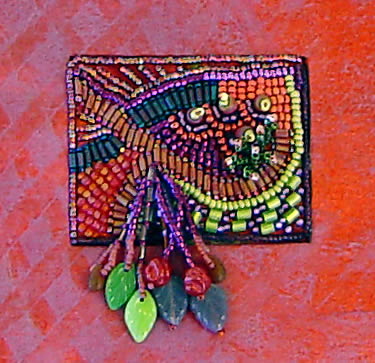
Both Susan and Phyllis chose the same fabric for their bead embroidery - a bright and playful Kaffe Fassett print. Although their bead embroidery reflects their individal style, the predominant color in both pieces is red. Here is Susan's. (Refer to my post on June 2 for Phyllis.)

And here are Susan's painted papers. She had fun repeating a theme of hands, spirals, hearts and buterflies - a heart warming and playful theme that matched her fabric and her mood during class.

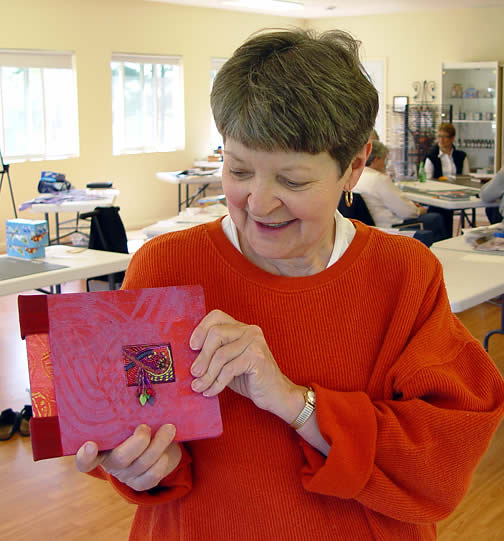
Below she shows off her creation! A couple of days ago she emailed to tell me that she'd already transcribed a Mary Oliver poem into her new book. That's music to my ears, as I love it when these books actually get used!

Saturday, June 03, 2006


Jill's Beadwork Prooves You Don't Need Expensive Beads To Make a Great Piece!

Using just some ordinary beads she had on had, Jill created a fun and compelling piece of beads embroidery, which is dramatically presented by her choice of a complimentary color for her cover paper.

Like Lin (see June 1 post), Jill works at the Minnesota Center for Book Arts, where she is the Youth Program Coordinator. I promised that I'd tell more about MCBA, so here it goes. There you can always see a great exhibition of hand made books, shop for all your book making needs, and take great classes in bookbinding, printing, and papermaking.... classes for kids too. Plus they offer an artist in residence program.


OK, back to my class at Valley Ridge Art Studio in WI. I like this picture of Jill, because she looks so happy painting. She's putting a color wash on the back side of a painted paper, which she will use as one of her signature covers.

Sticking with the theme of bright, happy colors for her signature covers, Jill made her whole book "sing." Below is the finished work of art.

Friday, June 02, 2006


Dramatic Diamonds
Enhance Book Cover ~

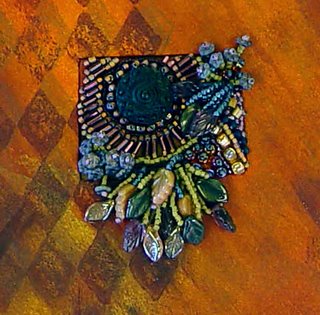
Chris took a time out from her pressured business routine to play with beads and paint for four days (plus some evenings) at Valley Ridge Art Studio in WI. As you can see, her painting has a dramatic flair, and so did her densely fringed bead emboidery.

When I took the picture below of her bead embroidery (on a flat surface), I forgot to arrange the fringe so that it would appear to fall naturally. You'll have to take my word for it that it is rich both in color and fullness.

Chris did a great job of layering paint on her papers to achieve depth. The closer you look at them the more you see. This depth, especially in her cover paper, matches the depth she achieved with her beads to yield a very pleasing overall look to her book.


Bold & Sassy Bead Embroidery ~
Embellishment for Handmade Book

Phyllis (from Texas) and her long-time quilting/beading friend, Susan (from California) agreed many months ago to meet in Wisconsin to take my class (Beads, Books & Paint) at the Valley Ridge Art Studio. At that time, they couldn't have known what a fabulous treat was in store for them... lovely sunny weather, peaceful rolling farm lands, and a small group of talented, like-minded women, who would share many hours of creativity and intense work over a 4-day period.

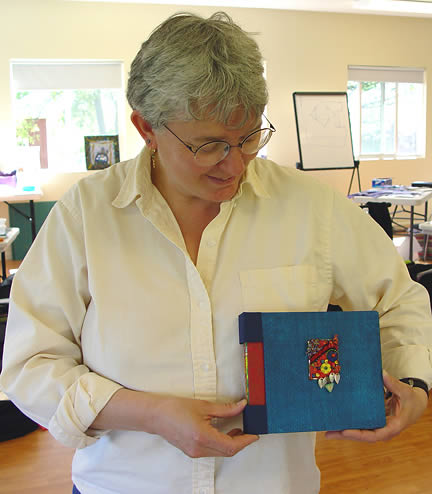
Not a stranger to bead embroidery, Phyllis used a very bold cotton print, which influenced her choice of bead colors and the flow of her design. In turn these colors influenced her painting, which was new to her. Look at her signature covers (below). What do you think gives them a sense of unity? To my eyes, the boldness in each of the patterns is the main unifying factor.

Phyllis returned to Texas with a stunning hand bound book to show off to her friends. She and Susan had such a great time that they're already planning to meet in WI again next year!

Thursday, June 01, 2006


Lin's Beaded Book ~

This is Lin, who teaches at the Minnesota Center for Book Arts in Minneapolis. Since she was such a prolific painter, I thought it appropriate to begin with this picture. We each painted 4 to 10 sheets of 80-90 pound drawing paper with multiple layers of acrylic paint. From these we selected one to use for the book cover. From the remainder, we cut six signature covers. Most of us painted the inside of the signature covers with a "wash" of watered down acrylic paint and matte medium. After completing her painting, Lin even had time to rubber stamp 1/4 inch letters on the cover paper and the insides of her signature covers.

We had fun "auditioning" Lin's papers and helping her decide which to use for her book cover. Looking at each student's papers took some time, but seemed a valuable aid to the decision making. Also one couldn't help but get ideas for the next painting session.


Lin's analogous color scheme, accented with black beads and black stamping really looks "snappy."


Lin was a little concerned that her bead embroidery wasn't a true rectangle, but I think it looks great the way it is... something eye-catching about the shape makes her book more dramatic.


I was a little uneasy during introductions when Lin and Jill said they both work and teach at the Minnesota Center for Book Arts. Actually, they were a joy to have in the class, learning new things and at the same time sharing tips from their previous experiences making books. Later when I feature Jill's book, I'll write more about the MCBA, which I visited about a year ago. Meanwhile, here is Lin and her completed book. Make that a "zowie!"

Wednesday, May 31, 2006


Auditioning Painted Papers For Jude's Book ~

Continuing the theme of posts from the past few days... scenes from Beads, Books & Paint, a 4-day workshop I taught at Valley Ridge Art Studio in southwest Wisconsin.

Today we'll take a look at Jude's splendid work. Here we are "auditioning" her painted papers, helping her make decisions about which sheet to use for the cover of her book and where to place her beadwork.

Jude had never done bead embroidery before, but bravely started right out on the piece for her book, practicing and learning the stitches as she went along. I admire that! And, it turned out very well, don't you think?


Her painted papers are really lovely too, utilizing complimentary colors in a pleasing way. Below you can see Jude's book cover and five signatures, ready to be bound together, the last step in the process.


Here she looks pretty pleased with her finished book. No wonder... it's a beauty!


Another Beautiful Beaded Book ~

And more yet to come! This one is by Cathy of Wisconsin, student in my class at Valley Ridge Art Studio (see previous posts). Cathy's improvisational beadwork began to suggest a garden. Most of her painting also reminded her of plants and flowers, and so it became the theme of her book.

I love Cathy's color choices... bold and yet harmonizing. Many of us painted with analogous colors (next to each other on the color wheel), which is a formula that nearly always works well. Cathy's colors are all over the color wheel and include both bright and soft combinations. In my opinion, what makes these papers look so nice together is partly that they are all similar in value (lightness <> darkness). The garden theme helps to relate them as well.