Making Dorset buttons is addictive!!! With endless possibilities for both design and use, these sweet creations keep my mind spinning, my hands busy, and my heart pulsating!
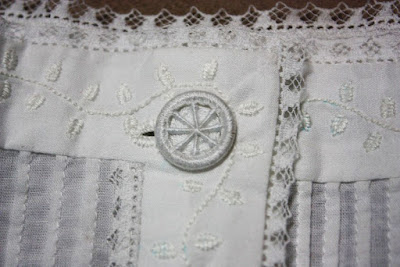
Made with a few simple materials - thread or yarn, a metal or plastic ring, and a needle - Dorset buttons can be plain, like this one on a replica of a Victorian chemise.
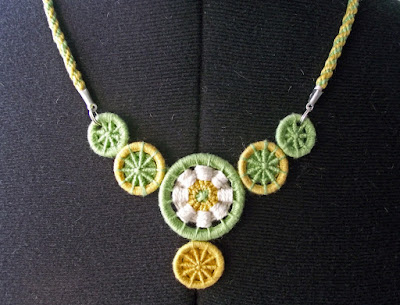
Dorset buttons can include beads, like the center button and the two on the right below.
Dorset buttons can be fancy like these, which I designed to suggest snowflakes.
Dorset buttons can be light or airy, like the ones above, or they can have a bit more visual weight like the one below, which is actually the same size (1 inch diameter) as the two above.
Dorset buttons can be multi-colored. I designed this one to suggest a poinsettia. Hmmm... maybe I should try again?
Dorset buttons can be made to resemble something, such as a tree.
Dorset buttons have many uses. Here is a Christmas ornament I recently made. It looks much prettier hanging (off the card) on a tree.
And here are a few ideas for using Dorset buttons that I found on the web:
It was easy to learn the basics from an online tutorial. After that, it was just a matter of searching images for "Dorset buttons" online, experimenting until I figured out how to make different patterns, and then starting to create some designs of my own.
One thing that took me a while to figure out, was how to make the button shank. I only add a shank if I intend the button to be used as a button, and then only if I want the button to "stand apart a bit from the surface" like for use on a sweater. For purposes like the Victorian chemise at the top of this post, the traditional method of attaching the button would have been simply to sew through the central woven area of the button.
The hardest part was, and still is, finding suitable rings. Most of mine are made on plastic cafe curtain rings, available at Jo-Ann's or hardware stores. The rings must not have a gap, so if they are metal, they need to be soldered. Metal rings made with 16ga. wire would be perfect, but to get them custom made and soldered neatly, would probably be expensive. They would have to be made with a metal that would not tarnish or rust, if the buttons were to last and stay nice looking. Recommendations, anyone?
I use tapestry needles, because the blunt point is perfect for "weaving" the button center (or "rounding" as it is more properly called). So far, I've experimented only with pearl cotton thread, size 12 and 8. Next I'm going to try Danish Flower Thread, which has a matte finish. I can think of many possibilities for using beads too. Some of the designs I've seen on the web are so heavily beaded, that the thread is not even visible, which doesn't quite "work" for me. I like the idea of making the buttons with finger-weight yarn (or any yarn) as closures for knitted sweaters, or as decorations for knitted caps and mittens.
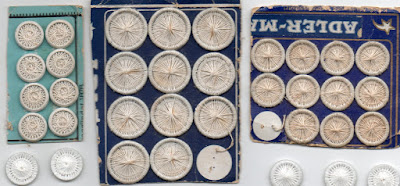
Dorset buttons, first made in the early 1600's in England, were popular for a couple of centuries, until the mid 1800's. You can read more about the history here. Some of these buttons, such as the ones above, now over 200 years old, are cherished (and occasionally sold) by button collectors.
If I don't post again for a while, I'm either making Dorset buttons or stitching hexies... you know how it is when obsessions take over!
Showing posts with label earrings. Show all posts
Showing posts with label earrings. Show all posts
Monday, December 21, 2015
Wednesday, May 01, 2013
In The Pink ~ Wireworking Tutorial
Maybe I'm back... Or, maybe I'm just avoiding the task of unpacking all the boxes...
Either way, as I put on my pink corduroy shirt this morning, the thought of making some new pink earrings propelled me into the studio. Yay... ignore the boxes and have some beady fun! As long as I was doing it, why not take a few pictures? OK, so here's a mini-tutorial about wire working.
This is how they look finished.
You need half/hard or full/hard wire for these, because they need to have some "spring" to them in order to be able to fasten the hook at the back. I used 20 ga., half/hard, gold-filled wire for this pair.
Cut two pieces of wire, each 4.5 inches long. File one end of each wire, so that the cut end is smooth. Use a small, round-nose pliers to make a small loop at the filed end of each wire.
Load the beads on the wire. Disc-shaped, lampwork beads work well for this style of earrings. I add a gold-plated snowflake spacer bead and a 2mm gold-filled, round bead on each side of the disc. After adding the beads, bend the wire upward at a 90 degree angle as shown in the picture. If the loop is turning the wrong way, grasp it in the jaws of a flat-nose pliers and twist to position it correctly (horizontal).
Use a felt-tip marker to make a mark on the wire 1.5 inches above the right angle bend. This mark will be at the center of the top of the earring.
Place a 3/8" or 1/4" dowel as a mandrel under the wire, centering the mark on the dowel. Bend the end of the wire downward, over the dowel, toward the loop at the back of the earring. Do this step slowly, checking your progress and making sure the bend is directly above the beads.
Cut the end of the wire about 1/8 inch below loop. File the cut end smooth, and slightly round the edges. Then I sand the tip of the wire with #400 (or finer) sandpaper, and polish it with a soft cloth to make it totally smooth.
Use round-nose pliers to round the tip upward a little, allowing it to hook into the loop for security.
These earrings are very comfortable to wear. Because of the hook at the back, you'll never cry over one lost earring!
Subscribe to:
Posts (Atom)


