Showing posts with label grandma's flower garden. Show all posts

Monday, August 21, 2017

Frida's Flowers - 1 Year Crochet Project - So Much Fun!

Crochet flower, hexie-shaped block made by Robin Atkins


It All Started with Hexie-lust!


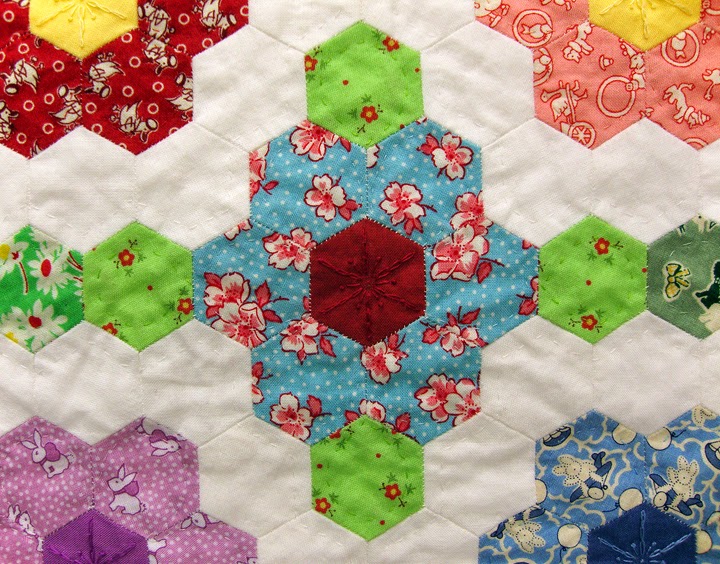
Look back to early 2012, when my dear friend, Christy, started covering little hexagon-shaped bits of card stock with fabric, making stacks of 6 ready to sew together as petals for a hexie flower. While I was working on a beading project, she was making these utterly irresistible stacks of hexies, until finally I succumbed to the temptation, and joined her.

My friend, Christy, with her bag of hexies, is a great influence on me!

Here is Christy holding a whole bag of covered hexie shapes, made for the pathway around her hexie flowers.

Robin Atkins, Grandma's Garden, hexie quilt, finishing the top

And here I am holding my hexie quilt, showing the final seam of hand stitching needed to complete the quilt top for my hexie quilt, Grandma's Flower Garden.

You'd think that hand-stitching and quilting over 4,000 hexies would be enough for any sane person, right?

Robin Atkins, 733 hexie flowers, made for triptych quilts

Guess I'm not sane, because in 2015 I started another hexie quilt, or as it turns out, a triptych of wall quilts, for which I've completed 733 hexie flowers (which requires 5,131 individual hexies)!

Getting Hooked on Crochet


OK.... so now, I'm finished with hexies, right?  You guessed it! The answer is, "NO WAY." And once again it's Christy's "fault." With her hexie quilt on the back burner for a while, she moved into a crochet phase, making lovely afghans and shawls. She, along with Sabine, my friend in Germany, got me hooked on crochet (pun intended). 

Robin Atkins, crocheted shawl

This is the first shawl I made late in 2015, learning and getting comfortable with the hook. 

crocheted afghan by Huib Peterson using Frida's Flowers pattern

Then....  the big bang happened...  the crochet-hexie connection!!! This is it.  I saw this picture on Huib Petersen's Facebook page, fell bonkers in love, messaged him to find out about it, and learned that there is a pattern for the flowers online. Click on the above photo of Huib's flowers to see it enlarged... Wouldn't you be a bit inclined to go bonkers over it too???

On June 12, 2016, just one day after seeing his crocheted hexie flowers on Facebook, Christy and I were in Island Wools, our local yarn shop, buying DK-weight, cotton yarn in a dozen colors, ready to begin our own stacks of crocheted hexie flowers!

On a whim, right there in the yarn shop, we decided to keep what we were doing a secret... not to show or tell anybody about our project until we finished our afghans... no blogging or posting on Facebook about it. We didn't even tell Libby or Julie at the yarn shop why we kept ordering more cotton yarn. Our secret-keeping made it all the more fun!

Original Crochet-Along, Frida's Flowers


According to Huib, the instructions for his flowers came from a Stylecraft, Crochet-Along, called Frida's Flowers, staring an original pattern by Jane Crowfoot.

Frida's Flowers, Stylecraft Crochet-Along, designed by Jane Crowfoot

This is a photo from the instructions, showing the finished afghan, which includes several identical flowers in each of 2 simple and 5 complex designs. All of the designs are are multi-colored and textural, with raised flower parts, enough to make us drool!

Bored with making 6 identical flowers - Colors calling us!


Our plan was to get together at my house every Sunday afternoon to crochet hexie flowers, each of us completing enough flowers to make an afghan. In a little over a year of working 4-6 hours nearly every Sunday and some Tuesday evenings as well, we each had completed 39 flower blocks and 6 half-flower blocks, and were ready to crochet them together.

Robin Atkins, Frida's Flowers, Block 3

Ooops... I'm getting ahead of myself with this story.  We began with this block, called Rosa, which was the 3rd block in the overall design. (Blocks 1 and 2 are the more simple ones with a small central bud and plain background). This one is the easiest of the full flower designs.

But, for both of us, it was difficult, as there were several stitches we didn't know. Thanks to Youtube videos, we were able to learn them. However, after making two flowers each in the pattern colors, partially out of boredom and partly because of the influence of Huib's multi-color, no-two-the-same flowers, we decided to pick our own colors, making only a pair in each colorway. This, of course, caused us both to buy a lot more colors of yarn... oh for fun!

Robin Atkins, Frida's Flowers, Blocks 3 and 5

After making 6 each of Blocks 3 and 4, mine looked like this. Christy's color choices are different... enough different that our finished afghans may look like sisters, but definitely not like identical twins.


Robin Atkins, Frida's Flowers, colors inspired by flower catalog images

Robin Atkins, Frida's Flowers, colors inspired by flower catalog images
I started looking at flower catalogs to find new color combinations... and both of us were buying yarn like crazy.  Some brands have more that 50 color choices in DK-weight cotton. I admit to spending over two hundred dollars on yarn all-in-all, with some remainders for future projects. Never mind the cost... I adore all the colors.

Designing Our Afghans


Early in the process, both Christy and I decided we wanted to make something more like Huib's, with a random or nearly random placement of the blocks. Plus, we wanted it to be a bit bigger than the 31-block original design.

Robin Atkins, Frida's Flowers, crocheted half-blocks for sides of afghan

Also, we didn't want to include any of the more simple blocks, except as modified half-blocks for the sides.

A year went by, with the two of us continually challenged, thoroughly enjoying the process of making our blocks. Then it was time to lay them all out!

Robin Atkins, Frida's Flowers, layout for crocheted blocks

Almost at once, it was clear that the flowers needed more space, more black around each one to set them off. So, before crocheting them together, we bought more skeins of black yarn, and added a row of double crochet around each of the blocks. This also would add a bit more to the size of the afghans, making them large enough to cover both arms and legs while watching a good movie on a winter's evening.

Robin Atkins, Frida's Flowers, all blocks joined with crocheted slip stitch

Here is my finished arrangement, the hexie flower blocks crocheted together with a slip-stitch, awaiting a border. Although the original design included a border that would have worked OK, by then I was flying solo, wanting a border I could call my own.  

Frida's Flowers, popcorn edge stitch invented by Robin Atkins

After some experimentation, trial-and-error, crochet and un-ravel attempts, this is my final border invention, which includes the "popcorn" stitch, central to many of the flowers. It was challenging to figure out how to crochet the increases and decreases necessary for the zig-zag edges on the sides, and still keep it flat. Again, trial-and-error was part of the process.

Robin Atkins with nearly completed crocheted afghan, Frida's Flowers

Here is my almost-finished afghan, my own version of Frida's Flowers, showing the size!

Entering at the San Juan County Fair


As we neared completion, we faced a moral dilemma, a difficult decision. We both enjoy submitting entries at our local San Juan County Fair each year, especially in the Fiber and Textile Arts Divisions. These entries are judged and eligible to win ribbons and cash prizes. In previous years, there haven't been many crocheted items entered, nothing that has won any of the top awards.

We figured our afghans could be "game changers," that they had a chance of winning. But we didn't like the idea of being in competition with each other for the top awards, the Best of Class and the Best of Show. If we both entered, neither quilt would win a top award, or one would win and the other wouldn't (which might be the worst outcome). So, after some heartfelt discussions, we decided I would enter mine this year, and she would delay finishing hers until later so that it would be eligible to enter next year.

Robin Atkins, crocheted afghan, Frida's Flowers, wins top awards at Fair

Here's what happened...  Best of Class and Viewer's Choice for me in 2017!!!! And hopefully, the same will happen next year for Christy's version. Twelve months from now, I know for sure all the attendees will have forgotten my quilt, and will love seeing Christy's flowers, just as they did mine this year!


Sunday, April 19, 2015

Grandma's Flower Garden - 3/4 Inch Hexie Quilt - Time Study

Grandmothers Flower Garden hexie quilt, Robin Atkins, flowers

As followers may recall, I started hand stitching hexies for a Grandmother's Flower Garden quilt in March, 2012... three years ago. Watching my friend, Christy, basting sweet, reproduction fabrics around paper forms, making little stacks of 3/4-inch hexagons, I just couldn't resist! These Beadlust posts show the various steps to making the quilt top and the start of  hand-quilting in more detail than this post.

Although I'm still hand-quilting, the end is in sight now. I'm hoping to finish in time for our County Fair in August.

In this post, I thought it might interest you to look at how much time it takes to complete each of the steps in hand piecing and quilting a 3/4" hexie quilt, and the total number of hours involved. I'm basing time estimates for all of the repetitive steps on how long it takes me to do a large number in one sitting, after having practiced... in other words, at my best speed.

Step 1 - Planning the Quilt and Getting Fabrics - time: 20 hours

I decided to make a version of the traditional 1930's Grandmother's Flower Garden quilt that is less common than the one with a path or ring around each of the flowers. I chose this design. Note the green hexie leaves, which form a vertical-horizontal grid.

Grandmothers Flower Garden hexie quilt, Robin Atkins, layout

The final size is 72 x 92 inches, a comfortable size for a twin bed, a total of 4,694 hexies. I wanted to use as many different fabrics in this quilt as possible.
  • flowers = 280 different print fabrics with any background color except green or white.
  • leaves = 150 different print fabrics in green
  • flower centers (repeats OK) = 25 different solids
  • double border = 1 print + 1 solid
Although I had collected 30's reproduction fabrics for a few years, I certainly needed more. From a selection of fabrics given to me, fabrics purchased in an eBay auction, and my stash, I found enough to make each of the flowers unique. Although there were not enough greens to make the leaves unique, I had about 60 different green prints, such that each is not repeated more than 3 times in the quilt. So, in the end the quilt includes more than 360 unique fabrics!

Grandmothers Flower Garden hexie quilt, Robin Atkins, fabrics for flowers

Step 2 - Wash and Iron all of the Fabrics - time: 15 hours

Yikes! A few of the fabrics I wanted to use were already washed; most were not. Knowing it should be consistent, and worrying that the reds might bleed, I decided to pre-wash and iron all of the fabrics. Doing this step in stages, as I acquired fabrics, I'm not really sure how long it took, perhaps quite a bit more than the above estimate.

Step 3 - Cutting and Trimming all of the Hexies - time: 28 hours

For each of the  4,694 hexies, I cut a 2" square of fabric, and trimmed off the four corners. Of course, I cut and trimmed in multiples, except for a few that I fussy cut individually. Again, since I did this step in stages, the above time estimate is a bit rough.

Step 4 - Basting the Fabric to the Paper Hexie Forms - time: 235 hours

Grandmothers Flower Garden hexie quilt, Robin Atkins, basting hexies
Once I learned that using YLI quilting thread for basting makes it go much faster than using regular sewing thread, I was able to baste 20 hexies per hour.

Step 5 - Stitching Hexies Together to Make Flowers - time: 105 hours

Grandmothers Flower Garden hexie quilt, Robin Atkins, whip stitching flowers
Averaging 2.5 complete flowers per hour, it took me about two and a half 40-hour-work-weeks to whip-stitch all 238 full and 42 partial flowers. There are 14-17 whip-stitches per 3/4 inch seam.

Step 6 - Stitching a White Hexie Ring Around 130 of the Flowers - time: 130 hours

Grandmothers Flower Garden hexie quilt, Robin Atkins, ringed flowers
On average, it takes me 1 hour to whip-stitch 12 white hexies around each flower.

Step 7 - Layout Flowers for Quilt Top; Note Position on Each - time: 4 hours

I didn't fuss too much about the layout, spreading out the flowers randomly, making sure the red ones were evenly spaced, and that no areas were overly dominated by one color. Assigning each row a letter and each position within the row a number, I marked each flower on the back (writing on the center paper piece).

Step 7a - Half Flowers and Double Border All Around - time 90 hours

This is an update, added Feb. 2018. (I can't believe I forgot this important step when writing the original time line.) To make 42 partial flowers to fill in the gaps around the edges of the top, I cut fabrics, basted hexies, joined petals, and then stitched the partials into the gaps. To make the outer border, I made 522 individual hexies, stitched them into rows, and then stitched the rows onto the top.

Step 8 - Sew Flowers into Small Groups - time: 90 hours

Grandmothers Flower Garden hexie quilt, Robin Atkins, flowers stitched together in small groups
To assemble the quilt top, I grouped 8-12 flowers, and whip-stitched them into a solid piece. There were 30 pieces, which took about 3 hours each to complete.

Step 9 - Sew Small Groups Together to Complete Quilt Top - time: 123 hours

Grandmothers Flower Garden hexie quilt, Robin Atkins, rows stitched together
I first sewed the small groups into rows, then stitched the rows together. As the sections got larger, the stitching took longer, making it difficult to estimate the time with total accuracy. I did a couple of time tests at different stages of the process in order to figure the above total. I completed this step on March 1st, 2013, one year after basting the first hexie.

Step 10 - Iron/Starch Top, Remove Papers and Basting Stitches - time: 33 hours

Grandmothers Flower Garden hexie quilt, Robin Atkins, pulled basting threads
Removing all the basting stitches and papers took a lot longer than I would have guessed. But when I look at the pile of basting threads, it begins to make sense.

Step 11 - Assemble Quilt Layers, and Baste - time: 12 hours

Christy and Lunnette helped me layout the back, batting, and top on the floor; then baste in a 4 inch grid. I think we pinned it first, then basted, then removed the pins. On our knees for most of the time, it sure was wonderful to have their help!

Step 10 - Quilt and Embroider the Flower Centers - time: 70 hours

Grandmothers Flower Garden hexie quilt, Robin Atkins, embroidered/quilted flower centers
Choosing a floss in a similar color to each flower center, I embroidered a flower. Intentionally, some of the stitches act as quilting stitches, while others slip between the layers and don't show on the back. Around the edges of the quilt, it took about 15 minutes per flower center. Toward the middle of the quilt, it took about 20 minutes per flower center.

Step 11 - Quilt Flower Petals - time: 106 hours

Grandmothers Flower Garden hexie quilt, Robin Atkins, quilted flowers
Quilting around the petals of each flower requires turning the quilt 270 degrees for each petal, which is why it takes at least 20 minutes per flower, longer toward the middle of the quilt when the whole weight of the quilt must be constantly shifted. There are 238 whole and 42 partial flowers. I'm figuring an average of 25 minutes per whole and 10 minutes per partial flower.

Step 12 - Quilt Around White Rings - time: 65 hours

Grandmothers Flower Garden hexie quilt, Robin Atkins, quilted rings
Like quilting the flower petals, quilting around the outside edge of each of the 130 white rings requires turning the whole quilt as I work, which adds a lot to the time it takes. I believe quilting the entire top in a diagonal grid of straight lines would take about half the time it takes to follow the curved, zig-zagging path of the hexie flowers, leaves, and rings.

Step 13 - Quilt Around Each of the Leaves - time: 79 hours

Grandmothers Flower Garden hexie quilt, Robin Atkins, quilted leaves
Not only does this step require turning the quilt as I stitch 360 degrees around each leaf, it also requires knotting and burying the tail at the start and finish of each leaf. Also I'm changing color of thread to more or less match the fabric color for each set of 4 leaves. Around the edge, it takes about 9 minutes per leaf; toward the center 11 minutes per leaf. There are 474 leaves total, at an average of 10 minutes/leaf.

Step 14 - Assemble Hexies for the Border Facing - time: 37 hours

Grandmothers Flower Garden hexie quilt, Robin Atkins, hexie strips for border facing
To face the double (print + blue) border on the back of the quilt requires 522 hexies. To sew them together, forming the border strips, takes about 1 hour per 14 hexies.

Step 15 - Trim Backing and Batting; Blind-stitch Facing to Border - time: 13 hours

There are 264 hexies around the outside edge of the quilt top. Since I have not done this step yet, the time estimate (blind-stitching 20 hexies together per hour) is somewhat rough.

Step 16 - Remove Paper Pieces and Basting from Border and Facing - time: 10 hours

Again, since I have not done this step yet, the time estimate is based on the time it took to remove paper pieces and basting threads from the quilt top.

Step 17 - Blind-stitch Facing to Quilt Back - time: 13 hours

Step 18 - Quilt Around Print Fabric Border - time: 13 hours

Step 19 - Blanket Stitch Around Outside Edge of Quilt - time: 10 hours

* * * * * * * * * * * * * * * * * * * * * * * * * * * * * * * * * *

Total Time to Complete Hand-Piecing the Quilt Top: 873 hours

This is equivalent to nearly 20 weeks or 5 months on a 40 hours/week job. It took me a year. Mostly the time flew by as I basted and hand-stitched the little hexies together. Always there was a new print to enjoy, a new stack mounting in size to admire, a growing quilt top to thrill me.

Total Time to Complete Hand-Quilting: 428 hours

Since this job isn't completed yet, the time is only a rough estimate, based on the times it took to do some of the already completed steps. In all, hand quilting will take the equivalent to 10 or 11 weeks of full-time work. I find the quilting rather very boring. After taking a break for more than a year, I started working on it again and hope to be finished by August this year. Audio books are the answer to the tedium for me.

Total Time, Start to Finish: 1,301 hours

With Steps15-19 still to complete, the total is a rough estimate. Still, it is obvious that making a quilt like this, start to finish, requires more than 1,300 hours or the equivalent of over 8 months of full time work. If I were to be paid only minimum wages (2015, Seattle, WA - $11/hr.), the cost of the quilt would be $14,311 + about $500 in materials, or a total of $14,800.  Good thing I intend to keep and use it myself!


UPDATE, July 4, 2016

Grandmothers Flower Garden quilt by Robin Atkins, detail

By June, 2015, I completely finished one corner, an area big enough to photograph so I could submit an entry form to the 2015 La Conner Quilt Festival, sponsored by the La Conner Quilt & Textile Museum. On August 7th, 2015, I received notice that it was juried into the show. Wow! That sent me into high gear for sure. After working non-stop, 7 days a week, and an average of 10 hours per day, I inserted my needle into that quilt for the last/final time on Aug. 24th, 2015, just days before delivering it to the museum. It took me 3 years and 3 months, start to finish!

Grandmothers Flower Garden quilt by Robin Atkins

I was surprised, honored, and incredibly pleased to find out it won the Curator's Award of Excellence, one of the top awards, which then qualified it to be shown at the museum for the month following the Festival. Note, the finished size is 71 x 93 inches, and there are 4,700 individual hexagons in it.


Big work for both hands, but sooooo satisfying!

733 hexie flowers, ready for design wall

In fact it was so satisfying that I've started another hexie quilt... Can you believe it? So far, I've made 733 hexie flowers for it! Although they are the same size hexies, there are no reproduction fabrics and the arrangement will be anything but traditional. Don't know why I love the hexagon shape so much... but it's certain that I do.

Monday, August 19, 2013

Hand-quilting Hexie Quilt


Thank the universe and libraries for books on tape! Without them, I don't think my Grandmother's Flower Garden quilt would ever get quilted. Last week, thanks to "Uncle Tom's Cabin," I got one corner finished, probably about 1/20th of the top. Here's how it looks (click picture to see details):


As you can see, the quilting around the petals doesn't show much, because I made a conscious decision to more-or-less match the thread color to the fabric. To me it seems the quilt is "busy" enough with over 400 different fabrics in it. I want the design, the placement of the flowers, leaves, and pathways, to be the dominate feature of the quilt, downplaying the hand-quilting.


Truth be told, there's another reason for downplaying the hand-quilting. I'm not very good at it... actually not at all good at it.  It feels like I've captured a bit of the fabric on the back with each stitch. Yet later, looking at the back of the quilt, I see "skipped" stitches where the thread didn't catch the backing fabric. Also, my stitches are uneven. I hope to improve as I continue quilting.


The pathway of my quilting stitches is shown above in hot pink. I'm emphasizing the flower shapes rather than the hexie shapes, which is the more traditional way to quilt hexie quilts. These are only 3/4 inch hexies, so the quilting is fairly dense. It probably isn't necessary to quilt around the white pathway (or outer flower petals). So I tried a couple of them just to see if it made a difference in the over-all appearance. Since it looks better that way to me, I'm going to invest a couple hundred extra hours to do it.


I really like how the quilting design looks on the back side, with the embroidered flower centers and the outlines of the petals and leaves in different colors. Isn't it sweet?!

Since I'll be listening to dozens of audio books (from a great selection at our local library), I thought it might be fun to give a little review of each one as the quilting progresses.  So here are the three best I've heard so far, all of them rated Thumbs Way Up in my opinion:

"Uncle Tom's Cabin" by Harriet Beecher Stowe, narrated by Richard Allen

Although very slanted toward Christianity, Stowe tells it like it was, developing characters and plot from real situations and people during the slavery years just prior to the Civil War. I learned a lot of history, both sad and hopeful. Richard Allen did a fantastic job of narrating this unabridged version of the book (16 CDs).

"Eat, Pray, Love" by Elizabeth Gilbert, narrated by the author

I very much enjoyed reading Gilbert's memoir shortly after it came out. It has a lot of meaning for me, as I am dealing with some similar issues in my own life; plus I enjoy her frank, often humorous, honest narrative. I wanted to hear the audio version of the book because I wanted to hear it in her own voice. Thumbs way up on her reading skills!

"Animals Make Us Human" by Temple Grandin, narrated by Andrea Gallo

Dr. Grandin concentrates on the emotional rather than the physical life of animals, although the two are clearly related. I was especially fascinated by her discussions of the "seeking instinct," described for dogs, cats, horses, pigs, cows, and wild animals, the roll it plays in their lives, and how we humans can understand them better and improve the quality of their lives by giving them opportunity to gratify this instinct.

Wednesday, July 03, 2013

Hexie Quilt - Embroidery Quilting in Flower Centers

This is WAY, WAY fun! I'm listening to books on tape, sitting at my big bead tables, embroidering the centers of the hexie flowers on my Grandmother's Flower Garden quilt!!! The embroidery serves as both embellishment and quilting, although not all of the stitches go through all the layers.


Here's how one of the flowers looks. Of course you can see the basting stitches which hold the top, batting and back together while I quilt. I'm using a single strand of embroidery floss for each flower center. The longer spokes are just on the surface, while the center knot and short stamen (spokes) go through three layers, quilting them together. It looks fairly neat on the back.


Here's how a cluster of the flowers looks (click on picture to enlarge and see detail). As you can see, I'm matching the thread color (more or less) to the fabric color. At first I considered doing all the centers in various shades of yellow floss, but later decided I don't want the embroidery to be that obvious. Instead, I thought matching it to the fabric color would add a subtle detail, one that would only be noticed when viewing the quilt closely.

After finishing all the centers (estimate 60 hours), I'll begin to quilt around the flower petals with standard quilting stitches using a "harmonizing" color of 50 wt. thread.

Sunday, June 30, 2013

Hexie Quilt - Paper Pieces are GONE +Tips

I don't really know how I can spend so many hours working on this quilt, enjoyable hours, inexplicably engaging and not boring hours, time I crave almost like an addict craves a fix. It must be what I need right now, meditative, quiet time.

During the past two weeks, I starched and pressed the back, removed all of the basting stitches and paper pieces, sandwiched the quilt, and began the long hand-quilting process. Pressing and starching (with Best Press, the scent-free variety) helps the hexies to keep their proper shape while and after removing the paper pieces.


Snipping the basting threads and lifting the stitches back to the knots on each end was fairly easy with these fabulous seam-ripping scissors, which I believe are actually suture removal scissors. I highly recommend them! Even with this great tool, it took about 25 hours to get all the stitches removed and another 4 to remove all the papers.


After working for a few hours on it, I started saving the threads. Quite a pile, don't you think? I might try to make an art project with them, spreading them out on a heavy plastic sheet covered with a PVA glue/water mix, arranging them into some sort of picture and then, when dry, appliqueing them onto a background.

Back to the quilt, the next step was to remove the paper pieces. Checking the quilt carefully after finishing, I found 5 or 6 I had missed. Thinking they were all out, I again pressed the wrong side, finding 4 more un-removed paper pieces. Now I had them all... right? Wrong.

I certainly did not want to get the quilt all basted together, start hand quilting and find paper pieces still inside some of the hexies. So I got the idea to hang the quilt top over the edge of my work table in a darkened room with a couple of lights under the table.


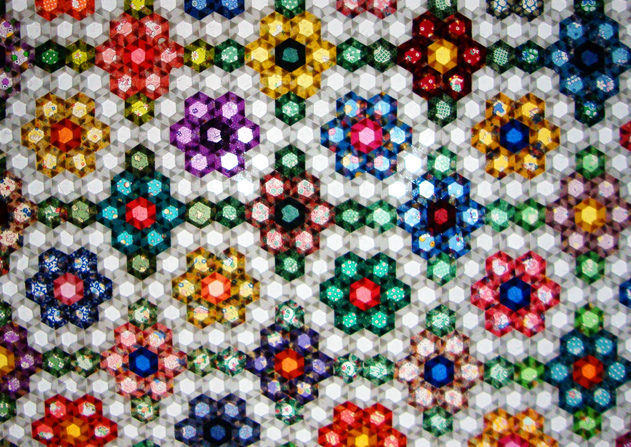
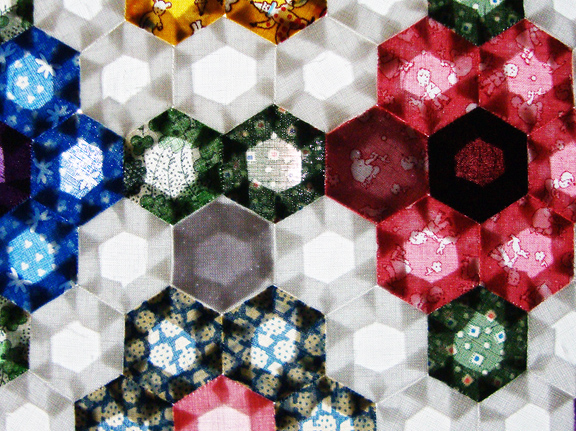
As you can see above, the effect was stunning, like a stained glass window in a cathedral (click on picture to see it bigger)!


Did I find more paper pieces hiding? Yes, three more showed quite clearly. In the photo above, you can see two of them, one in the white pathway of hexies, the other is one of the pink flower petals. The center of that same flower looks suspicious as well, but it was just the dark red fabric.


Now I'm willing to bet all the paper pieces are out. Of course I saved them to re-use on the next hexie quilt... Did I really say that? Eeeeeeek!

*    *    *    *    *    *    *

Basting Tip


I started basting the fabric around the paper hexie pieces using "junk thread," old cotton and polyester thread, bits and remains on nearly empty spools. I wasted a lot of time because the threads tangled and knotted, especially when I tried to use a longer thread. Using a shorter length (about 2 feet) helped a little with the tangles, but took longer to repeatedly have to thread the needle. I was using a regular sewing needle, one that was a little difficult to push through the card stock of the paper pieces.

Finally, I hit on the perfect thread/needle combination! Here it is, worth every penny of extra cost, and pennies sums it up, not dollars:


Basting thread - YLI glazed, 100% cotton quilting thread - I basted with lengths up to 48" long, and it never tangled or knotted, speeding up the basting process by at least 50%.


Basting needle - Foxglove Cottage straw needle, size 9 - Fabulous, strong, just the right length needle! It even kept its sharp point after basting through 100s of paper pieces. I used only three to baste over 4,000 hexies! Also, straw needles in size 10 were perfect for whip stitching the hexies together. I'll probably try them for hand quilting as well. Most quilting shops carry at least one of two brands, sometimes Foxglove Cottage, sometimes John James, both seeming equally good.