Two Thimbles & Exciting Gallery Show

Two thumbs way up for this chuck-a-block, full-of-great-fabrics-and-more shop! Two Thimbles Quilt Shop is located in Bellingham, WA on Cornwall Ave. If you're into batiks (like me!) or Civil War reproduction fabrics, you will be in heaven there. OMG, what a selection! I only had a half hour to shop, but would have been happy browsing for 2 or 3 hours. Above is a picture of a few things I bought there. These may have to be part of my May BJP. I also bought some interesting batiks that I hadn't seen anywhere else. The shop motto - Fabrics to inspire & delight! - is right on target!
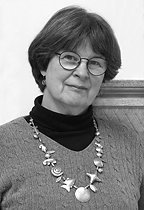
And while you're in Bellingham, don't miss seeing a collaborative show of beads, fiber & photography by Carol Berry (my bead mentor!) and Paul Brower at the One of One Gallery (1418 N. State Street). Carol and Paul are there Friday - Sunday with works in progress to show how they do their magical pieces. The show runs through May 9th. Their work is fascinating, original and unique. I've never seen anything like it and I love it!
Bead Journal Presentation in Denver April 23
If you're in the Denver area, you might want to attend the meeting of the Rocky Mountain Bead Society Thursday evening, April 23rd. I will be giving a Powerpoint presentation about the Bead Journal Project!
Visual Journaling with Beads, Fibers, Threads and Fabric
View over 200 beaded journal pieces by 42 artists participating in the 2007-08 Bead Journal Project! Compelling and inspirational, this unique beadwork tells stories, reveals emotions and follows important events in the lives of the artists who create a visual journal each month during the year-long project. In this presentation, you will see how the first year of the BJP developed into quite an amazing body of art!
April BJP ~ Progress Report & New Challenges
In all my 20 years of bead embroidery, I have never attempted (or been interested in) making a realistic picture of anything. I admire work by artists who do, but it just hasn't been my thing.
Well, here are a couple of pictures of why I'm going to give realistic a try for my April BJP:


Nearly every day, my neighbor and I take a 2.2 mile walk - up and back down an unpaved, back road starting from her house. It winds through an old-growth forest, undisturbed for many decades. The road criss-crosses a small creek along the way, a creek that runs strong in the spring and nearly dries up, leaving only a few sultry puddles, by the end of summer. Right now it's running strong. At night the sound of millions of frogs is a symphony of volume! And by day, one can spot the sunlit, bright-yellow skunk cabbage blooms from far away. I love this creek! And most of all I love the little waterfall near its headwaters. Every day, in both directions of our walk, we stop for several minutes to pay tribute to this small and wonderous gift of nature.
How could I not proclaim my gratitude by featuring it for my April BJP??? And how could I do it any other way than realistically?
Well for me, that's a challenge for sure!
I began by taking the above photos. Then I studied the light and dark pattern in the photo and cut my fabrics to repeat this pattern. After beading two skunk cabbages, the base of the waterfall and the tree, I began to be bored with realistic and bored looking at my work. For several days, I didn't want to bead on it at all. What to do?

Texture! Flat just doesn't do it for me. I needed texture! So here are two pictures to compare.


The first shows my original flat skunk cabbage. The second shows how it looks after I removed one of the leaves and made it three-dimensional. Better, eh? I also made the tree more dimensional and added texture to the moss-covered rocks in the stream. I'm definitely liking it better now and am re-motivated to keep beading it. Next I will start beading the water in the pond, but will save the waterfall for last as it will probably be fringed (a definite tangle-maker if I did it now).
Bead Embroidery ~ Tips
I've been receiving a number of emails lately asking about how to do bead embroidery. (If you're just getting started, I recommend getting my two books, One Bead at a Time and Heart to Hands Bead Embroidery.) Two of the most frequent questions involve what to use as a stabilizer and how to get a design on the surface...
There are many good answers to both of these questions, many different methods that all work very well. What works best in most cases for ME is to use an acid-free paper backing to stabilize my work and keep the stitches from puckering. I use either interleaving paper or Japanese Sumi painting paper. The photo below shows how I get the design on the surface.

A. I draw the shape of my piece on the paper and pin it to my fabric. Then I baste along my drawn lines in a color of thread that will show on the surface. The basted line becomes my guide, and I stay within it when beading. After I finish my piece, I tear away the paper outside the basted line, fold the fabric edges to the inside and back the piece with Ultrasuede or other backing, which hides the fabric edges and my stitches.
B. To sew two layers of fabric together, as in my April piece, I pin the top layer on the underlayer and, leaving the edges raw, I whip stitch them together. Here on the back side you can see my whip stitches. Look for them on the click-to-enlarge view of the right side above.
C. To transfer design elements, important lines and/or shapes to the fabric side, I first draw the shapes on the paper. (Sometimes I draw them on a different paper until I get what I want, then hold the paper to a window and trace the lines with a soft pencil on the wrong side. I put that side down on my paper stabilizer and re-draw the lines, which transfers the traced pencil marks to the stabilizer paper.) Then, I baste along these lines using a color of thread that I'll be able to see on the right side. Look for the basted lines of a second skunk cabbage to the left of the first in the click-to-enlarge view of the right side above.
Happy spring, everybody!!!

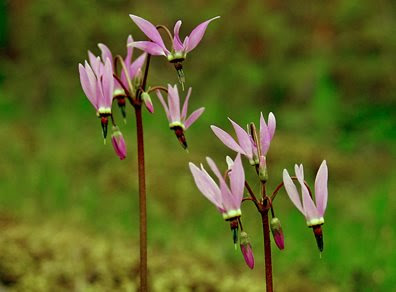
The first of our native wildflowers is heavily budded now! In a day or two, there will be a riot of purple and yellow shooting stars to delight our senses!!!! Above is one of my husband's pictures of these beautiful harolds of spring...
See you in a couple of weeks..... or maybe in Denver???!!!


