Sunday, June 20, 2010
Felting + Dying + Book Making = FUN!!!!
Just returned from a 3-day workshop taught by Chad Alice Hagen... Had a great time learning about felt and how to dye it using resist methods. Wanted to make more (many more) pieces of dyed felt to use in my various beading and collage projects. But after a day of dying, we moved on to book making, which (of course) was also way fun even though much of it was not new to me.
The reason I signed up for the class is because of the luscious, gorgeous, fantastically beautiful pieces of resist-dyed felt made by Christi C. (Sweetpea Path), two of which I've used for Bead Journal Project pieces (here and here).
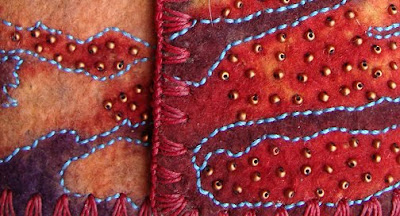
I LOVE, LOVE the way Chad embellishes bits of dyed felt and creates books and pins with them. Below are a few of her pins... Notice the stitching details and bead embellishments, carefully chosen to enhance the dyed designs on the felt.
Some of her pins were for sale... I couldn't resist (ha! pun intended)... bought the one on the top left in the second picture. Difficult choice... I liked them all!
Below is one of her little Coptic-bound books... Ooooh, again, the stitching and beading makes it extra specially precious, don't you think?! Knowing we would be making one too, I just about couldn't contain myself!
The first day we felted two large "sheets" of wool, needle-punched, pre-felt bats. Imagine the din as twelve of us literally THREW wads of wet felt onto our tables! When the wool was felted, we cut it into pieces and started up the dye pots (4 baths, 3 color choices each bath).
For each dye bath, we clamped various things on our felt pieces (hair clips, paper clips, metal parts, Popsicle sticks, clothes pins, etc. etc. etc.) and then tossed the pieces into the dye pot. After their 45-minute dye bath when the clips, etc. were removed, the piece would be the dyed color except where the clips were pressing on the wool and resisting the dye. Here are the 11 pieces I dyed that first day.
Above, Chad is giving some feed back to students about their felt pieces. I'm a tad, just a tad, disappointed in my results. Maybe some of them look a little too much like 60s tie-dyed t-shirts for my taste. I really wanted to spend a second, less rushed, day... further experimenting with this method. However, we moved on.
Day-two, we chose one of our larger pieces of felt and constructed a small, hand-bound, wrap-cover journal. Here's mine... the felt, the bound spine and the finished book...
At the end of day-two, we selected felt from our stash to make an embellished mini-book with Coptic binding, like the one Chad made pictured above. That evening our home work was to complete the thread embroidery and beading on both the front and back covers of our books. Here is the felt I chose.
Two other students joined my roommate and me in our room... beading, stitching and talking until well past midnight. That was the most fun of the whole workshop for me!
Below are my two embellished covers ready to bind into a book.
Below are all the embellished, felt cover-pieces made by the students in our class.
Below are pictures of my book, which I finished on the late ferry home just last evening!
Notice that the covers have a hand-stitched edging. We did this with the same waxed linen cord that we used for binding both books. This took longer than any of the other steps and was quite difficult. None of the students finished their edging or had time to bind their books in class. Fortunately, we received good handouts with excellent illustrations which I was able to follow for the binding.
I love constructing hand-made books!!!! And I love working with hand-dyed wool felt. I'm not so sure I love the dying process, especially the chemicals, the need to carefully monitor time, temperature, water-acidity, etc. I don't think I'll be buying any dye... but I would happily join a dye party at the studio of one of the other students!
Friday, June 04, 2010
Change - May BJP - Finished!
Major changes (which came into full swing during May) are happening in my life. All six of my words for the month are relevant. They are: change, remember, forgive, seek, open and thank. Can you find them in the finished piece below? (You may need to click to enlarge.)
I named the piece Change because that's the most important word of the six. Although I've decided not to delve into the personal changes I'm making in this post, it's not really a secret. If you're interested to read about it, you can check out my journal-blog, Words Paint, which I write under the pseudonym of Peacefulbird.
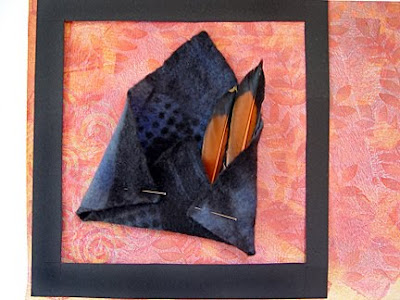
Obviously, the butterflies are symbolic elements of change and metamorphosis. A once-closed envelope (me) is now open with butterflies flying free. Feathers are another symbol of freedom, flight and good perspective... My husband found these two in our yard. My best guess is that a Northern Flicker gifted some tail feathers to us. The turtles are all about getting there, no matter how long it takes.
I started with the second, luscious, butter-soft, piece of resist-dyed felt made and given to me by Sweetpea. Without thought, I immediately folded and pinned it into an envelope shape. What could go in it? Oh, maybe those flicker feathers I've been saving! Oh, OK, now what paper will I use for the background?
Auditioning papers: This one seems to dark, don't you think?
This one seems too busy.
This one is really too busy; it competes with the pattern on the felt.
This one was my second choice. I like it a lot, but it seems a tad too pale or washed-out looking with the felt.
Here's the one I chose. Doesn't look like much in this picture, but the color has lots of life without being overpowering.
Once that was decided, I started playing around with various beads and elements I might use. I had 4 plastic butterfly-shaped buttons in my stash which looked really nice coming out of the felt envelope and had appropriate relevance to change.
How could I apply my words to these buttons and where could I find two more? Hmmm... gave up on that one and decided to make my own butterflies by sawing them out of copper sheet and metal-stamping the words. Tried that. Too big, and way too visually heavy for the delicacy of a butterfly. OK, well, maybe I could make butterflies out of heavy, water-color paper, write the words on the wings and paint them. Here are the three ideas. You can see why I rejected the copper...
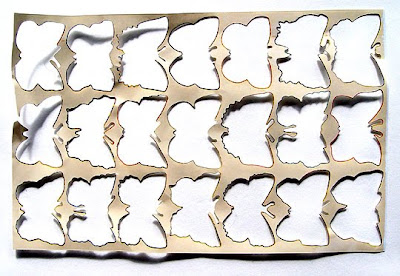
So then I played around with drawing butterflies free-hand. Ummm, I'm not so good at that. However I had a sheet of butterfly stickers that gave me an idea. I peeled off the background part of the sheet and placed it lightly on the water-color paper. Then I used a #2 Micron pen to draw around the inside (where the sticker was), which gave me some nice shapes.
I wrote the words vertically along the edges of the left-hand wings, extending some of the letters to look like the veins. For the right-hand wings, I wrote the words backwards. Ruined a few, but finally got six usable butterflies. Next I painted them with watered-down, transparent acrylic paints.
After painting, they looked like this.
Before cutting out the butterflies, I used an embossing stylus to score along the body on each side so that I could easily fold the wings into flying position.
Next, I had to figure out how to attach them to my piece. Everybody knows how much I don't like glue. So, I needed a way to sew them on the paper and felt. I also needed antennae. A double-layer body might do the trick...
I cut out six little, body shapes from heavy, black paper and made antennae from bent pieces of 28 gauge brass wire. Using PVA (acid-free, bookbinder's glue) and a toothpick applicator, I put a little glue on the back side of the butterfly bodies and along the duplicate body shapes. Then I placed two pre-cut lengths of Nymo thread in the glue, perpendicular to each body and laid the antennae in the glue at the head. When the glue was slightly set, I joined the duplicate body layer to the back of each butterfly. My plan, if the glued layers worked, was to use the four Nymo threads to sew each of the butterflies to my piece. It did work! I hope the picture helps to make sense out of what I just wrote.
I also used 28 gauge brass wire to wrap beads around the feather quills. In a similar manner to the butterflies, I laid two pre-cut Nymo threads along each quill before wrapping, which would allow me to sew the feathers to the paper.
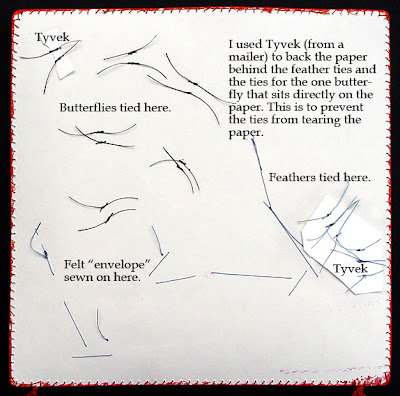
Here's what the back of my piece looks like. You can see where I tied the Nymo threads to secure feathers and butterflies. I used Tyvek (from a mailing envelope) as a backing to prevent the thread from cutting the paper. You can also see where I sewed the felt envelope to the paper using Nymo thread.
Well, there you have it, probably more how-to than anybody needs or wants... but I can't help myself sometimes...
I love this piece and what it represents in my life! Hope you like it too.
Wednesday, June 02, 2010
Ta-dah!!! The Winners Are....
Quick post to announce the winners of my two recent giveaways!
The winner of an autographed copy of Metalworking 101 for Beaders by Candie Cooper (read my "review" of this wonderful book here) is:
Sharyn Sowell! I think it's really fun that Sharyn is a paper cutter (I have some of her work and it's fantastic) and now she's interested in learning to cut metal... I am soooo looking forward to seeing what she does with it!
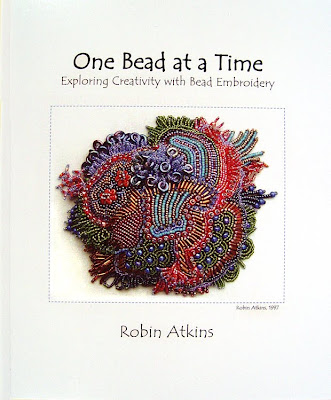
The four winners of the last four hard copies of my book, One Bead at a Time, are:
#1 - Madonna (Front Range Stitches) in Colorado embroiders with thread in many techniques. I enjoyed scrolling through her blog to see her many hand-stitched creations. I didn't see beads or bead embroidery, so maybe it's perfect that she's one of the winners.
#2 - Morwyn (AnotherCountry BeadWorks) in Albuquerque is absolutely no stranger to bead embroidery. I first fell in love with Morwyn's work when she participated in the first year of the Bead Journal Project. Later, so smitten was I, that I went to her etsy shop and bought one of her beautiful beaded boxes!
#3 - Dees (W.I.P. Work in Progress) in the Netherlands is also no stranger to bead embroidery or working improvisationally! As a participant in the Bead Journal Project for two years, Dees' beading impresses and inspires me more and more. I'm honored to gift her with my book!
#4 - Marsha, is the final selection of the random number generator. She commented anonymously saying, "Oh how I want to get back to beading, still have a stash, and your book looks like the one to do it with." Sounds like she's a great choice! Note to Marsha: Please contact me (robin at robinatkins dot com)... the email address you gave in the comment is not working.
Thanks to everyone (49 + 128) who entered the two drawings. Your wonderful comments were uplifting and kind! I WISH I had many more books to give away... At least, if you didn't win the drawing for One Bead at a Time, you can download it as an ebook for free, here. If you get a bandwidth problem message, it means too many are downloading at the same time... just try again at a later time.
Labels:
Bead Embroidery,
Giveaway,
metalworking,
One Bead at a Time
Subscribe to:
Posts (Atom)