Showing posts with label design. Show all posts

Monday, August 21, 2017

Frida's Flowers - 1 Year Crochet Project - So Much Fun!

Crochet flower, hexie-shaped block made by Robin Atkins


It All Started with Hexie-lust!


Look back to early 2012, when my dear friend, Christy, started covering little hexagon-shaped bits of card stock with fabric, making stacks of 6 ready to sew together as petals for a hexie flower. While I was working on a beading project, she was making these utterly irresistible stacks of hexies, until finally I succumbed to the temptation, and joined her.

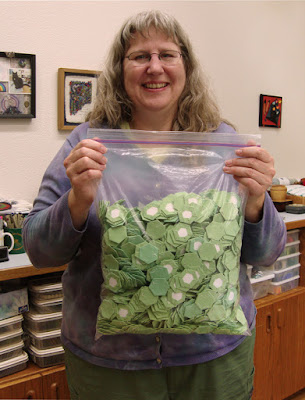
My friend, Christy, with her bag of hexies, is a great influence on me!

Here is Christy holding a whole bag of covered hexie shapes, made for the pathway around her hexie flowers.

Robin Atkins, Grandma's Garden, hexie quilt, finishing the top

And here I am holding my hexie quilt, showing the final seam of hand stitching needed to complete the quilt top for my hexie quilt, Grandma's Flower Garden.

You'd think that hand-stitching and quilting over 4,000 hexies would be enough for any sane person, right?

Robin Atkins, 733 hexie flowers, made for triptych quilts

Guess I'm not sane, because in 2015 I started another hexie quilt, or as it turns out, a triptych of wall quilts, for which I've completed 733 hexie flowers (which requires 5,131 individual hexies)!

Getting Hooked on Crochet


OK.... so now, I'm finished with hexies, right?  You guessed it! The answer is, "NO WAY." And once again it's Christy's "fault." With her hexie quilt on the back burner for a while, she moved into a crochet phase, making lovely afghans and shawls. She, along with Sabine, my friend in Germany, got me hooked on crochet (pun intended). 

Robin Atkins, crocheted shawl

This is the first shawl I made late in 2015, learning and getting comfortable with the hook. 

crocheted afghan by Huib Peterson using Frida's Flowers pattern

Then....  the big bang happened...  the crochet-hexie connection!!! This is it.  I saw this picture on Huib Petersen's Facebook page, fell bonkers in love, messaged him to find out about it, and learned that there is a pattern for the flowers online. Click on the above photo of Huib's flowers to see it enlarged... Wouldn't you be a bit inclined to go bonkers over it too???

On June 12, 2016, just one day after seeing his crocheted hexie flowers on Facebook, Christy and I were in Island Wools, our local yarn shop, buying DK-weight, cotton yarn in a dozen colors, ready to begin our own stacks of crocheted hexie flowers!

On a whim, right there in the yarn shop, we decided to keep what we were doing a secret... not to show or tell anybody about our project until we finished our afghans... no blogging or posting on Facebook about it. We didn't even tell Libby or Julie at the yarn shop why we kept ordering more cotton yarn. Our secret-keeping made it all the more fun!

Original Crochet-Along, Frida's Flowers


According to Huib, the instructions for his flowers came from a Stylecraft, Crochet-Along, called Frida's Flowers, staring an original pattern by Jane Crowfoot.

Frida's Flowers, Stylecraft Crochet-Along, designed by Jane Crowfoot

This is a photo from the instructions, showing the finished afghan, which includes several identical flowers in each of 2 simple and 5 complex designs. All of the designs are are multi-colored and textural, with raised flower parts, enough to make us drool!

Bored with making 6 identical flowers - Colors calling us!


Our plan was to get together at my house every Sunday afternoon to crochet hexie flowers, each of us completing enough flowers to make an afghan. In a little over a year of working 4-6 hours nearly every Sunday and some Tuesday evenings as well, we each had completed 39 flower blocks and 6 half-flower blocks, and were ready to crochet them together.

Robin Atkins, Frida's Flowers, Block 3

Ooops... I'm getting ahead of myself with this story.  We began with this block, called Rosa, which was the 3rd block in the overall design. (Blocks 1 and 2 are the more simple ones with a small central bud and plain background). This one is the easiest of the full flower designs.

But, for both of us, it was difficult, as there were several stitches we didn't know. Thanks to Youtube videos, we were able to learn them. However, after making two flowers each in the pattern colors, partially out of boredom and partly because of the influence of Huib's multi-color, no-two-the-same flowers, we decided to pick our own colors, making only a pair in each colorway. This, of course, caused us both to buy a lot more colors of yarn... oh for fun!

Robin Atkins, Frida's Flowers, Blocks 3 and 5

After making 6 each of Blocks 3 and 4, mine looked like this. Christy's color choices are different... enough different that our finished afghans may look like sisters, but definitely not like identical twins.


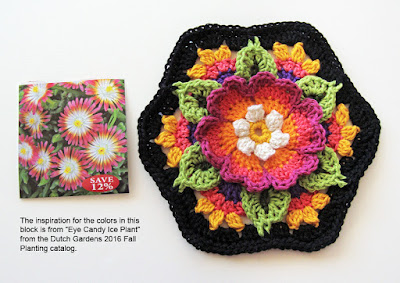
Robin Atkins, Frida's Flowers, colors inspired by flower catalog images

Robin Atkins, Frida's Flowers, colors inspired by flower catalog images
I started looking at flower catalogs to find new color combinations... and both of us were buying yarn like crazy.  Some brands have more that 50 color choices in DK-weight cotton. I admit to spending over two hundred dollars on yarn all-in-all, with some remainders for future projects. Never mind the cost... I adore all the colors.

Designing Our Afghans


Early in the process, both Christy and I decided we wanted to make something more like Huib's, with a random or nearly random placement of the blocks. Plus, we wanted it to be a bit bigger than the 31-block original design.

Robin Atkins, Frida's Flowers, crocheted half-blocks for sides of afghan

Also, we didn't want to include any of the more simple blocks, except as modified half-blocks for the sides.

A year went by, with the two of us continually challenged, thoroughly enjoying the process of making our blocks. Then it was time to lay them all out!

Robin Atkins, Frida's Flowers, layout for crocheted blocks

Almost at once, it was clear that the flowers needed more space, more black around each one to set them off. So, before crocheting them together, we bought more skeins of black yarn, and added a row of double crochet around each of the blocks. This also would add a bit more to the size of the afghans, making them large enough to cover both arms and legs while watching a good movie on a winter's evening.

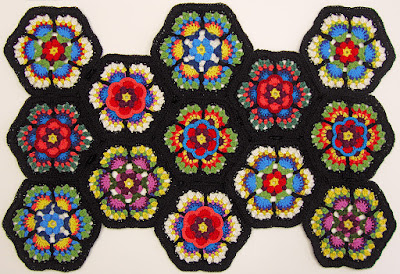
Robin Atkins, Frida's Flowers, all blocks joined with crocheted slip stitch

Here is my finished arrangement, the hexie flower blocks crocheted together with a slip-stitch, awaiting a border. Although the original design included a border that would have worked OK, by then I was flying solo, wanting a border I could call my own.  

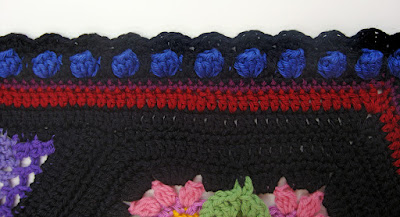
Frida's Flowers, popcorn edge stitch invented by Robin Atkins

After some experimentation, trial-and-error, crochet and un-ravel attempts, this is my final border invention, which includes the "popcorn" stitch, central to many of the flowers. It was challenging to figure out how to crochet the increases and decreases necessary for the zig-zag edges on the sides, and still keep it flat. Again, trial-and-error was part of the process.

Robin Atkins with nearly completed crocheted afghan, Frida's Flowers

Here is my almost-finished afghan, my own version of Frida's Flowers, showing the size!

Entering at the San Juan County Fair


As we neared completion, we faced a moral dilemma, a difficult decision. We both enjoy submitting entries at our local San Juan County Fair each year, especially in the Fiber and Textile Arts Divisions. These entries are judged and eligible to win ribbons and cash prizes. In previous years, there haven't been many crocheted items entered, nothing that has won any of the top awards.

We figured our afghans could be "game changers," that they had a chance of winning. But we didn't like the idea of being in competition with each other for the top awards, the Best of Class and the Best of Show. If we both entered, neither quilt would win a top award, or one would win and the other wouldn't (which might be the worst outcome). So, after some heartfelt discussions, we decided I would enter mine this year, and she would delay finishing hers until later so that it would be eligible to enter next year.

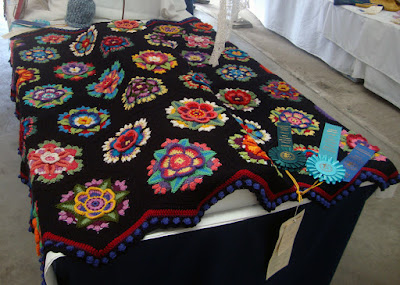
Robin Atkins, crocheted afghan, Frida's Flowers, wins top awards at Fair

Here's what happened...  Best of Class and Viewer's Choice for me in 2017!!!! And hopefully, the same will happen next year for Christy's version. Twelve months from now, I know for sure all the attendees will have forgotten my quilt, and will love seeing Christy's flowers, just as they did mine this year!


Saturday, May 16, 2015

"Square Dancers" - Shimmer Quilt

Kitty Sorgen, quilter extraordinaire, and Jenny Bowker, the pattern developer, are to blame for this madness! Shimmering Triangles Jenny calls it, and shimmer it does. In fact, it can be over done to the point where it's difficult to look at. But not Kitty's... Kitty, a member of our local guild and the best colorist I know, brought her shimmer quilt to Wednesday night quilting a few months ago, and

WHAMMMO!

I fell in love, bonkers, totally in love with her quilt. This isn't a great photo, but here it is, Kitty's shimmer quilt...

Shimmer quilt by Kitty Sorgen

It's so complex, at first I couldn't even figure out what was a block, squares looking like diamonds, color everywhere, blending in some places, shimmering in others. That day, on the spot, enough of us signed up and paid, filling a one-day class instantly.

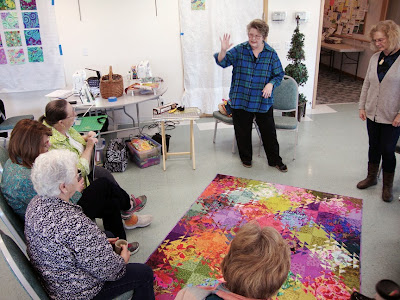
Kitty Sorgen teaching shimmer quilt for our local guild


The class was on Feb. 21, 2015. Most of the students got a block finished in class, some even finished two blocks. Each block is 16" square (finished), and has 69 pieces. Below is one block, showing the construction of it.


Robin Atkins, shimmer quilt, block construction

Me? Nope. I didn't sew a stitch. Long after the other students had finished arranging their fabrics on the design wall, I was still struggling with the concept, of how to get shimmer, but not too much shimmer, still arranging my fabrics (photo below).

Robin Atkins, shimmer quilt, tentative layout

It was really difficult to imagine what would shimmer, what might be too contrasty and shimmer too much (for my taste), and what would have too little contrast and thus not shimmer at all.


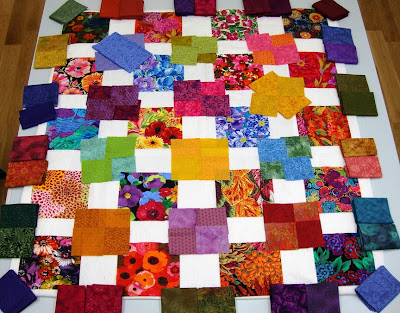
Robin Atkins, shimmer quilt, final layout
At home, I laid it all out on my work tables again, rearranging and rearranging the fabrics over and over again. The trick, in my opinion, is to work the diagonals. I began with a layout of focal fabrics, in my case "painterly floral prints," leaving space between them for the companion fabrics. Then choose companion "read as solid prints," placing them at the corners of the focals. Like Kitty, I decided to repeat the companions diagonally between two focals. I don't know if this even makes sense, but maybe you can see it in the layout above.


Robin Atkins, shimmer quilt, completed block
Silly me, I thought sewing it, once I got all the fabrics placed, would be a piece of cake. NOT! Well, technically speaking, sewing it is OK. Although it does take some time and attention to detail to get all the half-square triangles square, and the points nice and pointy.


Robin Atkins, shimmer quilt, completed block
But cutting the triangles is another matter. To make the colors and shapes flow, it's important to blur the line of the focal square by blending the design/color outward through the half-square triangles. Above is an example of one that worked pretty well, because you can only barely discern the square of focal fabric in the center of the block.


Robin Atkins, shimmer quilt, cutting fabric for half-square triangles
And here is some fabric I turned into Swiss cheese trying to get triangles that would bring the focal fabric design outward, tricking they eye, making it look like a diamond rather than a square. (Sorry, I didn't take a picture of that particular finished block.)

Robin Atkins, Shimmer quilt, paper piecing

I make the half square triangles using paper piecing, with a free, downloaded template printed on 16 pound copy paper. Paper piecing has a learning curve, yes, but it does make for very accurate piecing, such that I didn't have to trim any of the finished blocks at all!

Robin Atkins, shimmer quilt, four completed blocks

Here is a picture of four finished blocks. You can see the way the companion fabrics repeat diagonally to form a 4-patch block between the focal fabrics. These two fabrics need to be close in value and color. If there is too much contrast, it draws the eye away from the focal fabrics and shimmering triangles. In the case above, I think the orange and pink contrast a little too much. Also on the left the lighter and darker green is also a bit too contrasty.  Fabric choices are difficult and important... Any one companion fabric has to work with two focal fabrics and the adjacent companion fabric, which in turn has to work with it's two adjacent focal fabrics. Sound complicated and challenging? It is!

Robin Atkins, shimmer quilt, ten completed blocks

It took many days (lost count) to finish the first half of the blocks (10 of 20)... and many more to finish the last 10 blocks... a bit character building. Many times, I told promised myself I would never do paper piecing or make another shimmer quilt again in my whole life!

Robin Atkins, Shimmer quilt, auditioning border fabrics

Here I've finished all 20 blocks. I've moved all the furniture out of the studio, and put it on the floor to "audition" border fabrics. Most of the shimmer quilts I've seen do not have borders, but I wanted to make it a bit bigger so it could be used for a bed quilt.


Robin Atkins, Shimmer quilt, before quilting
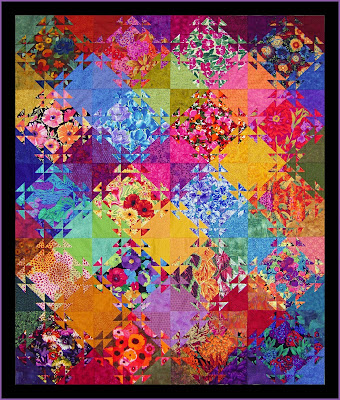
This is how it looks all finished, before quilting it, 90 x 74 inches.

Since the throat of my old machine is much too narrow to free-motion quilt a piece this size, I decided to get a professional to quilt it. But first I agonized some about how to do it. At first I thought it would be good to fussy quilt, making flowers in the companion fabric areas and vertical vines with leaves over the focal fabrics. This was my sketch for the idea.

Robin Atkins, Shimmer quilt, tentative quilting design

But then I saw a few quilts done like that, and the fussy quilting looked too busy, competing too much with the shimmer. So finally, I decided on using a double-leaf, free-motion edge-to-edge design. I named my quilt Square Dancers, because of the colorful costumes, movement, and squares.

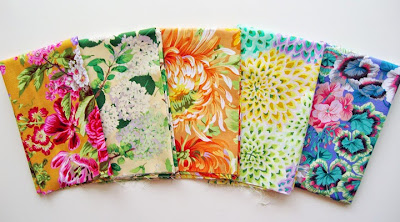
Now that it's finished, guess what?  I started gathering fabrics for my second shimmer quilt. I want a spring-summer quilt for my bed in softer, lighter colors. It needs to be bigger than the first one, at least 36 blocks, to work on a queen size bed. Here are some of the fabrics I've found so far:

Robin Atkins, focal fabrics for next shimmer quilt

Robin Atkins, focal fabrics for next shimmer quilt

Robin Atkins, focal fabrics for next shimmer quilt

Robin Atkins, focal fabrics for next shimmer quilt

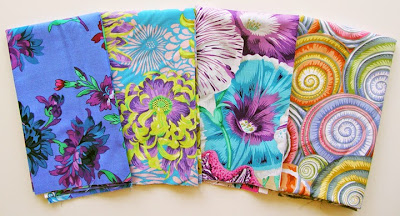
These are mostly designs by Philip Jacobs, one of the Kaffe Fassett Collective designers. I love his colors and designs! I will use other fabrics in my stash, but more than half of the 36 focals will be like these.

It will be fun to try this again, to apply what I've learned on the first one, to try to improve my fabric choices, always with the goal of some shimmer (but not too much) and good flow throughout the quilt. I'll also try to pick up my speed a bit, without sacrificing accuracy in the piecing.

Expect a post about #2 shimmer quilt in a couple of months. Right now, I'm still gathering fabrics.