Stitching my Bead Journal Project piece for July on neckties I had made for my Dad (here), gave me the idea to create a Memory Box I can use to safe-keep letters, photos and other remembrances I have of my parents.
The box, made from scratch using book board, fabric, thread and beads (no glue!), is 10" x 13" x 5" high, which should be large enough to hold most of the dearest things I have.
I'm going to show pictures and write about how I made it.
But first I just want to say that it's not so much a tribute to my parents (although that's part of it). More significantly, this box, with thousands of hand stitches and hundreds of hours in its making, represents a connection with them. In my mind and heart, each stitch binds us together - birth, memories, history, love, good-bad-ugly-quirky-beautiful, death - all that we were and are to each other symbolized by all the stitches in this box. I put me in the box too, in the form of quilted rabbits and hearts all around the inside. You'll see.
Many Ways to Make a Box ~ Here's One of Them
To make the box... I used a rather improvisational or just do it approach, since I've never made one before and didn't have a clear idea about how to do it. One step at a time... do what I know and figure out the rest later. That's one of my guiding lights. The other is: it doesn't have to be perfect.First I decided on the finished size. Using a box-cutter, I cut the pieces for the box and lid from heavy, dense, book board (Davey board). The lid pieces are about 1/8" larger all around than the bottom pieces.
Then I chose some fabrics that I loved and picked one of them to cover the inside bottom of the box. I happened to be going to an all-day quilting sewcial at our local Sr. Center and needed something to do. So I decided to quilt the bottom of the box. I sandwiched thin cotton quilt batting between the bottom fabric and some muslin and then stitched using embroidery floss.
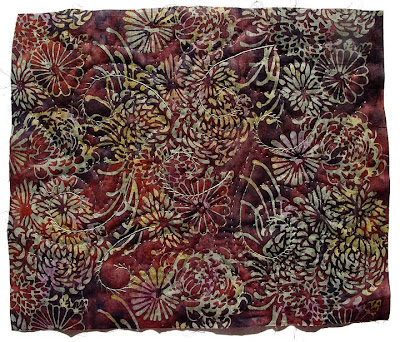
Here's how it looks. It's improvisational quilting... I just made a spiral shape in the center and worked my way out using a running (quilting) stitch and some embroidery stitches.
Some of the quilters wondered why I was bothering to quilt the inside-bottom of the box (where it won't show) and with a thread color that hardly shows. I didn't really know why at the time... now I think it's part of that stitching Mom, Dad and me together thing I mentioned above. Seeing it isn't as important as doing it.

This is a detail.
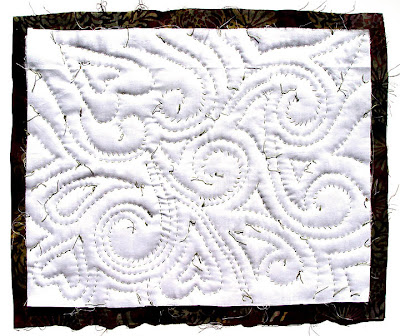
This is how it looks on the back side.
Quilting the bottom was fun! I enjoyed it so much that I decided to quilt the inside of the sides too!
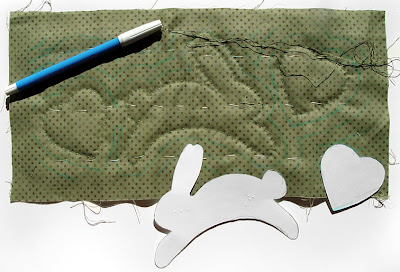
I cut a template of a rabbit (my totem animal) and a heart (my favorite symbol) from stiff paper and drew around them on the fabric with a water-erase marking pen. This is the start of one of the sides.

Above is one of the finished sides. Again, my quilting was fairly improvisational and I added some embroidery stitches as well. Each side is different.

This shows the back of the same side. To add a little more dimension to the rabbits and hearts (so they would show more), I cut the shapes out of stiffened felt and whip-stitched them to the back as you can see above.

Stiffened felt (Easy Felt), such as I used to pad my quilting, is also great for beading - inexpensive, stiff and easy to stitch through. I get it at Michaels.
Now came a part that I didn't photograph... sorry.
I made a tight-fitting sleeve for the bottom of the box and each of the four sides. To do this, I cut the outside fabric, laid the cut out book board on the wrong side and drew around the book board. Then I put the quilted inside fabric and the outside fabric right sides together and sewed just outside the drawn line on three sides. After turning it so the seams were inside, like a pillow case, I slipped the book board into the sleeve.
The fit needed to be snug. One sleeve was too snug and I had to rip one of the seams. Another was a tad too loose and I had to re-stitch inside the previous stitching on one seam. It was a learning process... I got better at it by the time I did the lid. These seams I stitched by machine.
Next, I turned under the remaining edges and whip-stitched the sleeves closed by hand, completely covering each of the box pieces.

To attach the sides to the box bottom, I decided to use the picot edge stitch. Above is a drawing showing how to do this stitch. I first attached one side to the bottom. With each stitch I tried to catch 4 tiny bits of fabric - one from the inside side, one from the outside side, one from the inside bottom and one from the outside bottom. Although this took quite a bit of time, I think it made a strong join.
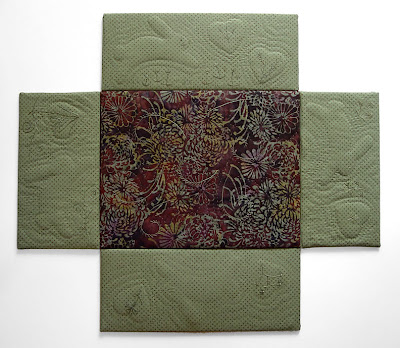
Here's how it looks with the four sides attached to the bottom. This is the inside.
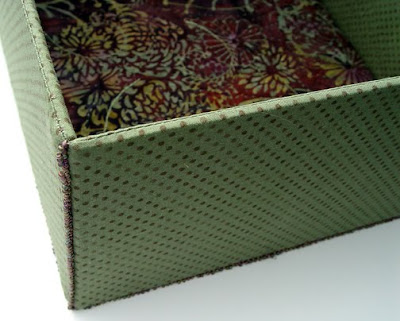
Then using the same method, I joined the side pieces together. Above is a detail showing one corner of the completed box. If you click to enlarge, you can see the picot edge stitch on the sides and bottom. I am satisfied with how this looks and think it will be as strong as any other method. I like it that I didn't have to use any glue.
Making a Lid for the Box
Now the lid! Oh boy, I was terrified that my calculations about the size of the lid would be off and I wouldn't know it until I finished the whole thing... Hours and hours of work! It was only because I wanted to finish the box in time to enter it in our County Fair that kept me going.
Before making the fabric sleeves for the lid pieces, I had to figure out how to attach my two bead journal pages to the top of the lid. First I needed to finish off the two pages. I decided they needed fabric borders made with the same fabric as the sides of the box.
So I cut narrow strips of fabric and hand-stitched them to the sides of my beading. The pictures below show the right and wrong side of two strips sewn to the butterfly piece. This is like log cabin quilting.


Next, I thought it would be good to have my beaded pieces slightly raised on the surface of the box lid. So I turned again to Easy Felt, cutting out a piece just the size of the beaded area (4" x 6").

Then I folded the fabric border to the back side, so that just 1/2" showed on the front. I tacked it down with running stitches to the Easy Felt on the back side. I finished each BJP piece with picot edge stitch around the outside of the fabric border.

Here's Mom and Me ready to attach to the lid.
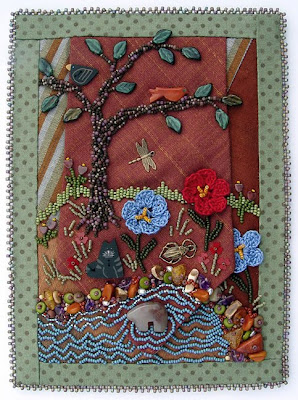
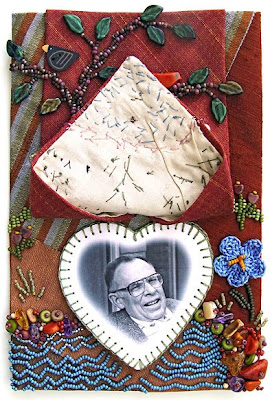
Here's Dad and Me ready to attach to the lid.
Next I stitched the finished BJP pieces to the cut out lid fabric (brown batik), using two lines of tiny running stitches - one at the outer edge and one at the inner edge of the fabric borders.

Before I made the fabric sleeve for the lid top, I decided I needed something to integrate the BJP pieces with the lid. A little quilting might do the trick. So, I made a sandwich of fabric, batting and muslin. I began quilting straight lines of stitches about 1/4" out from the BJP pieces. Nope. It looked too square, too formal. So rip, rip... out came the straight lines and back to improvisational quilting... Ha! Way better... a little spiral, some curved lines, more spirals... It worked!
The picture below shows the quilting, but even if you click to enlarge, it's a bit hard to see since I quilted with the same color thread as the fabric.

Then, finally, I made the lid the same way as the bottom of the box - machine sewn sleeves, whip-stitched closed, sewn together with picot edge stitch.
At last, came the test. Will the lid fit over the box? Will it be too loose? Ah, my lucky day! It fits perfectly. Here is a top view of the finished lid.

Important TIP!!!
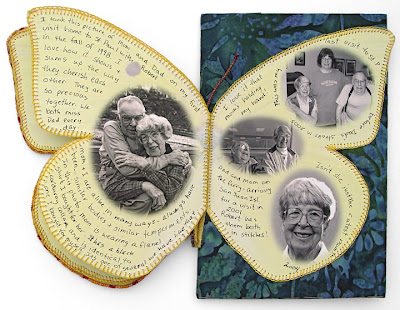
My bead embroidery is very textural and both of these BJP pieces have parts that open to reveal books of pictures inside (see pictures at end of post). Think about stitching around these pieces to sew them to the lid fabric and about stitching the lid pieces together. Can you imagine how many times one could get the stitching thread tangled in the beads, around the butterfly wing or the flap of the necktie? It's a nightmare to contemplate.
So here's the tip! I stitched the butterfly wing closed and the antennae down. And I covered the entire necktie piece with fine netting, basted to the surface, as you can see below.

It really helped! The thread got caught a few times around the crystals in the butterfly wing. (Guess I could have covered that piece with netting too.) Yet all-in-all, I had very little hassle. When finished, I removed the stitches holding the wing, antennae and netting.... good as new!
Ribbons at the County Fair
I finished the box just in the nick of time to get it entered in our County Fair last week. I wasn't surprised that it won a blue ribbon (1st place), but blown away that it took Best of Show in the Needle Arts Division!!! Here it is with the ribbons...

Remembrances
Now it's home again and I get to tie olive-green ribbons around packets of letters and pictures, and find my mother's wedding gloves and other remembrances of my parents to tuck into the box for safe-keeping. I also plan to use more of the green polka-dot fabric to make a fabric case to protect the box.
In case you didn't see these pictures in previous posts, here are a couple pictures of the butterfly piece, my November BJP, about my Mom. She's 92 years old and still doing fairly well in assisted living. She lives in St. Paul, MN. I plan to spend a week with her in October.


And below are pictures of the necktie piece, my July BJP, about my Dad. He died three years ago on July 13th. Although I miss him every day, more than I can say, the beading and stitching help me to feel connected with him in a way that is special and comforting.

Using Two of My BJP Pieces
Making this memory box required that I take two of my BJP pieces for the year out of sequence. That means I have 10 remaining pieces and can not show them all together in one group as I did last year. I feel a little separation anxiety about this.... But the memory box is important to me, so it's OK.
Now that my BJP set is already in two parts, I may continue with that thought and put the four pieces that have to do with spirituality together (make something with them... haven't decided what yet) and the three pieces that have to do with my relationship with my husband together. That leaves three fairly unrelated pieces... Maybe I'll frame them individually... or??? We have four months between now and when the BJP begins again. Lots of time to see what happens with my 10 remaining pieces!

