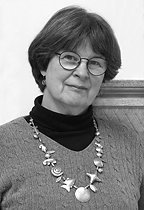
Kitty Sorgen, quilter extraordinaire, and
Jenny Bowker, the pattern developer, are to blame for this madness!
Shimmering Triangles Jenny calls it, and shimmer it does. In fact, it can be over done to the point where it's difficult to look at. But not Kitty's... Kitty, a member of our local guild and the best colorist I know, brought her shimmer quilt to Wednesday night quilting a few months ago, and
WHAMMMO!
I fell in love, bonkers, totally in love with her quilt. This isn't a great photo, but here it is, Kitty's shimmer quilt...
It's so complex, at first I couldn't even figure out what was a block, squares looking like diamonds, color everywhere, blending in some places, shimmering in others. That day, on the spot, enough of us signed up and paid, filling a one-day class instantly.
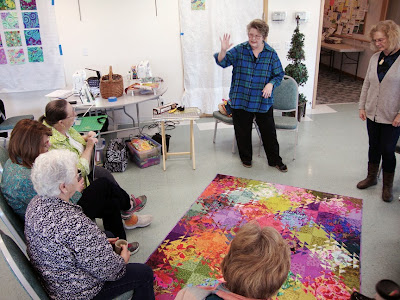
The class was on Feb. 21, 2015. Most of the students got a block finished in class, some even finished two blocks. Each block is 16" square (finished), and has 69 pieces. Below is one block, showing the construction of it.
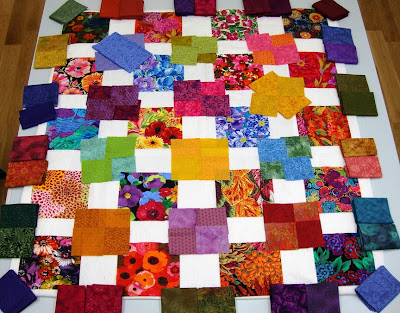
Me? Nope. I didn't sew a stitch. Long after the other students had finished arranging their fabrics on the design wall, I was still struggling with the concept, of how to get shimmer, but not too much shimmer, still arranging my fabrics (photo below).
It was really difficult to imagine what would shimmer, what might be too contrasty and shimmer too much (for my taste), and what would have too little contrast and thus not shimmer at all.
At home, I laid it all out on my work tables again, rearranging and rearranging the fabrics over and over again. The trick, in my opinion, is to work the diagonals. I began with a layout of focal fabrics, in my case "painterly floral prints," leaving space between them for the companion fabrics. Then choose companion "read as solid prints," placing them at the corners of the focals. Like Kitty, I decided to repeat the companions diagonally between two focals. I don't know if this even makes sense, but maybe you can see it in the layout above.
Silly me, I thought sewing it, once I got all the fabrics placed, would be a piece of cake. NOT! Well, technically speaking, sewing it is OK. Although it does take some time and attention to detail to get all the half-square triangles square, and the points nice and pointy.
But cutting the triangles is another matter. To make the colors and shapes flow, it's important to blur the line of the focal square by blending the design/color outward through the half-square triangles. Above is an example of one that worked pretty well, because you can only barely discern the square of focal fabric in the center of the block.
And here is some fabric I turned into Swiss cheese trying to get triangles that would bring the focal fabric design outward, tricking they eye, making it look like a diamond rather than a square. (Sorry, I didn't take a picture of that particular finished block.)
I make the half square triangles using paper piecing, with a
free, downloaded template printed on
16 pound copy paper. Paper piecing has a learning curve, yes, but it does make for very
accurate piecing, such that I didn't have to trim any of the finished
blocks at all!
Here is a picture of four finished blocks. You can see the way the companion fabrics repeat diagonally to form a 4-patch block between the focal fabrics. These two fabrics need to be close in value and color. If there is too much contrast, it draws the eye away from the focal fabrics and shimmering triangles. In the case above, I think the orange and pink contrast a little too much. Also on the left the lighter and darker green is also a bit too contrasty. Fabric choices are difficult and important... Any one companion fabric has to work with two focal fabrics and the adjacent companion fabric, which in turn has to work with it's two adjacent focal fabrics. Sound complicated and challenging? It is!
It took many days (lost count) to finish the first half of the blocks (10 of 20)... and many more to finish the last 10 blocks... a bit character building. Many times, I told promised myself I would never do paper piecing or make another shimmer quilt again in my whole life!
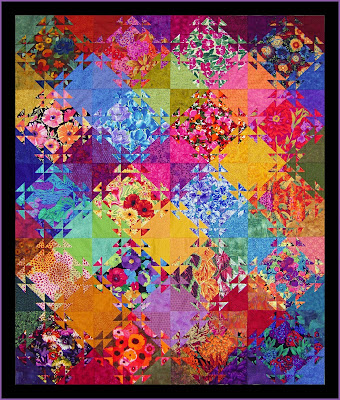
Here I've finished all 20 blocks. I've moved all the furniture out of the studio, and put it on the floor to "audition" border fabrics. Most of the shimmer quilts I've seen do not have borders, but I wanted to make it a bit bigger so it could be used for a bed quilt.
This is how it looks all finished, before quilting it, 90 x 74 inches.
Since the throat of my old machine is much too narrow to free-motion quilt a piece this size, I decided to get a professional to quilt it. But first I agonized some about how to do it. At first I thought it would be good to fussy quilt, making flowers in the companion fabric areas and vertical vines with leaves over the focal fabrics. This was my sketch for the idea.
But then I saw a few quilts done like that, and the fussy quilting looked too busy, competing too much with the shimmer. So finally, I decided on using a double-leaf, free-motion edge-to-edge design. I named my quilt Square Dancers, because of the colorful costumes, movement, and squares.
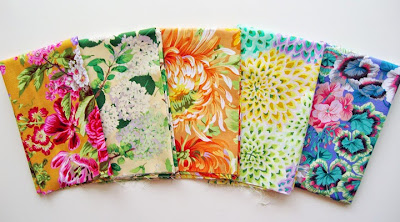
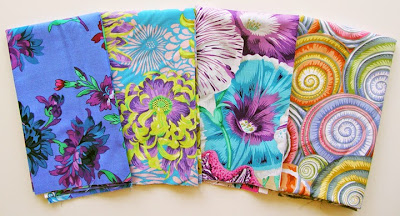
Now that it's finished, guess what? I started gathering fabrics for my second shimmer quilt. I want a spring-summer quilt for my bed in softer, lighter colors. It needs to be bigger than the first one, at least 36 blocks, to work on a queen size bed. Here are some of the fabrics I've found so far:
These are mostly designs by Philip Jacobs, one of the Kaffe Fassett Collective designers. I love his colors and designs! I will use other fabrics in my stash, but more than half of the 36 focals will be like these.
It will be fun to try this again, to apply what I've learned on the first one, to try to improve my fabric choices, always with the goal of some shimmer (but not too much) and good flow throughout the quilt. I'll also try to pick up my speed a bit, without sacrificing accuracy in the piecing.
Expect a post about #2 shimmer quilt in a couple of months. Right now, I'm still gathering fabrics.


