Friday, December 31, 2010

Adieu to 2010

rabbits dancing toward the sun
As the year closes, I find myself in a space of gratitude, feeling like one of these bunnies, holding hands paws with a more spiritual double, skipping toward the sunshine, grateful for my husband and family, meaningful friendships, space and time for making art, opportunities to explore and learn, support and inspirations found through blogging, another year of good health, our beautiful world, and so much more!

Sometimes seeking pleasure and happiness seems to get in the way of experiencing it... the seeking itself takes over and becomes the goal. Duh~ I am more mindful of that trap now, more open to seeing simply what IS with delight.

Looking back at 2010, I blew it on some of my goals, yet there were many accomplishments, some completely unexpected. A few reflections:

Bead Journal Project: I dropped the ball on both blogging and stitching after August. My September piece still sits unfinished. Although I did make progress in collage art and using words in my art, I also learned that setting multiple rules for myself hampered my enthusiasm. I don't know if I'll ever finish the last four pieces for 2010. But here's the good news... my exuberance for 2011 is steadily growing!

Personal stuff: One thing most cyber-followers of Beadlust don't know about me is that I've struggled with weight, overeating and compulsive binging for most all of my adult life. Being pretty good at periodic dieting, I've never gone higher than 240 pounds (gaaaak!), yet always ballooned right back to my high after every diet. Finally this year I faced the fact that I have an addiction going on and that I'm powerless to do anything about it. I joined Overeaters Anonymous, miraculously became free of obsessions with food sugary-fatty-crap, have gone from tight size 18 jeans to good-fitting size 12s, and most importantly, with the support of my OA group and higher power, I'm beginning to get in touch with emotions long suppressed by compulsive overeating. (My recovery journey is here.)

One other personal note: My husband and I came close to divorce this summer. Fortunately he is willing to get help and fortunately we found an excellent marriage counselor. A lot of my energy is going into spending more time with him... more quality time, more communication, more connection. I'm grateful to be in our marriage at the end of a rocky year.

New horizons: Beading, my passion for 25 years, is extremely important to me and I know without a doubt that it still holds amazing potential as a creative outlet. However, this year has been a year of exploring other things like quilting. Right now I'm making a God's Eye quilt using scraps saved from many, many projects over the past 20 years or so. It's thrilling to make the blocks, each a mini-journal in fabrics. I'll post some pictures soon. I'm also hand-quilting a large 1930's reproduction 25-patch quilt. Weaving a foundation for a wall quilt from re-purposed silk garments (with bead and thread embroidery embellishments) is calling me too!

As I've been dealing with addiction recovery and marital difficulties, failing in the process to keep up with the many blogs which delight and sustain me, I'm aware that connections are breaking or lost. This is a sad side-effect of shifting my focus. I hope plan to do better in 2011!

If you're one who is still following Beadlust, I thank you for your support and wish you all the best in the year ahead!

Sunday, December 05, 2010

Kantha, Embroidered Quilts of Bengal

Ever see a book that gives you instant goose bumps, heart palpitations and the feeling of mine-mine-MINE?

Kantha, the Embroidered Quilts of Bengal, book cover
Certainly Kantha, The Embroidered Quilts of Bengal is just such a book for me!*

Here are a couple of pictures to whet your appetite for this distinctive type of thread embroidery.

Kantha quilt with mandala center
Kantha quilt
Kantha quilt, detail showing embroidery of a fish
Kantha quilt, embroidery detail
Disclaimer... Sadly my pictures, photographed from pages in the book, don't do it justice at all. The abundant images are so exceptionally good that one could classify it as a photography book. We get large, full color pictures that show not only the quilts in their entirity but also many exquisite detail images that one can study for hours, looking at both technique and design elements. You can see more (and better pictures) here and here.

What I especially love about Kantha embroideries are the strong, story-telling designs, the simple yet effective stitches used to illustrate the designs, and the pull of primary colors toward fundamental truths. Maybe that's the real beauty of them, an unpretentious, honest story, told by a stitcher who never for even a moment dreamed her work would one day be in a book or hang on a museum wall and who would be amazed at the offer of even the smallest amount of money for it.

Take a moment to click on the pictures in this post, to study them. What do you see? What attracts you about them? What do you imagine about the life of the woman who created each of them? To me, they beg that kind of attention. With greatly aroused curiosity, I wonder about the life and intent of each story-teller.

Considered to be a sign of thrift, Kanthas are made from small scraps of well-worn fabric from clothing, no longer useable, stitched together and then embellished with colored threads pulled from worn textiles.

Stella Kramrisch, a legendary figure in the history of South Asian art, writes that the foundation, made of rags, exemplifies that nothing is being wasted, useless bits are joined and acquire wholeness and a unity of meaning. This act of perservation carries with it and becomes the technique and symbolic form of an imperishable knowledge. It belong especially to women. The needle and thread string together the single parts of the object and also the maker of the object.

In concept, I am reminded a little of quilts made by the women of Gee's Bend. I wonder what might have developed with their quilts if one of them had concieved the idea of telling stories with thread embroidery on top of the quilts which already told a story with worn fabrics from work shirts and the like?

_____
*You can read more about the making of the Kantha book from an exhibition of 85 pieces at the Philadelphia Museum of Art here. The large, 300-page book includes a wealth of information about the history, religious beliefs and self-taught art of women of all classes in two regions of South Asia known as Bengal, or today as West Bengal and Bangladesh. It's currently available from Amazon for $40, or hopefully from your local library.

Friday, November 26, 2010

Beadlust as a Book!!!!!

What if your blog suddenly went away,
disappeared into cyberspace
leaving not a trace?

Think about it...
what kind of loss would that be for you?


I don't know how often it happens. But I do know it happened to Allison Aller (Allie's in Stitches) a couple of years ago, all of her pictures, all her words, all her wonderful blog tutorials gone forever. Ever since I heard about her loss, I've wished for a way to back up my blog, a way to keep a hard copy of it.

Now there's a way, a very easy and delicious way!!! Blog2Print does all the work for you and produces a very nice looking book that will include as many of your posts as you wish. I'm going to write a little about the easy step-by-step process. But first let me show you how the first volume of my blog book looks.

my blog as a book, Beadlust by Robin Atkins, cover
This is the cover style I chose from many options. There is an opportunity to upload a picture for both the front and back cover of your book. I suggest using a picture that is sized for printing at about 300 ppi for best results.

my blog as a book, Beadlust by Robin Atkins, photo page spread
This is how a page spread looks when it's mostly pictures. The page size is 8.5 x 11 inches. You will have a choice of compact or snapshot page arrangement. Compact, just as the name implies, means that pictures will be grouped together to save space, resulting in text and picture alignment issues. Choosing snapshot, as I did for my book, means the layout will be exactly as it is on your blog.

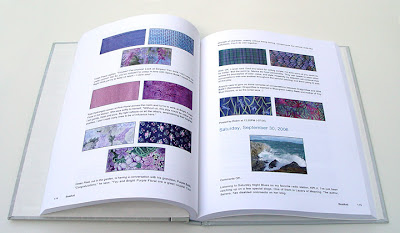
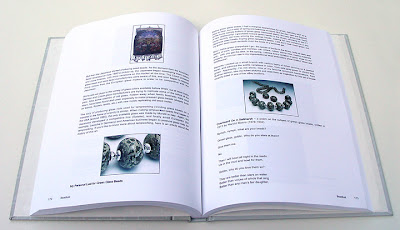
my blog as a book, Beadlust by Robin Atkins, text pages
This is how a page spread looks when it's mostly text. Note that all formatting from your blog (italics, numbered lists, indenting, bold, font style and color, etc.) will appear in the book just as it does on your blog.

My book is 300 pages long and full of color pictures. The high quality paper is thick enough so there is minimal bleed-through and very white, making the pictures and text look quite crisp. The cover is a laminated hard-board and the binding seems sturdy.

Since I've been blogging for over 4 years and tend to write long posts with lots of pictures, I decided to include only the first two years in my book, Volume 1. I can't begin to describe how pleased I am with the results. It makes me happy!!!!! I love having a written journal of my creative process, thoughts, projects, influences and even some non-art related happenings. Too look back, even just flipping through the pictures, is such a treat. And it takes away that nagging little worry about my blog disappearing.

Since it turned out so well, I've gone ahead and made a second book with blog years 3 & 4, another 300-page tome! It should arrive December 6th, an early Christmas gift from me to me!

The cost? Well, I chose the Cadillac version all the way. Yep, it was expensive, but the enjoyment I have from this book is well worth the $110 price tag. You can save quite a bit by selecting the compact page arrangement. The greatest savings results from printing in black and white rather than color. For me color is too important, but it is an option.
Important! If you should decided to make a similar book of your blog, now would be a good time to do it. Through November 29th, Blog2Print is offering a 15% discount. Use this code: b2p4theholidays
Blog2Print works for Blogger, WordPress and TypePad blogs. The process is very easy. You are asked to choose a cover style and indicate color or black and white. Then you enter the date range you want included in your book and decide on the blog order, from oldest to current or the reverse. You indicate whether or not you wish to include the comments.

You can input whatever title you wish to give your book and also optional side text and cover photo. Then you get to write a short introduction or dedication, if you wish. Next you tell it to upload your blog, review the book as a pdf file and order! Oh, yes, there's also a time when you can edit the book, deleting any posts you don't wish to include and a way to add the comments to specific posts. It took me about a half hour to complete everything. I received Volume 1 about a week later!

I don't intend to twist anybody's arm, only to share my deep pleasure at having my blog in print!

Monday, November 22, 2010

Rosie Goes to NY!!!

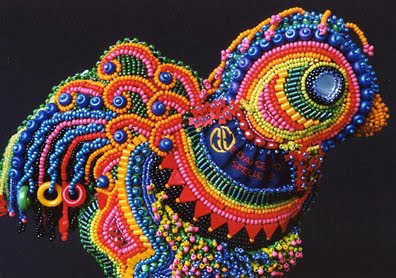
bead embroidery by Robin Atkins, Rosie The Uncaged Hen, detail
Rosie, The Uncaged Hen, is currently visiting NY, hobnobbing with other bodacious bead art, more than 80 pieces by well-known bead artists from around the country. If you're looking for something really special to do this week, go to the North Country Cultural Center for the Arts in Plattsburg, NY!!! Their exhibition of Contemporary Bead Art opened on November 6th and closes quite soon, on Nov. 29th.

I feel very pleased and honored to have been invited to exhibit my bead art in this show. Included are 11 of my pieces:
  • Forgive, Release and Believe, three of my Bead Journal Project pieces for this year.
  • Madrona and Aqua, two beaded, spirit dolls that are about environmental issues.
  • Beadlust, the beaded-quilted wall-hanging, part of which is shown on my blog header.
  • Blessings, a small, hand-made, hand-bound book with beaded covers.
  • Rabbit Journal and Earth Journal, two hand made books with bead embroidery inset into the cover or pages.
  • Marriage Bag, the beaded bag I made while trying to decide if I had sufficient commitment to get married.
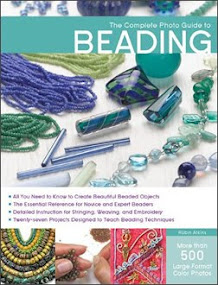
  • Rosie, The Uncaged Hen, a sculptural piece, cover-girl for the wonderful book, 500 Beaded Objects.

bead embroidery by Robin ATkins, Marriage BagMarriage Bag

bead embroidery handmade book by Robin Atkins, Earth JournalEarth Journal

beaded spirit doll by Robin Atkins, MadronaMadrona

beaded spirit doll by Robin Atkins, AquaAqua

Beadlust

Other bead artists represented in the show include Diana Grygo (The Lone Beader), Wendy Ellsworth, Laura McCabe, Marcia Decoster, Carol Perrenoud, Laura Willits, Carol Berry, Huib Petersen and more. This is not a group to be taken lightly... Rosie's privilidged to be out there with the best of the best! Here's a review from the local newspaper.

Wish I could have gone to the opening, or even just to see the show. (Waaaa) If you're able to get there before the exhibition closes, please leave a comment and let me know what you thought of it.

Sunday, November 21, 2010

Making a Book of My BJP Work from Last Year...

bead embroidery by Robin Atkins, detail from BJP piece, Stay in Touch with the River
Two years ago, I used My Publisher to make a hard-bound, photo-book showing and telling about the pieces I made each month during the first year of the Bead Journal Project. I was reasonably satisfied with the book, although a little frustrated with the lack of layout options offered by My Publisher. You can see a virtual copy of my first book here.

A couple of weeks ago, I decided to make a second book, using My Publisher again, this time to show my Bead Journal Project pieces from last year (2008-09). My book arrived in a mail Thursday! It's better than I thought it would be... top quality all the way!!! Here's a not-so-great photo of how the cover looks with the dust jacket on the book.

BJP book by Robin Atkins, cover
And here's the title page, or maybe it's better designated as the acknowledgement page. Note that there's a beautiful, semi-transparent, blank page between the cover and the first page of the book, and another like it at the end, a nice touch!

title page of BJP book by Robin ATkins
Here's what most of the spreads look like in my book, two columns of text on the left explaining about the piece and a picture of the piece on the right.

BJP book by Robin Atkins
Sometimes, I used a double page spread to show detail photos of the piece, like the one pictured below.

BJP book by Robin Atkins
My 34-page, coffee-table-sized, hard-cover book with photo dust-jacket cost me $48 for two copies (on a 2 for 1 promotional special). That's a chunk of money. Yes, it is. But, I'm so pleased to have both of my books. I keep them in the house; whereas my beadwork is in the studio. If ever there were a fire or if somehow my beadwork was destroyed, the books would be like gold to me. Also, I've given copies of them (always purchased when My Publisher has a 2 for 1 promotion) as gifts and they seem to be much cherished. So to me, they are worth the cost.

If you'd like to read/see a virtual copy of this book, where you can flip the pages one-by-one, it's here. In case you might wonder, once a book is published with My Publisher, the rights to it and the money from sales of it go to My Publisher. In other words, if anyone should decide to order a copy of my book (a very flattering thought!), the total amount goes to My Publisher. There are no author royalties! These are vanity books, pure and simple.

Are you curious about the process? It's fairly quick and easy...

In my case, I started by gathering my photos into a file. Then, using Photoshop, I reviewed each photo, sizing it for publication. The full-size pictures of each piece are sized to 9" high at a print-ready resolution of 300 ppi. If any picture was slightly out of focus or something about it was off, I deleted it from the file.

Next I made a photo collage (in Photoshop) for the printed dust jacket of my book. I cropped parts of the full-sized photos and layered them on a dark background. After fitting a part or all of each of my 12 pieces onto the 11.25 x 8.75 inch background, I added the text. Making a collage like this is not necessary, as you can simply use a single photo for the dust jacket along with a text box provided by My Publisher for the title. Or, you can choose not to have a dust jacket at all, a less expensive option.

After all my photos were labeled and ready to use in a digital file, I went to mypublisher.com and downloaded the program into my computer. Once downloaded, you can open it at anytime, work for a while on your book, save your progress, close it for the night, open it again the next day, etc.

For each page or each section of the dust jacket, you have a choice of layouts. You also have a choice of using the layouts, sized in standard ways, or to use them in a flexible way that allows you to re-size the photos and text boxes (as I did). For text pages, I used a two-column layout and wrote my text as I went along, applying standard formatting in a way very similar to MS Word or posting here. For photo pages, I uploaded my photos (in a way similar to uploading photos with Blogger), sizing them with the click-and-drag at the corners method.

When finished uploading all the photos and writing all the text, My Publisher provides a way to view the book in virtual form, just as if you had it in your hands, turning the pages. It's still possible to return to the editing window to make changes at any time. When the book seems as good as it can get, just hit the purchase button.

A week later, it's in my hands, crisp, professional-looking and beautiful! Be still, my vain little heart, this is such a treat!!!!!

Sunday, October 31, 2010

I Still Adore Beading!

hot springs, Yellowstone National Pk
The above picture is my tribute to Halloween night, when witches boil their brew, its bubbling sulfurous stench a warning to all who might venture near. Actually a hot springs in Yellowstone, it didn't smell all that bad, thanks to a slight breeze blowing away from me. I'm recently back home after a 3-week solo road trip to Minnesota, where I happily spent quality time with my mother, who is approaching her 94th birthday, two of my brothers and their families and a couple of beady friends.

Driving a total of 4,126 miles by myself was an interesting part of the experience, partly because I took time to make side trips, such as to Yellowstone, and partly because it gave me a boost of confidence, a return to decades ago when I fearlessly (almost) set off on long hikes, drives and trips abroad. Having not done anything like that since hooking up with my husband 13 years ago, the thought of setting out alone was a little daunting, yet at the same time exhilarating. Now safely back home, I give the experience a 5 star rating!

Before leaving, much of my time was devoted to making and finishing two quilts, one as a graduation gift for my niece and one a baby quilt for my nephew's first born son. I took the quilts with me to Minnesota so I could deliver them in person.

baby quilt by Robin Atkins
Here's the baby quilt. A section of it pinned for quilting, below, shows the colors better and also a few of the darling animals in the batik fabric I used for the log cabin centers.

detail, baby quilt by Robin Atkin

Andy, Sunny and baby August seemed to like it quite well!

my nephew looking at the new quilt

Here's the quilt I made for Margaret, my niece in celebration of her getting a Master's Degree from the University of Minnesota. Each of the pictures marks a special time or occasion in her life. It was a great hit with her!

quilt made by Robin Atkins

Driving, visiting, quilting... little time remaining for beading in the past month and a half. Never worry for a second, though, I'll be back! Yep, I'm nearly finished with September's BJP and will soon be starting October's piece. Plan to catch up by the end of November and be back on track with beading AND blogging.

Happy Halloween, everybody... have a very beady November!

Monday, September 13, 2010

Seeking Beads for a Good Cause...

A beady friend (Corinne... also in the BJP) in Phoenix, AZ is volunteering at a Domestic Violence Shelter and is seeking bead donations. One of the young women in the shelter is making beaded jewelry to sell in the thrift shop which supports the shelter. My friend has offered to help by rounding up more beads. We are thinking that beading is good therapy (right!) and that perhaps other women there will join in making items for the thrift shop as well.

I've just gone through my beads today and found some that are nice (yet I'll probably never use them), including some porcelain beads from China, a few charms, a set of jade beads that needs re-stringing, some seed beads and some findings. I'm going to send them to the shelter tomorrow.

I'm posting this because I figure maybe there are some readers who, like me, might have things in their stash they probably won't use. If so, and if you'd like to send them to the shelter, here is the contact/mailing information. Please let me know in the comment section if you plan to send a package, so I can alert Corinne to expect it.

Eve's Place
15270 Brookside Lane, Suite 129
Surprise, AZ 85374
623-547-6175 (Bonnie answers the phone)
Laura Horsley - Executive Director

That's it for today... Happy beading and stitching everyone!

* * * * * * * * * *
UPDATE: October 14, 2010

Eve's place has notified me that they are very grateful for the packages they have received thus far, having a plan in place whereby the resident who works with beads is teaching other residents, giving them all meaningful work which contributes to the operating funds for the shelter. If you've been thinking of sending a package but wondering if they still need more, the answer is YES! However, please mail your package now as the shelter is moving at the end of October. Thank you for sharing from your stash!

If you are reading this after October 31, please don't send a package. After they've moved and are settled into their new place, if they still need beads, I'll write a new post about it.

Thursday, September 02, 2010

Fine Art Finishing Technique for Bead Embroidery

quilt, Evolving Sampler by Myrna Giesbrecht
This post is inspired by the quilt by Myrna Giesbrecht pictured above which I saw at an exhibition last November (more about it here). It was set apart from all the other quilts in the show by virtue of the way it was displayed, not hanging soft against the wall, but mounted on a stretched and painted canvas. The artist had painted a stretched canvas black and then sewn the quilt to it, which made the quilt look like a fine art painting. Wow!

Even though it may not be fair to the quality, originality and beauty of the other quilts in the show, I believe Myrna could have sold her quilt for two or three times the amount any of the others could have gotten... because traditionally fine art commands higher monetary value than craft, stitchery, quilts, etc.

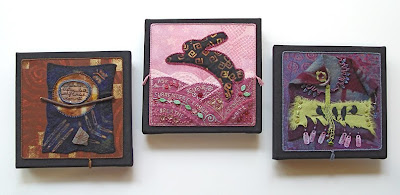
Light bulb! I tucked that sweet idea for display of fiber arts/beadwork in the back of my mind for future reference and recently resurrected it because I wanted to enter some of my Bead Journal pieces for this year in our County Fair, and I wanted them in the Fine Arts division! I hoped that mounting them in this way would give them a fine art look. Here's how my three pieces turned out. (All pictures in this post are click-to-enlarge.)

bead embroidery and collage by Robin Atkins, 3 pieces from 2010 bead journal project
All three (l to r: Release, Believe, Forgive) won blue ribbons, two of them also won "best of class" and one won a "special award gift certificate for art supplies." How's that for an idea that works? And why not share the finishing technique with my blogging friends? OK! Here you go...


How to Mount Beadwork on Canvas Stretcher Frames

Buy a pre-made, canvas-covered stretcher-frame from your local art supplies shop or on-line. No need to get one that is primed as you're going to cover it with fabric. It should be larger than your piece, but not so much larger that your piece is lost in the center of it.

canvas on stretcher frame
Select a fabric that enhances (but does not in any way detract) from your piece. For the three pieces shown above, I used a black batik. It's a tightly woven, durable fabric with no sheen to it. On close inspection it includes dark red, dark green and dark black in addition to deeply saturated black. I like the way the very subtle colors relate with the colors in my pieces. Cut the fabric about 3 inches larger than the stretcher on each side.

Center your beadwork on the fabric and determine how best to stitch your beading to the fabric. My choice was to whip-stitch over the couching stitches that hold the twisted cording around the perimeter of my piece, using the same holes and matching thread colors. See right and wrong side below.

beadwork sewn to fabric, how it looks on the front
beadwork sewn to fabric, how it looks on the back
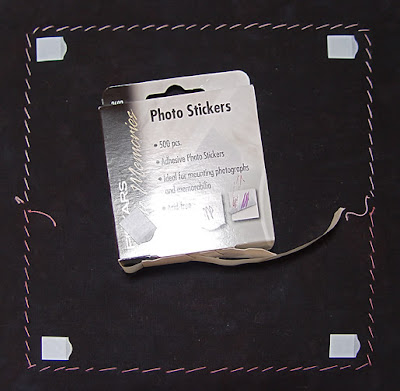
The next step is to lace the fabric to the frame. I use acid-free photo-mount stickers in the corners of my beadwork to hold it centered on the canvas while I lace it onto the frame.

use photo mount stickers to hold fabric in place on stretcher frame
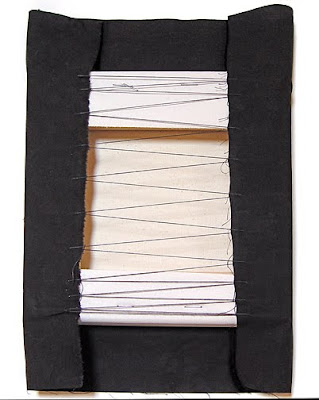
I use buttonhole thread (but any synthetic beading thread will work as well) and lace side to side first. I make my lacing stitches about a half inch apart at the ends and about an inch apart in the center. At first I simply lace without concern for tension. After the lacing is complete, I work from the starting point to the end, snugging each section of lacing thread as I go. Try to achieve an even tension across the width of the frame, but not so taught that it pulls your beadwork out of shape. Knot off the thread.

lace the sides first
Then on the back side, carefully mitre the corners at the top and bottom, folding the fabric inward and pinning it at the corners. Mark the approximate location of the hanging eye-screws. They should be about a third of the way down from the top and about a half inch in from the edge. The reason is that you don't want to cut your vertical lacing threads when you drill the holes for the eye-screws! Record the measurement on scrap paper. The corners should now look like this...

pin corners and mark where eye-screws will be placed
Lace the top to the bottom in the same way as the side lacing. Be careful not to place lacing over or near the marked spots. Snug the tension in the lacing and knot off the thread.

lace top and bottom
Use a piece of black or kraft paper, acid-free if possible, to cover the lacing. Cut it about one-quarter inch smaller all around than the canvas. I write the title of the piece and the date along the bottom edge of the backing paper and sign it before attaching it. Using double-sided tape or PVA glue all around the edge of the paper, center it over the back of the frame and drop it in place.

tape or glue backing paper over back to cover lacing
Remember the recorded measurement of your drilling spots? Use it to correctly locate the spots and mark them on the backing paper. Use a small hand drill and an appropriately sized bit to drill holes for the eye-screws.

mark and drill holes for eye-screws
Insert eye-screws. Measure a piece of picture wire 6 inches longer than the distance between the two eye-screws. Insert wire into one of the screws and twist the end around the wire to secure. Do the same on the other side, adjusting the tension so the wire is pretty much straight across. Add felt bumpers to the bottom corners. The completed back side looks like this.

finished and ready to hang
Note: You might ask, why not staple the fabric to the frame, like the canvas? In my opinion, with the beadwork already sewn to the fabric, you need a more forgiving method. You need to be able to delicately adjust both the tension and the positioning of the beadwork relative to the frame. To do that with staples would be tricky at best.

I am so pleased with how professional my pieces look mounted/framed in this way! Originally, I had planned to bind them into a hand-made book. Because everything is stitched rather than glued, I can easily disassemble these pieces and re-mount them in my book. But after seeing how they look like this, I'm tempted to change my mind and display all twelve pieces this way..

Wednesday, September 01, 2010

July BJP Finished ~ Focus

bead embroidery, Robin Atkins, bead journal project, detail Focus
As always, I chose my words for July's piece on the first day of the month...

focus
share
trust
create
imagine
inspire

Of the six words focus seemed super significant. I'm trying to make some changes in my life and the idea of focusing my full attention on the process seemed (and still seems) very important.

When I went through the felt pieces I made in Chad Alice Hagen's workshop, I immediately chose the one with the circle of red. The painted paper choice was easy too... first one I tried with the felt was a keeper. In fact nearly all the decisions regarding this piece were quick and easy... beads, threads, embellishments and the idea to bead the words were all no-brainers. Here it is finished...

bead embroidery, Robin Atkins, bead journal project, Focus
The finished size (not including the black background) is 7 inches square. The stitching is done with button hole thread and is a combination of back stitch and straight stitch. The beads are size 15s. It's less embellished than my other pieces this year, which seems appropriate to its meaning. To focus means to gather your attention toward one spot and not be distracted by other things... to keep it simple.

It was with this piece that my theme for the year finally became clear to me: Words to Live By! The notion to incorporate words in my pieces this year has been really challenging (I almost gave up after the first two months). But, piece by piece I feel that I'm improving. Besides that, having all these great action words in my life (my pieces as a constant reminder of them) is really satisfying.

You may recall that I've already posted my piece for August (here) and notice that this one is out of order. Although it was nearly finished in July, I was still missing the ribbons that hang from the pole on each side. I had ordered silk ribbons on line from Garden Fairies Trading Company. I waited and waited. Finally I called. Then I emailed. Someone wrote back that the order had been sent. 10 days went by. No order. I contacted them again. "order shipped," they said. Ha. Two more weeks went by before it arrived, post marked more than a month after I placed the order. On top of that they charged me for an item that wasn't enclosed and more than doubled the actual cost of shipping. Although they appear to have a good selection of silk ribbons, I'm sorry to say that I can not recommend them based on this experience. Anybody know of a friendly and reliable on-line seller of silk ribbons?

Wednesday, August 25, 2010

August BJP Finished!

Robin Atkins, visual journaling on resist-dyed felt
I started this one in July, before Aug. 1st when I would list my six words for the month. I needed a stitching project for a sew-day with friends, so why not begin a little early? Recently I got a new prescription for my glasses and they gave me the old lenses. I thought it might be fun to use one of them in the piece!

So first I picked one of the resist-dyed felts I made in Chad Alice Hagen's class that had a circle on it where I might be able to put the lens.

Robin Atkins, resist-dyed felt
Then I started stitching on the felt. This particular piece was quite thin, less than half the thickness of commercial felt. I needed some stiffener to keep my stitches from puckering. I suppose I could have used acid-free, interleaving paper (as I usually do), but this time decided to try a light-weight, non-woven interfacing fabric (which worked quite satisfactorily). Although I didn't finish that day, I worked on some of the stitching shown below.

Robin Atkins, visual journaling on resist-dyed felt, back stitch
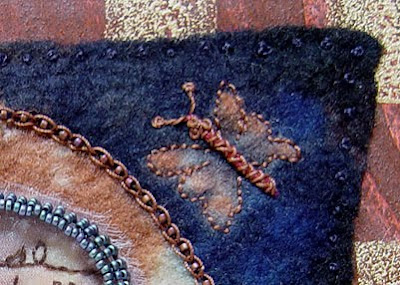
The stitches are done with cotton buttonhole twist. I used mostly back stitch (above), but around the circle I used chain stitch and then filled in the centers of the chain with size 15 beads (below). The rock is a chip of slate from some steps we had made on the trail to the studio.

Robin Atkins, visual journaling on resist-dyed felt, chain stitch
After choosing my words on August 1st...

release
listen
talk
shift
risk
commit

I thought long and hard about how to add them to my piece. I wanted them to be under the lens, suggesting the need to really see the words, or even to magnify the importance of them in my current life... words to live by. I considered writing them on paper and then mounting the lens over the paper. That idea didn't seem quite right for the piece, as I wanted to preserve the mottled look of the felt in the circle area.

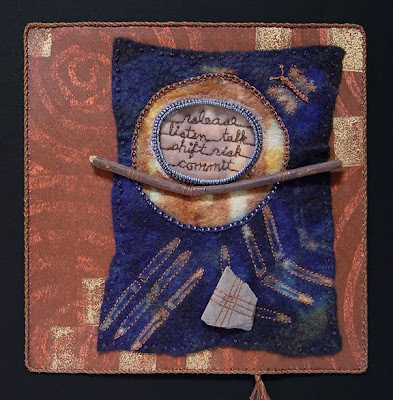
Finally I got the idea of writing the words on a somewhat transparent fabric, organza, then basting the fabric over the circle and embroidering the words with backstitch (through both the organza and felt). It worked pretty well! After finishing the words, I made a beaded bezel to hold the lens over the words, as per the instructions in my book, Heart to Hands Bead Embroidery. The last step was to cut the outside edges of the organza about a quarter of an inch away from the beaded bezel. I used my finger to scruffle and fray the edges of the organza. Here's how it looks...

Robin Atkins, visual journaling on resist-dyed felt, bead journal project
I used colonial knots (similar to French knots) to mount the felt onto my painted paper and added a twisted embroidery floss border (as on all of my BJP pieces for this year). The finished size is 7 x 7 inches. Here's how it looks...

Robin Atkins, visual journaling on resist-dyed felt, bead journal project

After finishing it, I got out all eight BJP pieces for the year, placed them in order on the table and took a good look at them. Conclusion? It pays great dividends to stick with a challenging technique or artistic concept! Step by step, piece by piece, improvement is seen.

This is the year I took on words... and collage too. I've been fascinated by other BJP members over the three years who so successfully use words in their work and who use paper collage techniques as inspiration for multi-media collage with fibers and beads. I was afraid my need for technical perfection and structure in my art would be a road block, which it was and to some extent still is. But definite improvement is there to be seen, each piece a small victory over the one before it. Yay!

Stay tuned, I'm finally back on the beadlust/BJP track again! My next post, in a couple of days, will feature a tutorial on finishing and after that a post showing my July BJP!

Thursday, July 22, 2010

June BJP Finished!

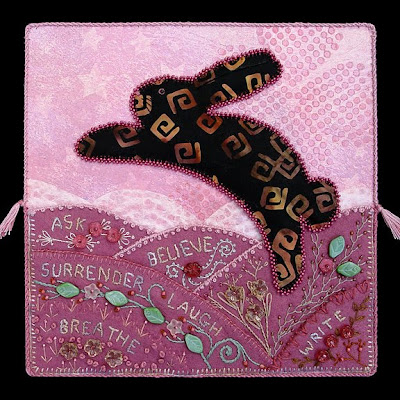
This was a fun one! My words for the month of June made me think of my totem animal, rabbit.

stuffed rabbit, component for June BJP by Robin Atkins,detail
So this is how it all started. I had a package of bunnies pre-cut out of different batik fabrics and selected one that appealed to me. A black bunny with square spirals... What could be more cute than that?

I decided to make a slightly stuffed (dimensional) bunny, by cutting out a back piece, inserting some quilt batting and beading around the edge with picot edge stitch.

stuffed rabbit, component for June BJP by Robin Atkins
Here's how the back looks.

stuffed rabbit, component for June BJP by Robin Atkins
And here's the front.

Now what? Well, doesn't a bunny just love to leap and frolic across little hills and fields of flowers? And wouldn't pink be just the right color... my favorite color as a child to go with my childhood favorite animal?

decorative paper painted with acrylics by Robin Atkins
I painted the above paper some years ago (acrylic paints on heavy drawing paper... stenciling, stamping, glazes, textures, layers). The white spiral design is purchased rayon lace paper left over from a bookmaking project.

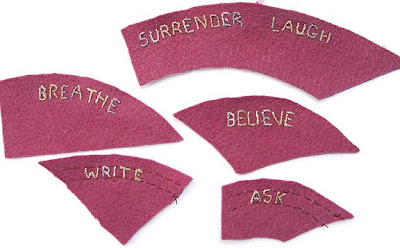
Next I needed some pink felt for the hills and my words. This time I decided to try stitching my words with embroidery floss. I used a double strand of variegated silk floss and the stem stitch. For the first two words breathe and believe), I "just did it." But I could see that my size and spacing weren't very good that way. So for the other four words, I stitched guidelines on the the felt, which you can see in two of the words below.

embroidered words, components for June BJP by Robin Atkins
Next I stitched the hills together using various embroidery stitches. Then came the beads and embellishments! The most fun part! I stitched the flower and leaf beads in place and then embroidered around them. It is so sweeeeeet to embroider on felt.... I love the feel of it!

bead and thread embroidery by Robin Atkins, bead journal project, Believe
Here's how it looks finished. Since my primary word for June is "believe," that's the title of this piece... Believe! (Click picture to enlarge.)

I believe in
  • asking for what I need and want
  • writing, writing, and more writing
  • surrendering rather than fighting
  • breathing deeply and mindfully
  • laughing as much as possible
So there you have it! I believe my dear totem animal guide, rabbit, is enjoying a leap into the stars... definitely in the pink!