Wednesday, December 30, 2015

How to Frame Bead Embroidery


During the past 28 years of stitching beads on cloth, I've veered away from making necklaces, bracelets, and bags or purses, mostly producing wall art pieces. Thus, I've had lots of opportunities to experiment with various methods of finishing and framing my work, making it suitable for display.


I always leave ample fabric margins surrounding the actual beaded area, giving me lots of options for finishing or framing.  One simple finishing method is to wrap the extra fabric around the sides of a manufactured painting-canvas (over stretcher-bars), and lace the fabric snugly across the back, as in the photo below.

how to frame bead embroidery - lacing diagram

But the problem with this method, of course, is that the surface of the beading is exposed to dust and air-borne grime, which over the years may spoil the fresh look of the beading, aging the piece prematurely. So we look to frames and glass to protect our work.

Among the various methods for covering (and protecting) beadwork with glass, the following is the one I use most frequently, and like the best.  It's not very expensive, or particularly difficult, although it does take a bit of time. Even if you already know about frames, please take a look at the section called Preparing Your Bead Embroidery for Framing in the Tutorial below.

Tutorial: How to Frame bead Embroidery

Choosing a Frame

This tutorial assumes the beaded work has straight sides, and will be framed in a square or rectangular frame. The frame size, color, and style are important considerations.

Wanting viewers to look at my beading and not be distracted by an overly fancy, gaudy, or large frame, I generally select a plain, narrow frame in a color that compliments my beading without competing for the viewer's attention. Sometimes I choose a stained, wooden frame if it seems to fit the theme of my beadwork better than a metal frame. Depending on the size of my beadwork, I generally size my frame at 2-3 inches more on each side than the beadwork.

Frame: Often I use a painted, metal frame with a cross section similar to this.

how to frame bead embroidery, cross-section of metal frame, rabbet

I either buy it as a kit (pre-cut pieces and required assembly hardware), assembling it myself, or buy it from a frame shop. The advantage of buying from a framer is that you will be able to see samples. Also, the framer can cut an accurate mat, foam core insert, and backing board for you, and can supply the needed risers. If you decide to work with a framer, I suggest you print this post (to show the framer how you will be preparing your work for the frame), or take the prepared bead embroidery with you to the frame shop.

Glass: I believe in using the highest quality glass, even though it is a lot more expensive than ordinary glass. The UV resistance is good, but the primary reason for using premium glass is its clarity, which allows the viewer to see the details of your work without any distortions or color shift, as if there were no glass at all.  Note: do not use non-glare glass. It only works if it lies directly on the surface of the art. You will be putting risers under the glass so it sits above the uneven surface of your bead embroidery, not touching any of the beads; even at this slight distance from the beadwork, non-glare glass will look frosted and obscure the details of your work.

Other Framing Materials You Will Need

Mat: Choose a simple, acid-free, neutral-colored mat, either warm or cool white, depending on the emotional message and colors in your work. All those beautiful colors in the framer's palette are appealing, but for most bead embroidery, there is color and texture enough in the beads, and no value in adding more with your mat choice. If you do not have a mat cutter, a framer can cut your mat. Although I have not ever used a double mat (because I find them distracting, bringing my eyes away from the beadwork to the edges), it could be a way to gain a little more space for the glass above the beadwork.


how to frame bead embroidery, risers on glass to prevent it touching the beads

Risers: Dense plastic rods, risers are 1/8th inch square in cross-section, with an adhesive surface on one side. Use a wire nipper to cut the rods to fit along the outer edge of the glass; remove the paper strips covering the adhesive from the the risers, adhering them to the glass along the edges, as shown above. They prevent the glass from touching your beadwork, by resting on the outer edge of the mat, thus holding the glass above the beaded surface. If the surface height of your beadwork is greater, you can adhere two rods together, making a quarter-inch of space. If the depth is more than a quarter-inch, you might want to consider mounting your work in a shadowbox frame (see this post for a good example and instructions).

3/16th Inch Foam Core Board: Since your beadwork will be mounted directly into this foam core board, be sure to use the white, acid-free, buffered, slightly more expensive variety. You can buy it at art supply or frame shops, in person or on line. You will need a piece at least 3 inches larger than your bead embroidery on each side.

 Preparing Your Bead Embroidery for Framing 

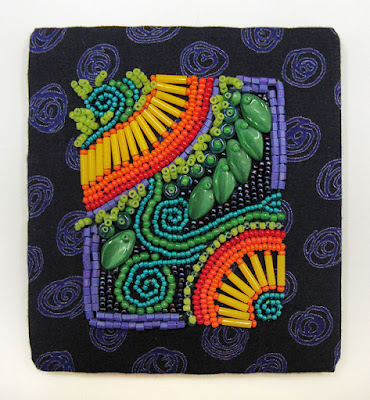
how to frame bead embroidery, framed beadwork by Robin Atkins 
The piece above is the example used in the the steps which follow. It's a small piece of bead embroidery, measuring only 1-3/4 inches wide by 2-1/4 inches high. The mat is 2 inches larger on each side. Numerous folks have surprised me with high offers to buy this piece (which is not for sale), illustrating that nicely framed bead embroidery can be sold at a favorable price.

Mounting your bead embroidery in foam core board 

As per the recommendations in the frame section above, draw the frame size (which will always be designated by the inside dimensions, the size of the artwork) on a piece of 3/16th inch foam core. Use a mat knife and ruler to accurately cut out this shape.

Then, measuring carefully, making sure it is exactly centered, draw lines to indicate the outline of your bead embroidery, adding 1/2 inch on each side. For example, if your beaded area was 2 inches wide, you would draw your lines 3 inches apart (2" for the beadwork plus 1/2 inch on each side). Designate one edge as the top, and mark. Draw a vertical arrow from the top through part of the center through part of the outside margin. With a mat knife, cut out the center, being careful not to damage it or the outside frame. The cut out center will eventually be placed back in the hole by aligning the arrow segments drawn on the back.

how to frame bead embroidery, foam core board cut for beadwork
For the next step, you will need at least a 1.5 inch margin of un-beaded fabric all around your beadwork. If you have less than a 1.5 inch margin, cut strips of any cotton fabric (re-purposed sheet or shirt fabric is fine). Using a zig-zag stitch on the sewing machine, and placing the strips under the margin of the beaded fabric (wrong side), stitch the strips to the margins, extending them to a total of 1.5 inch from the edges of your beadwork on the top, bottom, and both sides.

Center your beadwork on the cut-out piece of foam core board. Hold in place using map or sewing pins, pushed straight through the beading down into the board. Wrap the fabric snugly around the board and pin from the back. Remove the pins from the front. Check to make sure the work is still centered accurately. Re-pin if necessary. Using a sewing needle and beading thread, stitch from side to side, lacing the fabric around the foam core, as in the example below. Start with the longer sides. Knot when finished. Then do the same on the shorter sides.

Tip: I like to rest the beaded side face down on a thick, folded, bath towel while I am lacing the back.

how to frame bead embroidery, beadwork laced around foam core board

This is how mine looks on the front after being laced around the foam core board on the back. If I had not wanted to frame this piece, I could have used double-sided, archival tape to adhere a heavy paper backing over the laced area on the back; it could then be displayed on a small stand similar to the one in the second photo from the top of this post.

how to frame bead embroidery, beadwork laced around foam core board

This is how it looks on the back, when it is placed back in the original hole cut into the foam core board. Notice how the arrows match up, insuring a perfect fit.

how to frame bead embroidery, beadwork laced around foam core board

This is how it looks on the front. Note: the hole in the mat will be cut exactly to the size of the beadwork, so that when it is framed, you will not see any of the fabric around the outside edge of the beaded area.

how to frame bead embroidery, beadwork laced around foam core board

Assembling a Bead Embroidery Sandwich


Now it's time to make a sandwich with the foam core board between two pieces of acid-free mat board, one which has a beveled hole cut in the center, the other which is solid and goes on the back.

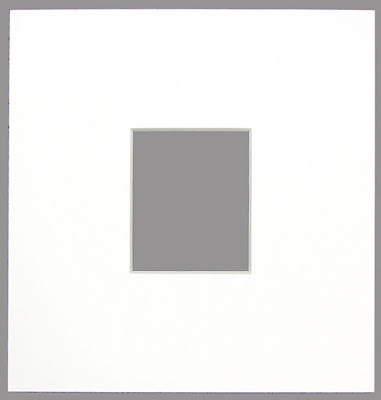
how to frame bead embroidery, mat measured, hole for beadwork cut

To cut my own mats, I first measure and draw the exact outline of my bead embroidery centered on the wrong side of the mat. I always mark the top, because sometimes the work is not precisely square or rectangular. Of course you can give the dimensions to a frame shop, and have a professionally-cut mat made for your beadwork.

Tip: One way to get an exact measurement of the beaded area is to make a 100% copy of it on a scanner or copy machine. Cut out the copy with a ruler and mat knife, test it by holding it over your beadwork. If it is exact, use it as a template to mark the hole on the mat board. If the mat is hand-cut, the hole does not have to be precisely square or rectangular.

how to frame bead embroidery, mat measured, hole for beadwork cut

Using a special, beveled, mat-cutting tool, I then cut away the center, where the beading will show.

how to frame bead embroidery, mat placed over beadwork

Here is how the top and middle of the sandwich looks, with the mat placed on top of the foam core board and beadwork.

how to frame bead embroidery, mat placed over beadwork and backing cut

The photo above shows a piece of mat board cut for the sandwich back (on the right). Note that I've drawn around the laced beadwork, and cut away a layer of the mat board to make space for the laced fabric in the sandwich. Do this by gently cutting along the drawn lines, being careful not to cut very deeply into the mat. Then, use a knife to lift one corner of the inside area and peel it back creating a shallow empty space.

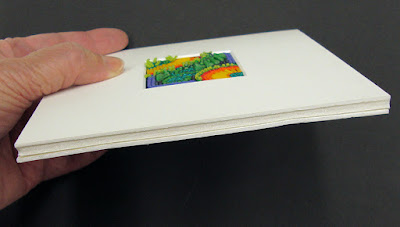
how to frame bead embroidery, beadwork between mat and backing

This is what the completed sandwich looks like. The beading is supported well between two pieces of mat board, and can't shift when hung. No glue or tape (to later fail or chemically alter the mat or beading) is necessary in this process. And it looks so neat and professional!

Assemble the Frame

With the more challenging steps already completed, the final assembly goes very quickly !

how to frame bead embroidery, assembling metal frame

Assemble the bottom and sides of the frame by inserting the metal corner plates, and tightening the tension screws. Insert and tighten the corner plates into the top of the frame. Make a double-decker sandwich by putting the glass with the attached risers on top of the mat. Be sure the glass is clean and clear of any finger prints. Slide the complete d-d-sandwich into the obvious slot in the bottom part of the frame. The hanging wire can be added now or later.

how to frame bead embroidery, assembling metal frame

Slip the corner plates at the top of the frame into the slots on the sides, and tighten the tension screws. You should have gotten metal spring strips with your frame kit. Lay them out on the back, spaced evenly around. Push down on the center of a spring and slide it under the edge of the frame, between the backing mat and the frame. Do the same with each of the springs. If you haven't already, add a hanging wire. Add a felt or rubber wall-bumper to each of the lower corners.

how to frame bead embroidery, back of framed beadwork

That's it! You are finished... your bead embroidery is ready to hang on your wall!  For those who would like a little more detailed step-by-step explanation of how to assemble this type of frame, this is a good one or if you prefer videos, this one is pretty complete.

Tip: Whether using a metal or wooden frame, the depth of the frame is an important consideration because the d-d-sandwich will be thicker than a photograph or most paintings. The measurement of the depth, or space inside the frame structure to accommodate the thickness of the artwork, is called the rabbet. The rabbet measurement on the above metal frame is 9/16th of an inch, which is adequate with a single riser under the glass. But it's a tight fit, the springs having to be nearly flat when inserted. If I had used a double riser, I would need a frame with a deeper rabbet. I've found it rather difficult to find small, narrow, simple, plain, wooden frames with a deep enough rabbet.

Here is a link for downloading this post as a printable PDF. It's a free, and slightly expanded version of what you've seen above. Free Download: How to Frame Bead Embroidery by Robin Atkins

Monday, December 21, 2015

Dorset Buttons

Making Dorset buttons is addictive!!! With endless possibilities for both design and use, these sweet creations keep my mind spinning, my hands busy, and my heart pulsating!

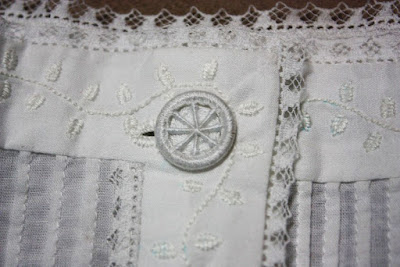
Made with a few simple materials - thread or yarn, a metal or plastic ring, and a needle - Dorset buttons can be plain, like this one on a replica of a Victorian chemise.

Dorset button on Victorian chemise
Dorset buttons can include beads, like the center button and the two on the right below.

Dorset buttons with beads, made by Robin Atkins
Dorset buttons can be fancy like these, which I designed to suggest snowflakes.

Dorset buttons, snowflake pattern designed by Robin Atkins
Dorset buttons can be light or airy, like the ones above, or they can have a bit more visual weight like the one below, which is actually the same size (1 inch diameter) as the two above.

Dorset button, star pattern designed by Robin Atkins
Dorset buttons can be multi-colored. I designed this one to suggest a poinsettia. Hmmm... maybe I should try again?

Dorset button made by Robin Atkins
Dorset buttons can be made to resemble something, such as a tree.

Dorset button, tree design, made by Robin Atkins
Dorset buttons have many uses. Here is a Christmas ornament I recently made. It looks much prettier hanging (off the card) on a tree.

Dorset buttons, Christmas ornament, by Robin Atkins
And here are a few ideas for using Dorset buttons that I found on the web:

Dorset buttons on knitted sweater

Dorset button earrings

Dorset button on knitted cuff

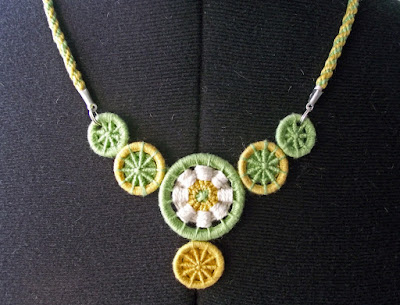
Dorset buttons as necklace focal
It was easy to learn the basics from an online tutorial. After that, it was just a matter of searching images for "Dorset buttons" online, experimenting until I figured out how to make different patterns, and then starting to create some designs of my own.

Dorset button by Distinctivelacemore on Etsy
One thing that took me a while to figure out, was how to make the button shank. I only add a shank if I intend the button to be used as a button, and then only if I want the button to "stand apart a bit from the surface" like for use on a sweater. For purposes like the Victorian chemise at the top of this post, the traditional method of attaching the button would have been simply to sew through the central woven area of the button.

The hardest part was, and still is, finding suitable rings. Most of mine are made on plastic cafe curtain rings, available at Jo-Ann's or hardware stores. The rings must not have a gap, so if they are metal, they need to be soldered. Metal rings made with 16ga. wire would be perfect, but to get them custom made and soldered neatly, would probably be expensive. They would have to be made with a metal that would not tarnish or rust, if the buttons were to last and stay nice looking. Recommendations, anyone?

I use tapestry needles, because the blunt point is perfect for "weaving" the button center (or "rounding" as it is more properly called). So far, I've experimented only with pearl cotton thread, size 12 and 8. Next I'm going to try Danish Flower Thread, which has a matte finish. I can think of many possibilities for using beads too. Some of the designs I've seen on the web are so heavily beaded, that the thread is not even visible, which doesn't quite "work" for me. I like the idea of making the buttons with finger-weight yarn (or any yarn) as closures for knitted sweaters, or as decorations for knitted caps and mittens.

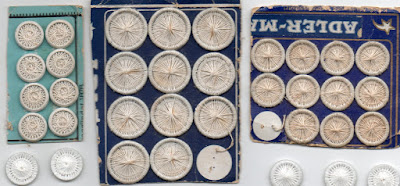
vintage Dorset buttons as originally sold on cards
Dorset buttons, first made in the early 1600's in England, were popular for a couple of centuries, until the mid 1800's. You can read more about the history here.  Some of these buttons, such as the ones above, now over 200 years old, are cherished (and occasionally sold) by button collectors.

If I don't post again for a while, I'm either making Dorset buttons or stitching hexies... you know how it is when obsessions take over!


Friday, November 13, 2015

Brother & Sister: Both Quilters & Beaders

My brother, Thom Atkins, is a very talented quilt and bead artist!

Thom Atkins, quilter, beader, artist gives a lecture about beaded quilts

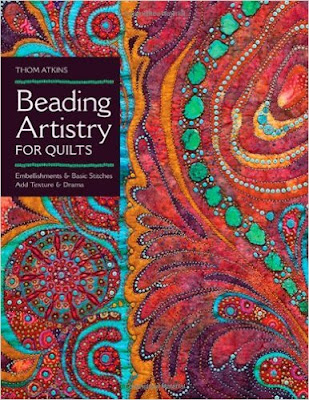
He's written a popular book about how to make beaded quilts.

Beading Artistry for Quilts by Thom Atkins

Recently he sent me a wonderful birthday present - a box of his scraps to use for making hexie flowers for my in-progress, hand-pieced, hexie quilt. Forty-nine different fabrics makes quite a stack of flowers.

Robin Atkins, hexie quilt, stack of 49 stitched hexie flowers made with Thom Atkins fabric scraps

Here they are again, this time arranged on a flat surface (click photo to enlarge for details). It's way fun to play with the flowers, re-arranging them in different ways, re-stacking them, and then spreading them out again.

Robin Atkins, hexie quilt, 49 stitched hexie flowers made with Thom Atkins fabric scraps

All the while I was cutting, basting, and stitching these flowers I was thinking about Thom, about our history and our mutual love of stitching. I recognized most of the fabrics. One was in a quilt we made 19 years ago for our mom's 80th birthday. Some were from blouses, dresses, shirts he made for himself and his wife. Some were from pillows and other home decor he made for their home. Some were from his early quilts. Most of them brought up a ton of memories for me!

I always like (and sometimes love) things that Thom makes, and yet I've also noticed when we are in a fabric store together, we do not gravitate toward the same fabrics. I wouldn't have guessed that I would use almost every one of the fabric scraps he sent. There were a few that were too glitzy, had a stronger metallic look than I like. But 90% or more could have come from my own stash. That's how much I like them.... leaving me to conclude that we are more alike than I thought.

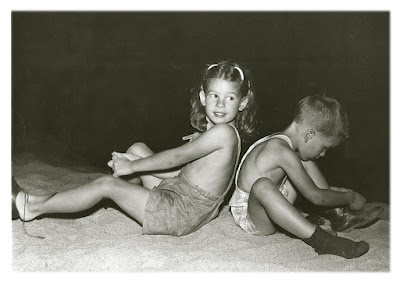
Robin Atkins and Thom Atkins, sister and brother, circa 1947

Here we are as kids... book ends.  Me 16 months older than him.

What's it like when brother and sister, close in age, are both quilters and beaders, both of us entering our quilts in shows, both of us teaching workshops and writing books?

Are we competitive?

A little, but not very much in my opinion. I admit to being a little "nervous" when he took up bead embroidery a few years after I make it the focus of both my art and my career. In artistic matters, he has a quicker learning curve than I do, rapidly achieving excellence in any medium he tries.

The fact that he likes bling and representational, while I like matte and symbolic, makes our work look different, which helps. We're also very different in our approach to quilt designing. While I am heavily influenced by traditional quilts, his quilts are all "art quilts." Most of his are heavily beaded, while mine are mostly not. Right from the start, he usually has a complete "picture" in his mind of what his quilt will look like when finished; whereas I rarely have a clue what mine will be like until I'm nearly finished with it.

Nor have we had issues with our teaching. I mostly teach beaders, emphasizing bead embroidery techniques rather than projects. He mostly teaches quilters, concentrating on methods for sewing beads onto quilts. There are enough teaching opportunities for both of us to accept as many gigs as we can handle.

What's the best thing about our mutual passions for beading and quilting?

Well, we talk on the phone for hours at a time about our current projects. Our conversations would bore everybody else in our families to death, but for us it's exciting to share our ideas, challenges, and victories. We do it often! It seems each of us has always respected the artistic sensibility and skills of the other. It's great to have somebody you can count on to say, "That's really wonderful," when you show them your latest work.

We also share information about photography, opportunities for showing our quilts, inspirations, promotion of our books, and countless other related things. We help each other to solve problems and to grow artistically.

It seems pretty ideal; was it always like that?

If you've read my first book, One Bead at a Time, available here as a free download, you know that Thom grew up favored to be the artist in the family, showing his talents at a very early age. My bend was more academic, although I had no clear pathway. After majoring in art in college, Thom rapidly became established as an artist. After majoring in English and psychology, I muddled around in a couple of careers for many years. I didn't discover my passion for beading or start to think of myself as an artist until I was 46 years old. Until then I always admired Thom's art, but didn't relate directly to him about it. I'm glad it is different now; glad we are both talented and creative... together!


Thursday, October 08, 2015

Tips for Cutting Fabrics for a Hexie Quilt

I'm making 3/4" hexies, which means each of the six sides measures 3/4 of an inch. For these I need to cut 2" squares. (At the end of this post there is a table showing the size of fabric squares that corresponds to each of the standard sizes of hexie paper pieces.) To make each hexie flower, I need 6 squares for the petals and 1 square for the center. This is how I cut them.

hexie tutorial: for 3/4" hexies, cut rows of 2" strips into 2" squares
The first thing I do, is sort my scraps into piles by size. The easiest to work with are strips. These I iron, sort by approximate width, and stack 6 strips high, aligning the top and right side edges. Then I cut each stack of 6 strips to exactly 2" wide by slightly more than 14" long. From each one of the strips, I will get one set of petals and one center. After cutting 5 stacks of strips (a total of 30 different fabrics), line them up next to each other as shown above, and cross-cut 2" squares through all of the strip piles at once.

hexie cutting tutorial: pile stacks of 2" squares, alternating orientation of each stack

Now, pick up the piles of 2" squares, and place them in stacks, alternating the orientation as shown above.

hexie tutorial: trim corners off squares, cutting 6 at a time

Next, use dressmaker's shears to trim the corners off of each of the piles. Each pile has 6 fabrics, so you are trimming 6 at a time. Re-stack them as shown above. Note that there are only 6 piles in each row. The 7th pile in each stack, I have set aside to use for centers. These I keep separate from the petal sets, selecting a center for each petal set later in the flower-making process.

hexie tutorial: the yield from cutting the strip is 36  petal sets

The final step is to separate each of the piles into 6 separate piles, one for each of the fabrics. You will end up with 30 singles piles, or petal sets, each with 6 of the same cut and corner-trimmed fabric, enough to make 30 hexie flowers.

Certainly there are other, and even possibly more efficient ways to cut fabrics for hexies, but this way works well for me. Some quilters recommend using the squares without trimming the corners. I tried it that way, but went back to corner-trimming because I like not having the extra bulk toward the centers of each hexie. I'm especially glad I trimmed the corners on my Grandmother's Flower Garden hexie quilt, because it was that much less to stitch through in the hand-quilting process.

Sometimes, the fabric scraps are not strips, or would more effectively be cut as a chunk rather than strip. Basically it's the same process. I stack 6 different fabrics, aligning the top and right hand edges. From this stack, I cut a 4 x 6 inch block, and then cut that in half to make two 2 x 6 inch strips. I align the strips the same way as the 14" strips above, cross-cutting several at one time, and finish the same way as described above.

Fabric Cutting Guide for Different Sizes of Hexies

1/4" hexie  --- cut 1" squares
1/2" hexie  --- cut 1-1/2" squares
3/4" hexie  --- cut 2" squares
1" hexie ------ cut 2-1/2" squares
1-1/4" hexie - cut 3" squares
1-1/2" hexie - cut 3-1/2" squares
2" hexie ------ cut 4-1/2" squares
3" hexie ------ cut 6-1/2" squares
4" hexie ------ cut 8-1/2" squares
6" hexie ------ cut 12-1/2" squares

A very handy, and more complete cutting guide is available from Paper Pieces, which is where I get my pieces. Nope, I don't cut my own; too boring, and I really like the precision of die-cut paper pieces!

For a lot more helpful tips on making a hexie quilt, please see these posts:

Grandma's Flower Garden - 3/4 Inch Hexie Quilt - Time Study

Hand Quilting a Hexie Quilt

Hexie Quilt - Embroidery Quilting in Flower Centers

Hexie Quilt - Paper Pieces are GONE + Tips

Hexie Quilt - To Fix or Not to Fix

Hexie Quilt Top - Almost Finished

Hexies Galore - Grandma's Flower Garden

Grandma's Flower Garden Quilt - I'm Doin' It!


Quilters, Beaders, and Embroiders are the World's Most Generous People!


gifted fabrics for my hexie quilt, flower petal sets
The quilting community is awesomely generous!!!  Thanks to all who have sent me scraps for making hexie flowers:

Lunnette Higdon Hertel
Judy Lynn
Nancy Anders
Kris Phillips
Carol Holland
Bobbi Pohl
Debbie Schnabel
Sue Shufel
Phyllis Petersen
Thom Atkins
Sabine Keichel
Yvonne Morrill
Sylvia Griffin
Christmas Cowell

I really understand and appreciate that it takes time to sort through your scraps, selecting some that you feel might work for me, packing them to send, getting them to the post office. In some cases, you even took time to cut them into 2" squares for me... WOW! Bless your hearts!

The most interesting thing is that all the fabrics I've received so far are ones I might have picked myself, yet so far there are no duplicates. As of Oct. 19th, I have cut petal sets for about 650 flowers (from my own scraps and fat quarter stash, as well as scraps I've received from other quilters), all of them unique! That's about 90% of what I need to make the quilt, and certainly enough to keep me busy for a looooooong time. It will probably take me a year or so to baste and stitch all of the flowers, although I admit to going at it with a lot of gusto.

Monday, September 28, 2015

What! Again? Another Hexie Quilt Started?!


Mama's Garden, Hexie Quilt by Robin Atkins, hand pieced, embroidered, quilted; detail
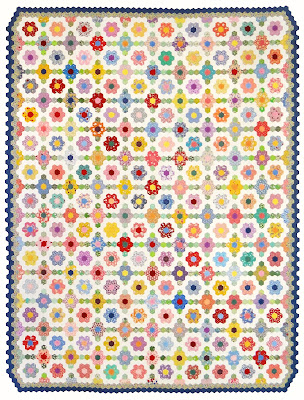
If you're a Beadlust reader, you know I worked for three years (more than 1,300 hours) to hand piece, hand embroider, and hand quilt Mama's Garden, with 4,700 3/4-inch hexies, a true labor of love. A big push this spring got it finished in time to enter into the International Quilt Festival in La Conner, WA. Hooray, hooray, the judges accepted it into the show!!!!

Mama's Garden, Hexie Quilt by Robin Atkins, hand pieced, embroidered, quilted
This coming weekend, October 2-4, all you quilting enthusiasts will find it rewarding to make the effort and get to La Conner (WA) for the Festival, where you will see an excellent selection of quilts and fiber arts, plus a variety of interesting vendors! Here is the information. Head first for Maple Hall, a huge 2-story building, filled with quilts, at the corner of 1st Street (the main drag) and Douglas Street! Bring your camera, because photos are allowed (at least in the past they were).

Map and directions to La Conner Quilt Festival
What do you think? After all those hours, would it be crazy to even THINK about making another hexie quilt, another one with 3/4-inch hexies? Well, then I guess I'm crazy, because the irresistible call of the hexie hooked me again. And why not re-use the same paper pieces?

This one will not be traditional, and will definitely NOT be hand quilted. It will be hand pieced, using small left-over fabrics (I refuse to call them scraps), cotton prints (but not batiks). I have no idea how I will arrange them, how big it will be, or anything else about how this new project will develop.

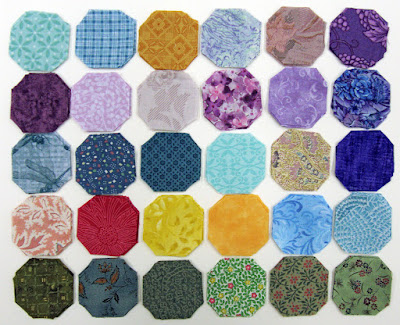
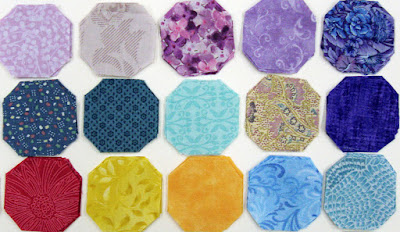
The first step was to cut out sets of  2" x 2" squares (6 per set) to make flower petals. So far, I've cut about 130 sets. Here are 80 of them, ready to baste onto the 3/4" paper hexie pieces.

fabrics cut for hexie flower petals, new hexie quilt by Robin Atkins
From very small pieces, I cut single 2"  x 2" squares to make flower centers. These I've already basted to the paper hexie pieces.

basted hexie flower petal centers, new hexie quilt by Robin Atkins
After basting some of the petals and centers, I started choosing centers for the petal sets. This part is fun! I enjoy "auditioning" various centers until one of them seems right. I'm avoiding high value contrast between petals and centers, because I might want to do a color study with them (no borders).

arranged hexie flower petal & centers, new hexie quilt by Robin Atkins
When the urge gets really strong, I allow myself to start stitching the hexies together to make flowers.

finished hexie flowers, new hexie quilt by Robin Atkins
This quilt will probably have about 650 flowers! I've cut 130 so far, each different. I cut flower petals from all of my small pieces, every one. My preference is to have all 650 flowers different.

Sooooooo, if YOU have some small fabric pieces you'd be willing to donate, I'd love to have part of you in my quilt. This is what I need:

For petals - 2" x 12" strip, or 4" x 6" piece
For centers - 2" square (only one per fabric design)

Quilting weight cotton prints only, no batiks.
One petal set per fabric design (no duplicates).
Prefer small to medium scale prints.

Mail to:
Robin Atkins
1785 Douglas Road #4
Friday Harbor  WA  98250

THANK YOU!!!!!

Wednesday, September 23, 2015

Wool Applique + Thread Embroidery + Beads = Happy Quilts!!!

Margaret & Scott, a wall quilt by Robin Atkins
Oh dear, busy me, four months since I've posted here. Lots of quilting, a little beading, some travels, and recently several sets of house guests have made "retirement" a bit of a joke. For now, since the La Conner Quilt Festival is just around the corner (October 2-4), my subject is one small exhibition on the first floor at the Museum, which is currently up, and will remain through the Festival.

Last year at the Festival (and again this year!) Sue Spargo taught workshops on her wool applique embroidery methods. Those of us who were lucky enough to get in were invited by the Museum to exhibit our finished pieces. These marvelous creations are the subject of this post. Uneven lighting makes it difficult to get good photos, so please forgive poor color or tone on some of these photos.
In case you are unfamiliar with Sue's work, below is an example of her work. Students in her class could choose to make chicks, circles, or flowers. Most chose the chicks. Eight of her students are showing their work in the current exhibit.

Chicks, a wall quilt by Sue Spargo, embroidery on wool applique
My vote for the most awesome-creative piece goes to Bunny Starbuck for She Has Flown the Coop! Here it is:

She Has Flown the Coop, a wall quilt by Bunny Starbuck, embroidery on wool applique
Having put my chicks all in neat rows similar to Sue's example, I find it amazing that Bunny's mind took the idea and made a whole different story of it... a coop full of chicks, with two in line on the roof ready to follow the one already in the air. Don't you just love the way the lines divide the space?!

She Has Flown the Coop, a wall quilt by Bunny Starbuck, detail

She Has Flown the Coop, a wall quilt by Bunny Starbuck, detail

She Has Flown the Coop, a wall quilt by Bunny Starbuck, detail

She Has Flown the Coop, a wall quilt by Bunny Starbuck, detail
Note Bunny's use of whispy yarn to suggest little chick feathers, her use of snaps for eyes, the one chick turned full front, the one with a bead-tassled braid and glasses, and the one with beaded loop fringe and a gathered yellow ribbon (?) yo-yo. I love them! I'm in awe, Bunny!

Below is Chicks on Parade by Dorie Benson. It's so fun the way they are so close together, with two of them going in a different direction, just as you might see in a little cluster of chicks. If you click the photo to enlarge it, you can see some of Dorie's excellent stitching and hand quilting!

The next one is Chicks by Glenys Baker, who not only did all 36 chicks but also made a second quilt featuring circles (shown further down). Awesome work, Glenys!

Chicks, a wall quilt by Glenys Baker, embroidery on wool applique
And next is Birds of a Feather Can Dance Together by Lorraine Jones. The fun of the title is matched by the fun of Lorraine's embellishments, including her border treatment. (You'll have to see this one in person, because the light from a table lamp, made the lower corner of the photo look terrible.)

Birds of a Feather Can Dance Together, a wall quilt by Lorraine Jones, embroidery on wool applique
I guess most of us like to "swim the other way," as you can see in the next piece, Chickadees, by Carrie Unick. I thought many of Corrie's embellishments were especially fun and creative, so I've also included a couple of detail photos.

Chickadees, a wall quilt by Carrie Unick, embroidery on wool applique

Chickadees, a wall quilt by Carrie Unick, detail

Chickadees, a wall quilt by Carrie Unick, detail

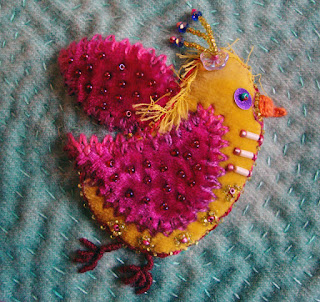
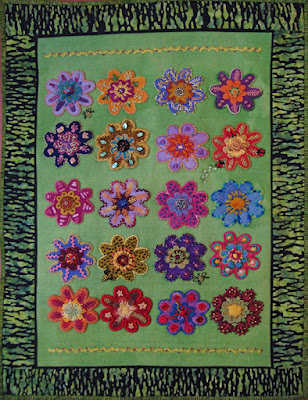
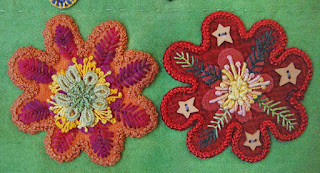
Last of the chicks is my piece, simply named Chicks. It was so much fun, that I made another small piece (also in the exhibition), shown at the top of this post. Both are displayed in shadow-box type frames to protect them from dust and moth damage.

Chicks, a wall quilt by Robin Atkins, embroidery on wool applique
Glenys Baker, in one year, made not only a 36-chicks quilt (shown above), but also a 48-circles quilt, Circles. How she keeps thinking of new embellishment variations I can't imagine. Yet each of her circles is completely unique! Her choice of border fabrics is perfect for the quilt, complimenting the flow of color among the circles.

Circles, a wall quilt by Glenys Baker, embroidery on wool applique

I love the fun color combinations and the way the beads enhance her embroidery on Nancy Anders' Bodacious Blooms, a joyful wall quilt if ever there was one! (Again, I couldn't quite get the color right in the photo, so you'll just have to go to the Museum to see it in person.)

Bodacious Blooms, a wall quilt by Nancy Anders, embroidery on wool applique

The name of Roberta Roberts' flower quilt, Memories, invites us to look closely at the flower with three ladybugs. I don't know the story, but I can tell there is one here... and I love that. Her embellishments are varied and fun as well.

Memories, a wall quilt by Roberta Roberts, embroidery on wool applique

Memories, a wall quilt by Roberta Roberts, detail

Memories, a wall quilt by Roberta Roberts, detail
There you have it... 10 quilts by 8 students who learned some methods of wool applique and embroidery from Sue Spargo, last year at the La Conner Quilt Festival. I'm so grateful to be one of them!