
Hexie Quilts - How to Make a Hexie Facing to Finish a Quilt with a Hexie-shaped Edge

1. The facing will be made of the same size hexies as the top. I generally use matching fabrics. In the image below, you can see the fabrics in the strip of facing hexies match the fabrics on the top.

2. The facing can be a single row of hexies, as shown above, or more. In the example below, I have created a double-wide hexie border for my Grandma's Flower Garden quilt. The hexie facing is a duplicate of this border. In the photo below you can see a bit of both the front (border) and back (facing) of the folded quilt corner.

3. Make each of the facing hexies the same way you made hexies for the quilt top, then stitch them together to form separate strips for each side of the quilt. I also made separate strips for the corners of the above quilt.

4. After making the strips, spray them lightly with spray starch and press well. Then remove the basting stitches and papers. Press again. The facing is ready to attach to the quilt top.
5. Now comes the slightly tricky part, and (sorry) I don't have pictures. This step is to trim away the excess backing fabric and batting. The goal is to clip enough away so that the quilt edge is not overly bulky. Trim the batting a full quarter inch back from the outer edge of the quilt top. Trim the backing fabric an eighth inch back from the outer edge of the quilt top. Imagine looking at the quilt after you've trimmed the excess. Imagine it face down on a table. All the way around the edge you will see about 1/8 inch of the top fabrics under the trimmed backing fabric. If you lift the backing fabric, you will see 1/4 inch of the top fabrics under the batting.
6. Lay the strips of hexie facing along the edge of the quilt, and baste them in place.

7. Stitch the top and bottom hexies together using a slip (hidden) stitch along the outside edge. Then stitch the inner edge of the facing to the quilt backing. Alternatively, you can use a decorative stitch along the outside edge, such as the button hole stitch, as shown below.
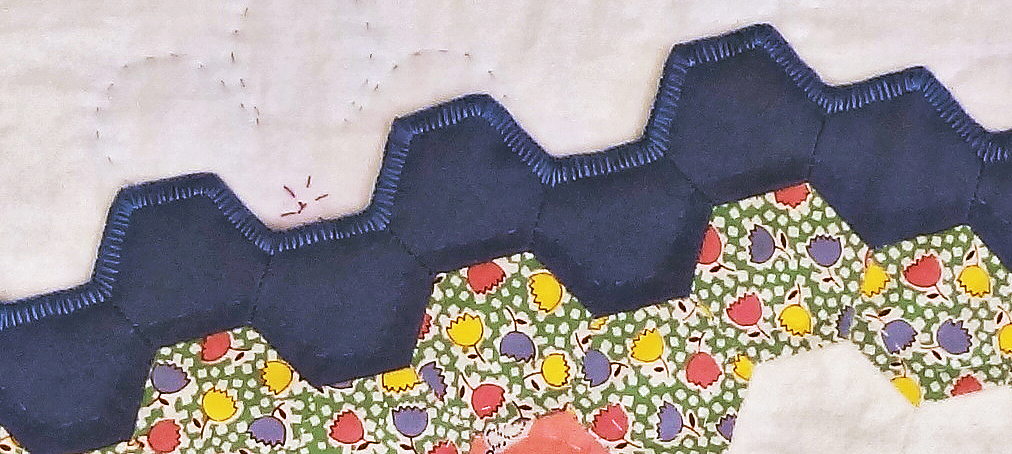
8. There are some decisions to be made about quilting the facing area of the quilt. In general, just as with normal quilt binding, I recommend quilting before the facing is added. Quilt the top to within 1/4 inch of the edge, then add the facing. There is no need to quilt the facing. However, in the case of Grandma's Flower Garden (above), the facing mimics the border on the top, which was ignored when quilting the flowers. So, after attaching the facing, I quilted 1/4 inch from the edge of the blue and the floral hexies all the way around, stitching through all the layers. This gave a nicely finished look to it. You can see the quilting stitches in the photo above. Below is the finished quilt. It's big enough to be a topper on a queen sized bed. The hexies are 3/4 inch. Here's a link to a time-line post listing all of the steps and how long each of them took to complete: https://beadlust.blogspot.com/2015/04/grandmas-flower-garden-34-inch-hexie.html


No comments:
Post a Comment
Thanks you for joining the discussion on this post today!