Thursday, July 27, 2006

color palette based on Kandinsky painting in new book by Margie Deeb More Building Blocks ~
Color Theory
For Bead & Other Artists

If you are feeling stuck in a rut with your art, there's nothing like experimenting with colors to make it fun again. Even if you're not feeling stuck, playing with color, challenging yourself with color, can be exhilarating!

Such was the case for me 6 months ago when Margie Deeb asked me if I was interested in contributing any of my beadwork to her new book about color. Would I? You're darn tootin' I would!

One of Margie's ideas for the book is to take various famous paintings, abstract from them a proportional palette of colors (or hues) used by the artist, and create something new using the palette. My first assignment was a painting by Kandinsky (check out this or this). The palette is shown above, but because of copyright arrangements, I'm not allowed to show you the painting (although it will be in Margie's book). It's a little like this one.

Immediately, looking at a picture of Kandinsky's painting, I thought of JAZZ music, especially bluesy jazz. The notion came into my mind to make a bead embroidered pin about how much I love this type of music.

The first step was to gather beads which matched the palette. Kandinsky used a lot of colors, as you can see above ~ probably more than I could work into a "canvas" that would be less than 2 inches square. But it was really fun to go through my stash of seed and accent beads, selecting everything that closely matched the palette.

Once I was ready to start beading, I studied Kandinsky's work one more time, then put it away for the duration of the project. I didn't want to copy Kandinsky. Rather, I set as my goal: to capture the "feeling" of Kandinsky.

What made it most exciting was to work with an assortment of beads that I would not ordinarily choose on my own, and in a broader color range. What made it most challenging was the attempt to "say" something about both Kandinsky and my love of jazz in one tiny creation. Here is the finished work:


I call it All That Jazz, because it reminds me of both the movie and the song. Isn't it lucky that I happened to have these three blown glass jazz instruments? They've been in my stash for about 15 years, and I don't even remember where I got them. All in all, it was a most satisfying experience. So I invited Margie to give me another "assignment," which happily for me, she did. Please come back tomorrow for more.

The working title for Margie's new book is The Beader's Color Palette Book, but that could change as it goes into its final production stages. From what I have seen, it will offer many inspirational color palette ideas, each illustrated with examples made with different beading techniques and varying in complexity. Some of the palette ideas will also include step-by-step instructions for a project, one of which I'll show you in the next post. To get an idea of how Margie writes about color check this out, and be sure to scroll down far enough to get to the colors!

Wednesday, July 26, 2006

Margie Deeb, new book about color theory New Ideas For
Working With Color!!!

I'm so excited about this, I can hardly stand it! I've just gotten permission to share a secret with you... and it's HUGE!

In 2004, Watson-Guptil publised a
fabulously original book about color theory for beaders by Margie Deeb. It has been so popular that they've asked her to write more on the subject. After writing a book rated one of the top 20 beading books on the market (by Beads 2006), and being a substantial book (144 pages), one might think this was a somewhat daunting request. But not for Margie, who has seemingly unlimited ideas about how to get us jump-started with our colors.

Important: Margie's books about color are as much for non-beaders as they are for beaders. Read on and you will see what I mean.

Although Margie's new book doesn't have a firm release date yet, she's given me permission to show you some pictures from the book. For the next several posts, I will be giving you an EXCLUSIVE preview!

For the past 4 months I've been challenged to make beaded objects based on various color schemes which will be included in the new book. So far, I've made 10 pieces for it. Fun! Exciting! New! And very difficult to keep under my hat. I'll get to my work in the next few posts, but today I'm featuring work by Thom Atkins, my brother. Because of an injury, Thom gave up creating bronze sculptures some years ago, and got serious about quilting and beading... What fun it is to share my beady passion with a bro!


Blue Fillies, painting by Marc Franz


Margie gave Thom and interesting challenge. "Create something, perhaps a small beaded quilt or tapestry, based on the color palette in Blue Fillies, a painting by Marc Franz," she requested. Here's the painting, and above you can see the color palette she extracted from the painting.


beaded quilt by Thom Atkins


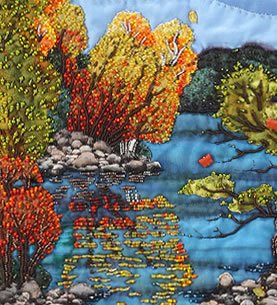
And here is what Thom made! Notice how he kept the proportions and hues of color approximately the same as in the painting, yet the subject is entirely different. Whereas the painting is an example of expressionism, Thom's landscape is more realistic.


beaded quilt by Thom Atkins, detail


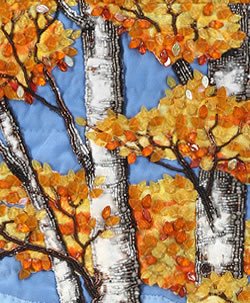
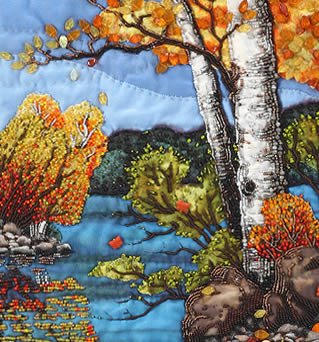
Here are some details from Thom's work. He uses beads to quilt, to add texture, and to add dimension. Congratulations, Thom! Well done!


beaded quilt by Thom Atkins, detail


beaded quilt by Thom Atkins, detail


Don't miss it... There will be more palettes and more beadwork in the next few posts!

Tuesday, July 25, 2006

Bead Weaving

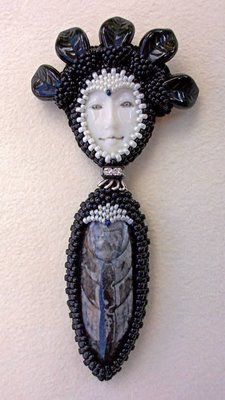
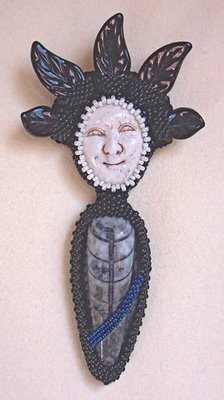
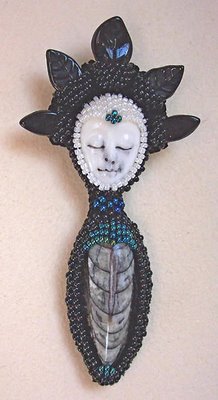
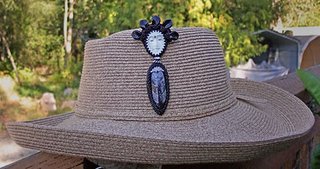
Here are three more pieces by Tressie Hughes. This time, she has made The Royal Family Blackivory, each member featuring an ancient Orthoceras fossil as the body. She has used peyote stitch (an off-loom weaving technique) to fasten the fossils and carved bone faces to the surface (which I think is Ultrasuede) and to add the other details.


beaded pin by Tressie Hughes

Lady Blackivory
Pin or Pendant by Tressie Huges


beaded pin by Tressie Hughes

Lord Blackivory
Pin by Tressie Huges


beaded pin by Tressie Hughes

Prince Blackivory
Pin by Tressie Huges


beaded pin by Tressie Hughes

Shows pin worn as hat ornament.

If you'd like to contact her, you may email Tressie at
kc7bal -at- juno.com
Please substitute @ for -at- to make it work.

Sunday, July 23, 2006

Beautiful Bead Embroidery
and Fringes


It feels a bit strange to be taking a break from grieving the loss of Dad, doing something normal, thinking about something that doesn't involve him. Yet, maybe it's important for me to move on with life as much as I can...

And so, we will return to the Puget Sound Bead Festival, where I was privileged to see and photograph some fabulous beadwork. Today I'm going to bring you beadwork by Tressie Hughes.

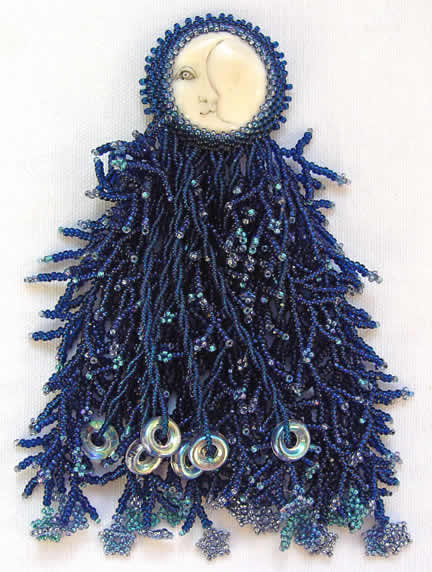
beaded and fringed cabochon pin by Tressie Hughes

Blue Moon with Stars
two-piece pin by Tressie Hughes (nfs)

This is the first pin (brooch) made by Tressie after taking my beaded fringe class at PSBF three years ago, and my brother Thom's beaded cabochon class two years ago. Please be assured that excellent work, such as this, is not attributable to Thom or me in any more than a very rudimentary way. Tressie took the techniques we taught and made them her own, creating work that is amazing.

beaded and fringed cabochon pin by Tressie Hughes

Raspberry Pink Moon Lady with Stars
two-piece pin by Tressie Hughes

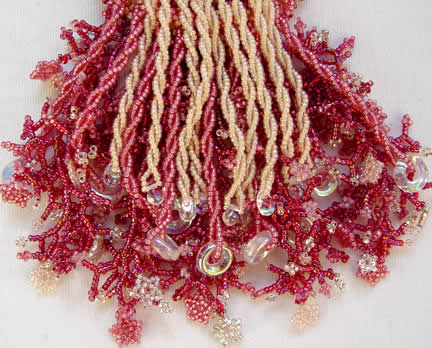
Like her first pin, Moon Lady has two parts. The face and two layers of twisted fringe (pink and raspberry) form the the primary component of the pin. The other longer branch fringe with stars is a separate piece. Depending on your mood, you can wear it as a fairly modest pin, or add the extra fringe for a more complex look. The bezel around the carved bone cabochon-shaped face is done with peyote stitch, a type of off-loom weaving.


beaded and fringed cabochon pin by Tressie Hughes

Raspberry Pink Moon Lady with Stars
Fringe detail


beaded fringe, detail of cabochon pin by Tressie Hughes

The Peach Lady
two-piece pin by Tressie Hughes

Another graceful, femine pin based on a carved bone face. On this one, the face and fringe ending in pearls make up the basic pin, with a wear-or-not fancy under-fringe attachment. Tressie designs some of her pieces to be worn either as pins or as pendants on a necklace. Either way, this one is magnificent, don't you think?


beaded and fringed cabochon pin by Tressie Hughes

Blue Mischief
pin or pendant by Tressie Hughes

Lately, Tressie has taken to making complete figures. There may be some mischief in this little guy, but he certainly has an angelic face. There's an optional woven necklace to which he may be attached and worn as a pendant.

beaded and fringed cabochon pin by Tressie Hughes

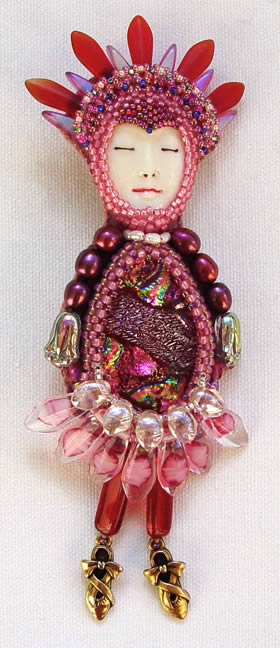
Red Russian Ballerina
pin or pendant by Tressie Hughes

Tressie told me she had this hot pink dichroic glass cabochon for a year, not knowing what she wanted to make with it. Then she found the ballerina slipper charms. She says, "Those slippers just wanted to be together with the cab." Looks like a happy union to me!

In case you're wondering, Tressie doesn't have a website. However, all of the pieces (except Blue Moon with Stars) are for sale ($85 to $200, depending on her time and materials cost). If you're interested, you can contact her by email: kc7bal-at-juno.com. (Be sure to substitute @ for -at-). Check in tomorrow to see Tressie's Royal Family!

Thanks, Tressie, for allowing me to take pictures of your work and share them with my blog readers!
Friday, July 21, 2006

D is for Dad...

D is for Dad, my wonderful Dad, who peacefully passed away last Thursday evening, two hours before I was able to get there (to St. Paul Minnesota, where my parents and two brothers live).

Dad & Robin (I'm about 13 years old in this picture)


K is for kind and patient, which he always was with his five children. Yet he was not "soft," for he held us to high standards, both by his example and by his requirements of us.

H is for honest. I've never known a more honest and trustworthy person than my Dad

U is for unpretentious. Though he was a Phi Beta Kappa, PhD graduate of Stanford University, and a distinguished Professor at the University of MN for 37 years, he lived simply and modestly.

H is for his sense of humor and ready chuckle, the way he always made up funny words and songs, the way his spontaneous and contagious laugh would send adults and children into giggles and guffaws.

E is for even-tempered. Dad was a get along type of guy, optimistic, with a sunny disposition.

F is for friend. As I matured, our father-daughter relationship faded and morphed into a deep friendship, which flourished as Mom's hearing began to fail and finally was lost. Dad and I talked on the phone frequently, sometimes daily, often with long discussions on many diverse topics. I cannot imagine what it will be like not to have these telephone conversations any more.

L is for lost. This is how I feel at the moment.

L is also for love. Our love is with him and surrounds him, wherever he is... and his love is with us and surrounds us, wherever we are.

M is for how much I miss him... more than I can express.

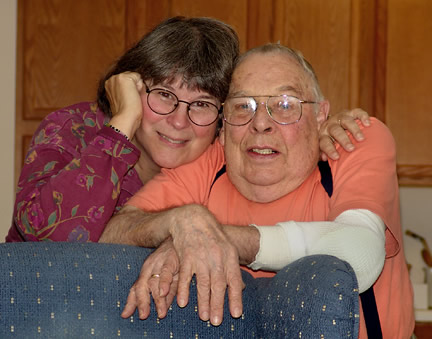
Dad & Robin ~ About 50 years later (September, 2004)


T is for thank you. Thank you for the kind thoughts and wishes many of you posted to comments a week ago. They were a support and comfort to me.

Wednesday, July 12, 2006

On the Road Again...

Sad news. My wonderful Dad, who has been under Hospice care now for a while, has taken a turn for the worse. So, tomorrow I'll be heading for St. Paul, where I'll stay for a week at least. It's a tough time for our family... brother in CA is having surgery tomorrow.

I'll have access to a computer in MN, so I might do a post or two (without pictures). Will just have to see how it goes. Please check back from time to time...
More Lampwork Beads
&
Treasure Bracelets


So we continue yesterday's post with a look at some of Nicole LeClaire Brown's beautiful lampworked beads.


lampwork bead set by Nicole LeClaire Brown


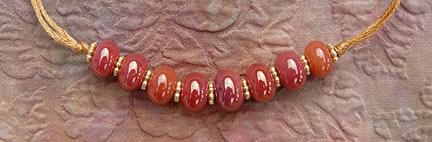
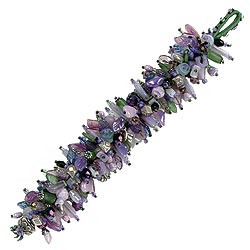
This carmel/peach set will make a fabulous bracelet. Of course they could be strung with accent beads between them, and that would be nice. But I think they'll look scrumptious in a woven treasure bracelet. Below is one of Nicole's bracelets (she's taken my class twice - once at the Coupeville Art Center, and again at the Bead Festival last week).


finger woven treasure bracelet by Nicole LeClaire Brown


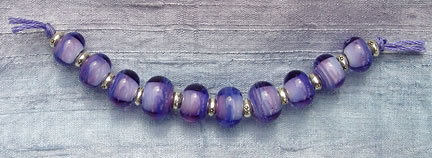
You can see how sweet these precious little beads look with just a few other complimentary beads, woven into a bracelet. Below is another set of Nicole's beads, which I plan to turn into a purple/blue dream bracelet.


lampwork bead set by Nicole LeClaire Brown


And here's the bracelet Nicole made during class last week. This one she made for her mom, Renee, who was also in the class. These colors are totally Renee!


finger woven treasure bracelet by Nicole LeClaire Brown


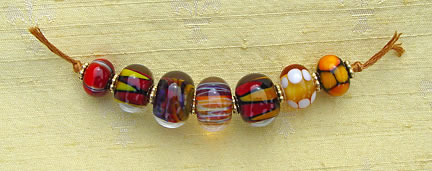
The bead sets and bracelets above feature repetition of the same (or very similar) beads, which gives the bracelets a pleasing unity. It's also fun to bring less similar, but still related, beads into a design scheme. Below are two groups of beads I got from Nicole, which I selected from about 200 orphan beads - one of a kind, left overs from sets, experimental beads, etc. I simply chose ones that I really liked. When I got home, and started playing with them, they seemed to group themselves into three different sets. I could only get two of the images to upload... here they are:


lampwork beads by Nicole LeClaire Brown


lampwork beads by Nicole LeClaire Brown

Aren't they just yummy?!!!


To ~ Nicole and Terri (see Terri's beads in yesterday's post) ~ Thanks for letting me post pictures of your beads, and here's wishing you all the success in the world with your passion. You are both so very talented!

To ~ All Who Don't Make Lampwork Beads ~ I've tried it and it isn't easy. It requires good depth perception (which was a problem for me) to be able to tell where your bead is positioned within the flame of the torch... a tad too close to the source and your bead is burned, a bit too far away and the glass doesn't melt properly. It requires steady hands and a willingness to get very close to fire. The glass, tools and equipment are expensive (as in: comparable to a closet full of fabrics, top of the line sewing machines, and a full set of templates and cutting tools). For most, the learning curve spans years, with lots of cracked, lumpy, unattractive beads along the way, before they're able to produce the consistency needed for a set of beads such as Terri's Lagoon Relic (picture previous post). Lampworkers, I salute you!

Oh, here's a grand link! It's a site where lampworkers can post pictures of their beads. They are currently showing the work of 1,809 glass artists. Here's Nicole's page.

To ~ Those of you who'd like to give finger weaving a try ~ this book (my newest baby, born just 4 weeks ago) shows you everything I've learned and discovered in the past 15 years about making and designing finger woven treasure bracelets, necklaces, tassels and straps. It's a fun, versatile, easy to learn technique!

Tuesday, July 11, 2006

lampwork bead by Patricia Frantz


Lampwork Beads
&
Treasure Bracelets


Fourteen years ago, I wrote an article for Ornament Magazine about Patricia Frantz and the process of making lampwork beads. At that time, she was one of four people in this country who knew how to make beads in the flame of a torch. Since then the art has grown and flourished, until, like all things beady, there are dozens of lampwork beadmakers in every community, thousands nation-wide. If you want to see examples by the best of the best, take a look at this book.

Among the relative newcomers to the field of lampwork beadmaking, Terri Budrow-Nelson and Nicole LeClaire Brown are two of my favorites. If you have a few seconds, check out these two links. Terri sells her beads on eBay; Nicole sells hers through her website.

Below is a set of beads (which she calls Primary Retro) I recently got from Terri.


lampwork bead set by Terri Budrow-Nelson


And here is the finger woven treasure bracelet I made with them last week as a demonstration project for 22 very eager students at the Puget Sound Bead Festival. Their bracelets (and two tassels made with the same technique) are fabulous! If you want to learn how to make beaded treasures with finger weaving, get this book.


finger woven treasure bracelet by Robin Atkins, bead artist


Here's one more set of Terri's beads. She calls this one Lagoon Relic.


lampwork bead set by Terri Budrow-Nelson


I'll be making a finger woven treasure necklace with this set... can't wait to get started! Of course, I'll post pictures.
Tomorrow, look for pictures of Nicole's beads and two of her finger woven treasure bracelets. Here's a hint of what's to come ~ one of Nicole's beautiful lampwork beads:


lampwork bead by Nicole LeClaire Brown


* * * * * *


Surprisingly (because there was sooooooo much eye candy and lots of beady friends), I missed blogging and reading your blogs while I was at the Bead Festival last week. As soon as I get around to going through several hundred pictures I took there, I'll be sharing some fabulous art with you!

Wednesday, July 05, 2006

Wheeeee!
Beadland, Here I come...


Beautiful day for a ferry ride! Mt. Baker will be in her glory, early morning light revealing every contour of her glaciers, pure white against the deep blue sky. Heading south to Tacoma, WA for the Puget Sound Bead Festival... Beadland, I call it - place where beaders of all types gather to share, to learn and to shop. There I will wallow in the thick of it for the remainder of this week!


See you next week, when the new topic will be:

Sunday, July 02, 2006

hand made book with bead embroidery by Robin Atkins, bead artist
Bead Embroidery in Hand-made Book ~ Wedding Gift!

Earlier posts (May 29 - June 9) this year covered hand-made books made by my students at Valley Ridge Art School. Today, I finally got around to taking pictures of the book that I made during those four days. This book will be a wedding present for a very dear young friend, who I met in Romania in 1988, when she was 11 years old. Tomorrow I'll mail it to Denmark (where she lives now). I'm hoping they'll want to use it as a guest book, an album for their wedding photos, or perhaps a journal for recording special moments in their life together.

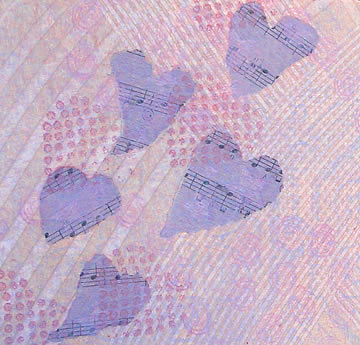
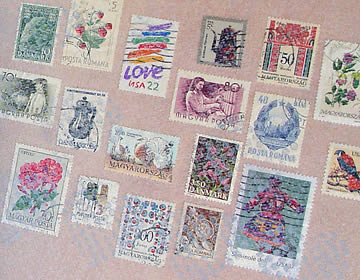
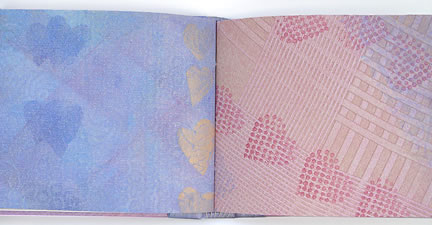
For this particular book, I first painted all the papers with many layers of acrylic paint. On some of the papers, I used acrylic matte medium to apply ephemera such as postage stamps, torn maps, torn vintage sheet music, candy wrappers, etc. I used various painting techniques, such as stenciling, stamping, texturing and glazing. From these painted papers, I selected the ones I wanted to use for the covers of the book and to wrap around each of the six signatures (sections of blank paper) inside. Here are a few of them:
painted paper for hand made book by Robin Atkins, bead artist

painted paper for hand made book by Robin Atkins, bead artist
Next, I started sewing beads on a pretty piece of silk cloth. Like most of my work, it's improvisational, but I like that it looks a little like a tree. To me it suggests that this marriage will be grow, thrive and be well rooted in love. Here's a close-up of the bead embroidery:
bead embroidery by Robin Atkins, bead artist
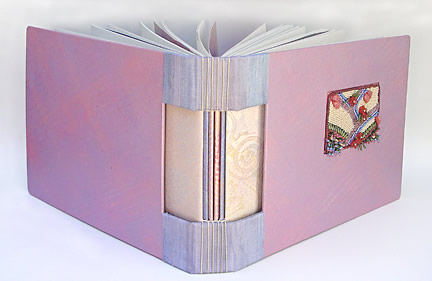
Constructing the book came next - pasting papers on the cover boards, cutting the hole for and inserting the beadwork, glueing the binding, and finally sewing in the signatures. Here's another view of the finished book showing the spine:

hand made book with bead embroidery by Robin Atkins, bead artist
This particular binding method allows the book to open flat and shows off the painted signature covers in the spine. Here's how it looks opened between the second and third signatures:
hand made book with bead embroidery by Robin Atkins, bead artist
The technique for inserting bead embroidery into the cover of a purchased book is described in a book recently published by Interweave Press... Beading for the Soul includes project examples and instructions by a number of well-known bead artists, including the book making project/instructions by me. Deborah Cannarella did an excellent job of editing, researching and presenting the theme of the book in such chapters as Beading for Healing, Beading for Prayer, and Beading for Protection. I feel very honored to have been chosen as a contributing artist.

Friday, June 30, 2006


Confessions of a Chocolate Addict ~
How a Spirit Doll is Helping!

I am a chocolate addict. You may think this statement is funny, but actually I'm pretty serious about it. For years, I lied about chocolate, I hid it, I binged on it, I was obsessed about getting my chocolate fixes twice daily (at least). After the first bite or two, I didn’t even taste it.

As I consumed more and more of it, it began to consume me. Until finally, through journaling and writing poems in a group of writers bent on healing, I finally realized it was an addiction with a solution. Abstinence. I’ve fallen off the wagon twice in the past 10 years, but since 2002 I’ve been totally abstinent. No chocolate at all. I feel better without that awful compulsion crowding my life.

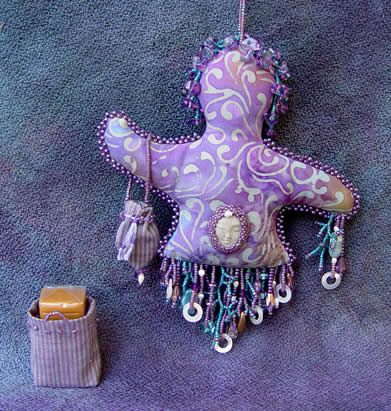
However! Here comes the part about the spirit doll… Last winter I went to “Quilt Camp” (a totally fabulous 3-day retreat with local quilters), and arrived to find a big bowl of candy on every table. Almost all of it was chocolate. Little Robin (LR) within me panicked… “What about ME? What treats do I get?” A quick look through the bowls revealed a few wrapped caramels in each bowl. Quickly LR went around to each of the tables and took the caramels to stash at our work station.


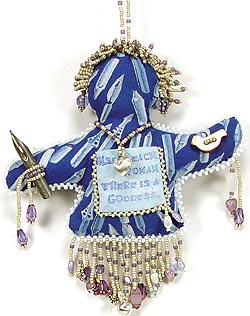
spirit doll by Robin Atkins, bead artist

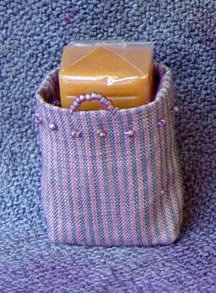
That evening, suffering from fuzzy teeth from eating so many caramels, I began making a spirit doll with the prayer that she might help me and LR to eat more healthily. I wanted to make her a little purse to hold my written prayer. At first I made something that looked like a shopping bag… too big for the doll. I stacked two caramels in that little bag, and distributed the remainder of the stash back into the bowls at the other tables. Those two candies in the sack are still there!
spirit doll, detail, by Robin Atkins
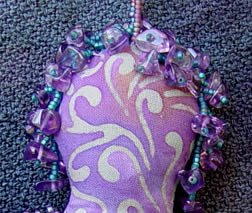
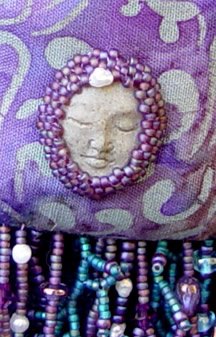
After that I made the purse you see hanging from the doll’s arm. She has amethyst (a stone said to have healing and cleansing powers, especially beneficial to the mind) chips in her hair and fringe. The pearls represent purity. The ceramic face is her (and my) "happy tummy" - serene and contented.

spirit doll, detail, by Robin Atkins


spirit doll, detail, by Robin Atkins


spirit doll, detail, by Robin Atkins

At first nothing much changed. But just before Lent, a friend said she was going to give up sugar for Lent. Immediately I joined her. I’m still not eating sugar. This is a huge change in my eating habits… I AM eating more healthily. Yeah! Many, many baby steps - from chocolate to poems to quilters to spirit doll to healthier eating – and look who’s emerging!

Are you wondering about LR? I think she’s doing OK too. She and I are trying to look toward painting, time to play with art, as a treat (rather than sweets). At the risk of being overly optimistic, my Healthy Eating Spirit Doll seems to be doing her job, for which I am most greatful!

Monday, June 26, 2006

spirit doll by Robin Atkins, bead artist
Spirit Dolls ~
Two New Ideas!

Mary, one of my mail order customers, just sent me an email about her ideas for making her first spirit doll. She has two fabulous new ideas, which need to be shared right now.

Explaining that she's been disabled for 16 years and that there's no cure for her disability, Mary wrote that she could use a "miracle doll." Isn't that a great idea? It's a special, healing process to make a spirit doll, to imbue her with your prayers, to empower her with positive energy. What if you could take it one step further, and actually fill her with your prayers for a miracle? Why not?

Her second idea is really sweet! She writes: "the maker could write the intention on a piece of cloth (or soft paper), and include it in the stuffing of the doll - just to reinforce that intention forever!" I've sewn little pockets on the outside of some of my spirit dolls, pockets which then carry little scrolls of paper with poems and/or wishes written on them. I like Mary's idea, because it is more permanent (the little scrolls sometimes get lost) and because it's more private.

The spirit doll pictured here is Madrona ~ Tree Protection Goddess. I made her last summer when our beautiful madrona trees (and many other species as well) were suffering terribly from three consecutive years of drought. To weight her body (so she won't tip over easily), I put a packet of river pebbles inside at the base. My thought was that rivers carry water, and by association I wanted the pebbles to bring water to the trees.

If you've never been to the NW coast, you may not know what a madrona tree looks like. Fortunately for you, my husband is a photographer! Go here to see color images of our beloved madronas (taken right on our property), and/or here to see B&W images. Both series feature close-ups of the fracturing, peeling bark... a phenomenon that ocurrs mid to late summer every year.

Saturday, June 24, 2006

bead embroidery sampler by Robin Atkins, bead artist
Puget Sound
Bead Festival

If you can't make it this year, put it on your calendar for next year! Hands down, this is my totally favorite event of every year, and it's right around the corner. Just a week and a few days from now, I'll be up to my ears in beads, glorious beady people, and the nicest host and hostess one could ever want.

In July each year, the Bead Factory sponsors the Puget Sound Bead Festival at the Tacoma Convention Center in WA state. What began in the early '9os as a bead bazaar, a gathering of bead spirit doll by Robin Atkins, bead artistsellers and buyers, has evolved into a fabulous 4-day event with many top-notch teachers and a huge bazaar.

Despite the size of the event, organizers, Vicki and Mark Lareau, manage to make everyone feel comfortable with their seemingly tireless personal attention to details. For example, every class room is equipped (at their expense) with an Ott Light for every work station. This is a fantastic advantage for beading students... no eye strain here. Also their friendly staff are conveniently stationed and available to all participants to answer questions or solve the occassional problem.

Now, if you aren't already itching to jump on your magic carpet, think about this: the Tacoma Convention Center is walking distance from the Museum of Glass, where cfinger weaving, treasure bracelet by Robin Atkins, bead artisturrently they are featuring a full-scale exhibition of beadwork by Joyce Scott! Joyce is a prolific, internationally known bead artist. Her work always generates an immediate, strong emotional response. Although her work is widely published, it's well worth seeing in person.

The pictures in this post illustrate the 4 classes I'll be teaching this year: Techniques of Bead Embroidery, Bead Embellished Spirit dolls, Woven Treasure Bracelet and Beaded Buttons.

Will you be there?

beaded buttons by Robin Atkins, bead artist

Mountains & Streams
Improvisational Bead Embroidery
In Progress
~
bead embroidery by Robin Atkins, bead artist
Here is Mountains & Streams (shown finished in previous post) about one third complete. You can see the Kaffe Fassett fabric that I chose for this piece. By the way, I'm really not a fabric snob. Other than a preference to work on natural fabrics such as cottons or silks, all fabrics are possibilities. Most of the time, I buy fabrics without the slightest idea of what I will do with them, choosing simply on the basis of "love at first sight." I wouldn't have known that this lovely ikat fabric was designed by Mr. Fassett, except that the clerk made quite a point of telling me.

When I begin working on a piece, I go to my fabric stash and pick out something I love at that moment. A few weeks before starting this commission piece, I'd been to the quilt shop on the mainland, where I picked up about 6 fat quarters and a half yard of this ikat fabric. Being on top of my stash and very lovely, I chose it for this piece. Next I gathered a bunch of beads I loved, the colors of which were naturally influenced by my fabric choice.

The size of the piece was determined by the fact that my customer wanted it the same size as Moss & Wildflowers, which she had seen in one of the classes I taught at Quilt Festival. So, the first step was to cut the fabric to about 9 inches square, cut a piece of acid-free interleaving paper to the same size, draw a rectangle of the finished size (6.5" x 6") centered on the paper, and baste the two together around the lines of the drawn rectangle. The paper is a stabalizer, so that I can keep my stitch tension fairly tight without puckering. The basting stitches, showing on the fabric, provide a beading guideline and show the image area. In the picture above, I folded back the extra fabric border, but you can see my red basting stitches along the top edge.

Time to bead!!! Sewing the first beads on a piece this large can be daunting. I often begin by dividing my "canvas" with lines of beads. Then I can work on one small area at a time, which seems much less difficult. This piece was no exception, so I began with lines of silver beads, which eventually started to look like mountain peaks. Then, to further divide the piece into workable areas, I sewed on diagonal lines of aqua beads. These lines immediately suggested streams or rivers.

At this point, it was pretty obvious that I was headed toward mountains and streams as the subject of my work. Yet, this isn't "forced" in any way. I don't try to make a realistic picture. I don't even try to make a picture at all. It's just in the back of my mind somewhere that this seems to be about mountains and streams. I continue to choose beads I love, and sew them on somewhere. If I had turned the piece upside down one day, and it had suggested something else, I might have gone off in a totally different direction.

After completing the silver and aqua lines that divided the whole, I settled on the area in the lower right corner, and began to fill it up with beads. The small area on the lower left side was next. I continued to bead one small area at a time, ending with the sky, until it was finished. You can see a nice large picture of it here.