Thursday, January 18, 2024

Hexie Quilts - How to Make a Hexie Facing to Finish a Quilt with a Hexie-shaped Edge

Of course there are many ways to finish the edges of a hexie quilt, including making them straight by sewing partial hexies to fill the gaps, and then binding it like any other quilt. I happen to like seeing the hexie shape along the edges. This post is about the facing method I use to achieve that look.

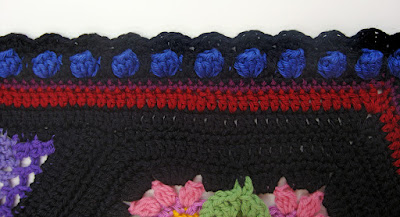
1. The facing will be made of the same size hexies as the top. I generally use matching fabrics. In the image below, you can see the fabrics in the strip of facing hexies match the fabrics on the top.


 2. The facing can be a single row of hexies, as shown above, or more. In the example below, I have created a double-wide hexie border for my Grandma's Flower Garden quilt. The hexie facing is a duplicate of this border. In the photo below you can see a bit of both the front (border) and back (facing) of the folded quilt corner.


3. Make each of the facing hexies the same way you made hexies for the quilt top, then stitch them together to form separate strips for each side of the quilt. I also made separate strips for the corners of the above quilt.


4. After making the strips, spray them lightly with spray starch and press well. Then remove the basting stitches and papers. Press again. The facing is ready to attach to the quilt top.

5. Now comes the slightly tricky part, and (sorry) I don't have pictures. This step is to trim away the excess backing fabric and batting. The goal is to clip enough away so that the quilt edge is not overly bulky. Trim the batting a full quarter inch back from the outer edge of the quilt top. Trim the backing fabric an eighth inch back from the outer edge of the quilt top. Imagine looking at the quilt after you've trimmed the excess. Imagine it face down on a table. All the way around the edge you will see about 1/8 inch of the top fabrics under the trimmed backing fabric. If you lift the backing fabric, you will see 1/4 inch of the top fabrics under the batting. 

6. Lay the strips of hexie facing along the edge of the quilt, and baste them in place.

7. Stitch the top and bottom hexies together using a slip (hidden) stitch along the outside edge. Then stitch the inner edge of the facing to the quilt backing. Alternatively, you can use a decorative stitch along the outside edge, such as the button hole stitch, as shown below.


8. There are some decisions to be made about quilting the facing area of the quilt. In general, just as with normal quilt binding, I recommend quilting before the facing is added. Quilt the top to within 1/4 inch of the edge, then add the facing. There is no need to quilt the facing. However, in the case of Grandma's Flower Garden (above), the facing mimics the border on the top, which was ignored when quilting the flowers. So, after attaching the facing, I quilted 1/4 inch from the edge of the blue and the floral hexies all the way around, stitching through all the layers. This gave a nicely finished look to it. You can see the quilting stitches in the photo above. Below is the finished quilt. It's big enough to be a topper on a queen sized bed. The hexies are 3/4 inch. Here's a link to a time-line post listing all of the steps and how long each of them took to complete: https://beadlust.blogspot.com/2015/04/grandmas-flower-garden-34-inch-hexie.html


Monday, January 15, 2018

"Eclipse" - Scrappy Improvisational Quilt

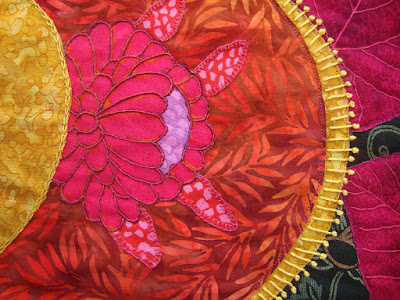
Robin Atkins, "Eclipse", scrappy improvisational quilt, detail
When my brother, Thom Atkins, visited last fall, he showed me (and a few quilting buddies) his new method for designing and constructing "scrappy improv wall quilts," a technique that turned out to be a lot of fun for me, especially given my long history with an improvisational, intuitive approach to bead embroidery.

Basically, what we did was to empty our bags or boxes of scraps onto a large table and start pawing through them, pulling out ones that appealed to us at that moment. For me it was all about color - red, magenta, fuchsia, with hints of pink, golden-yellow, orange, lavender, and dark green. All of the fabrics were in my scrap box. We had two days of Thom's demonstrations and guidance. During that time, each of us in our small group produced a unique and very pleasing "piece" or "block," measuring roughly 18 x 21 inches, the size of a fat quarter.

One of my red scraps, cut in a nice arc at one end, was the start of it all because I liked the shape and the color. Next I picked up a small strip of yellow, and held it behind the arc of red. Ooooh! Nice enough to repeat. The scrap of orange/red batik was large enough to cut a similar arc, and the strip of yellow was long enough to go behind that one too. These two arcs formed the basis of my piece.

Robin Atkins, "Eclipse", scrappy improvisational quilt, in process
You can see the two arcs above; the lower right was the first. The yellow strip was only about 3" wide, not enough to go all the way around the arcs, but I cut two shapes that would echo the top of each of the arcs. I layered the remaining scraps from that on top of the arcs along the vertical edges of the design. Then I put a dark green scrap behind the arcs and the yellow, which set them off nicely. The rest was just filling to the edges of the quilt with more scraps, including fussy-cut leaves and flowers.

The next step was to glue it all together along the 1/4" seam overlap, working in layers from bottom to top, and cutting away the excess fabric from the underside after each piece is glued. Cutting away the excess fabric leaves a double layer of fabric only at the seams; the rest is a single layer. The glue is Elmer's School Glue, Disappearing Purple, as shown below. It is an organic stick glue, relatively easy to sew through, repositionable, (in case you change your mind), and purple when first applied, drying to transparent (so you can see where exactly you are putting it).

Elmer's Washable School Glue, Disappearing Purple, 3 sizes
Thom's method is a type of raw edge applique, typically accomplished with heat-fusible web, such as "wonder under." The typical method, given a complex, layered design such as mine, would have resulted in a thick, stiff, multi-layer surface, which would be difficult to quilt, even with a machine. In Thom's method, there is no web, and in most places only one or two layers of fabric. Like all raw edge techniques, the raw edges must be sewn down, and the resulting quilts are not very suitable for bed quilts unless there is heavy stitching over the raw edges (for example, dense, zig-zag, machine stitching).

After gluing my original (shown above) quilt top, I assembled the quilt, using a spray glue to layer the backing, batting and top. The next step was to stitch along the "seams," the overlapping, glued edge of each piece. From there, it was up to each of us as to how to finish the quilt, perhaps with machine quilting, such as stippling or contour stitches, or perhaps with beading, all of which Thom does on his quilts.

A couple of months went by after getting to the unfinished stage shown above. I liked it, but didn't know what to do with it, until one day when I was at our Senior Center, getting foot care from a trained nurse who comes a couple times a week to help those who need it. Her treatment room, about the size of a walk-in closet, has no windows. Her client faces the door to the room, a plain, wooden door.  "That door needs a quilt," I told her. The rest is history; my scrappy improv quilt, Eclipse,  hangs there now.

Robin Atkins, "Eclipse", scrappy improvisational quilt
Only first I had to finish it. Above is the finished quilt, Eclipse. Below I'll tell you some of the finishing steps and about how I transformed it from looking flat and ordinary to sharp and textured using embroidery embellishments. Please click on the photo so you can see the details!

You might have noticed that the finished quilt is longer (better suited for hanging on a door) than the original piece. That was a challenge, although less than you might expect, because Thom had demonstrated for us how he sometimes extends the size of his quilts. In short, I roughly planned out the addition, the mock-up shown below, then created it using the same process and scraps as the original piece.

Robin Atkins, "Eclipse", mock up of added part at bottom

I used fusible "tape" made for butt-joining pieces of batting, to add a new piece of batting to the bottom edge of batting on the original (upper) part of the quilt. The horizontal strip of striped fabric overlaps the two parts of the quilt and the joined batting underneath. As you can see below, I added a fussy-cut flower over the striped fabric to break up the horizontal strip and visually join the two parts.

Robin Atkins, "Eclipse", added part at bottom, detail

Confession time... I'm not good at machine quilting, and don't even have a proper quilting foot for my old machine (1972 Pfaff). I tried stitching around the fussy cut flowers to secure the glued edges, but failed miserably. What to do? Ah, hand-sew with embroidery stitches and floss? Yes! It took a few tries, but eventually I found stitch and thread combinations that worked.

It looked so good that I decided to add stitching and knots to the yellow arcs next. Wow! That popped the eclipse look! In the photo below, you can see bits of all the embroidery stitches I added. Not only does the embroidery provide embellishment and emphasis, it also further quilts the piece. Click the photo to see the detail and better read the stitch identification.

Robin Atkins, "Eclipse", embroidery embellishment, stitch identification

Here are two more detail photos of the finished quilt (without the text boxes).

Robin Atkins, "Eclipse", scrappy improv quilt, embroidery embellishment

Robin Atkins, "Eclipse", scrappy improv quilt, embroidery embellishment

Lots of fun, and I like the results! Will I do another one? Well, right now I've finally returned to my hexie project, where I'm likely to remain for many months, but after that, scrappy improv may be just what I need!


Monday, August 21, 2017

Frida's Flowers - 1 Year Crochet Project - So Much Fun!

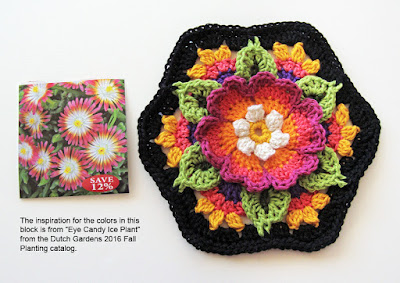
Crochet flower, hexie-shaped block made by Robin Atkins


It All Started with Hexie-lust!


Look back to early 2012, when my dear friend, Christy, started covering little hexagon-shaped bits of card stock with fabric, making stacks of 6 ready to sew together as petals for a hexie flower. While I was working on a beading project, she was making these utterly irresistible stacks of hexies, until finally I succumbed to the temptation, and joined her.

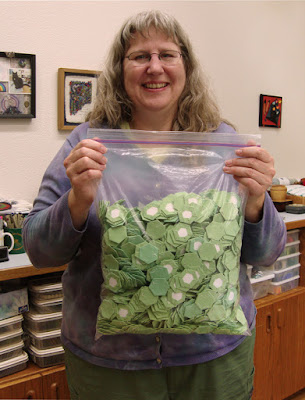
My friend, Christy, with her bag of hexies, is a great influence on me!

Here is Christy holding a whole bag of covered hexie shapes, made for the pathway around her hexie flowers.

Robin Atkins, Grandma's Garden, hexie quilt, finishing the top

And here I am holding my hexie quilt, showing the final seam of hand stitching needed to complete the quilt top for my hexie quilt, Grandma's Flower Garden.

You'd think that hand-stitching and quilting over 4,000 hexies would be enough for any sane person, right?

Robin Atkins, 733 hexie flowers, made for triptych quilts

Guess I'm not sane, because in 2015 I started another hexie quilt, or as it turns out, a triptych of wall quilts, for which I've completed 733 hexie flowers (which requires 5,131 individual hexies)!

Getting Hooked on Crochet


OK.... so now, I'm finished with hexies, right?  You guessed it! The answer is, "NO WAY." And once again it's Christy's "fault." With her hexie quilt on the back burner for a while, she moved into a crochet phase, making lovely afghans and shawls. She, along with Sabine, my friend in Germany, got me hooked on crochet (pun intended). 

Robin Atkins, crocheted shawl

This is the first shawl I made late in 2015, learning and getting comfortable with the hook. 

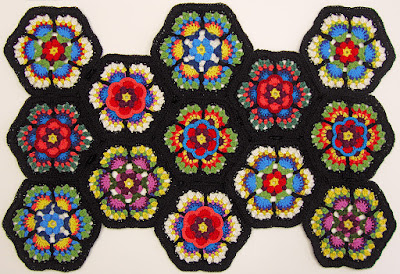
crocheted afghan by Huib Peterson using Frida's Flowers pattern

Then....  the big bang happened...  the crochet-hexie connection!!! This is it.  I saw this picture on Huib Petersen's Facebook page, fell bonkers in love, messaged him to find out about it, and learned that there is a pattern for the flowers online. Click on the above photo of Huib's flowers to see it enlarged... Wouldn't you be a bit inclined to go bonkers over it too???

On June 12, 2016, just one day after seeing his crocheted hexie flowers on Facebook, Christy and I were in Island Wools, our local yarn shop, buying DK-weight, cotton yarn in a dozen colors, ready to begin our own stacks of crocheted hexie flowers!

On a whim, right there in the yarn shop, we decided to keep what we were doing a secret... not to show or tell anybody about our project until we finished our afghans... no blogging or posting on Facebook about it. We didn't even tell Libby or Julie at the yarn shop why we kept ordering more cotton yarn. Our secret-keeping made it all the more fun!

Original Crochet-Along, Frida's Flowers


According to Huib, the instructions for his flowers came from a Stylecraft, Crochet-Along, called Frida's Flowers, staring an original pattern by Jane Crowfoot.

Frida's Flowers, Stylecraft Crochet-Along, designed by Jane Crowfoot

This is a photo from the instructions, showing the finished afghan, which includes several identical flowers in each of 2 simple and 5 complex designs. All of the designs are are multi-colored and textural, with raised flower parts, enough to make us drool!

Bored with making 6 identical flowers - Colors calling us!


Our plan was to get together at my house every Sunday afternoon to crochet hexie flowers, each of us completing enough flowers to make an afghan. In a little over a year of working 4-6 hours nearly every Sunday and some Tuesday evenings as well, we each had completed 39 flower blocks and 6 half-flower blocks, and were ready to crochet them together.

Robin Atkins, Frida's Flowers, Block 3

Ooops... I'm getting ahead of myself with this story.  We began with this block, called Rosa, which was the 3rd block in the overall design. (Blocks 1 and 2 are the more simple ones with a small central bud and plain background). This one is the easiest of the full flower designs.

But, for both of us, it was difficult, as there were several stitches we didn't know. Thanks to Youtube videos, we were able to learn them. However, after making two flowers each in the pattern colors, partially out of boredom and partly because of the influence of Huib's multi-color, no-two-the-same flowers, we decided to pick our own colors, making only a pair in each colorway. This, of course, caused us both to buy a lot more colors of yarn... oh for fun!

Robin Atkins, Frida's Flowers, Blocks 3 and 5

After making 6 each of Blocks 3 and 4, mine looked like this. Christy's color choices are different... enough different that our finished afghans may look like sisters, but definitely not like identical twins.


Robin Atkins, Frida's Flowers, colors inspired by flower catalog images

Robin Atkins, Frida's Flowers, colors inspired by flower catalog images
I started looking at flower catalogs to find new color combinations... and both of us were buying yarn like crazy.  Some brands have more that 50 color choices in DK-weight cotton. I admit to spending over two hundred dollars on yarn all-in-all, with some remainders for future projects. Never mind the cost... I adore all the colors.

Designing Our Afghans


Early in the process, both Christy and I decided we wanted to make something more like Huib's, with a random or nearly random placement of the blocks. Plus, we wanted it to be a bit bigger than the 31-block original design.

Robin Atkins, Frida's Flowers, crocheted half-blocks for sides of afghan

Also, we didn't want to include any of the more simple blocks, except as modified half-blocks for the sides.

A year went by, with the two of us continually challenged, thoroughly enjoying the process of making our blocks. Then it was time to lay them all out!

Robin Atkins, Frida's Flowers, layout for crocheted blocks

Almost at once, it was clear that the flowers needed more space, more black around each one to set them off. So, before crocheting them together, we bought more skeins of black yarn, and added a row of double crochet around each of the blocks. This also would add a bit more to the size of the afghans, making them large enough to cover both arms and legs while watching a good movie on a winter's evening.

Robin Atkins, Frida's Flowers, all blocks joined with crocheted slip stitch

Here is my finished arrangement, the hexie flower blocks crocheted together with a slip-stitch, awaiting a border. Although the original design included a border that would have worked OK, by then I was flying solo, wanting a border I could call my own.  

Frida's Flowers, popcorn edge stitch invented by Robin Atkins

After some experimentation, trial-and-error, crochet and un-ravel attempts, this is my final border invention, which includes the "popcorn" stitch, central to many of the flowers. It was challenging to figure out how to crochet the increases and decreases necessary for the zig-zag edges on the sides, and still keep it flat. Again, trial-and-error was part of the process.

Robin Atkins with nearly completed crocheted afghan, Frida's Flowers

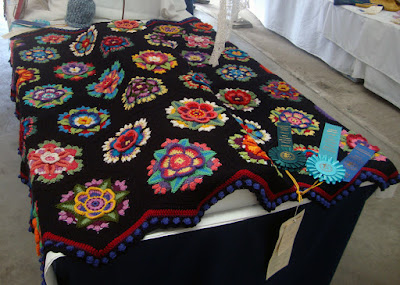
Here is my almost-finished afghan, my own version of Frida's Flowers, showing the size!

Entering at the San Juan County Fair


As we neared completion, we faced a moral dilemma, a difficult decision. We both enjoy submitting entries at our local San Juan County Fair each year, especially in the Fiber and Textile Arts Divisions. These entries are judged and eligible to win ribbons and cash prizes. In previous years, there haven't been many crocheted items entered, nothing that has won any of the top awards.

We figured our afghans could be "game changers," that they had a chance of winning. But we didn't like the idea of being in competition with each other for the top awards, the Best of Class and the Best of Show. If we both entered, neither quilt would win a top award, or one would win and the other wouldn't (which might be the worst outcome). So, after some heartfelt discussions, we decided I would enter mine this year, and she would delay finishing hers until later so that it would be eligible to enter next year.

Robin Atkins, crocheted afghan, Frida's Flowers, wins top awards at Fair

Here's what happened...  Best of Class and Viewer's Choice for me in 2017!!!! And hopefully, the same will happen next year for Christy's version. Twelve months from now, I know for sure all the attendees will have forgotten my quilt, and will love seeing Christy's flowers, just as they did mine this year!


Saturday, March 04, 2017

I Just Closed My Business....

With very mixed feelings, sadness and joy all jumbled together, I closed my business with the state of Washington today, retroactive to December 31, 2016.

It's super great to think about never having to keep track of business miles, save receipts for every little business expense, do the tedious bookkeeping, take end-of-the-year inventory, or prepare everything for taxes.... Not ever again will I have to do any of those odious tasks!

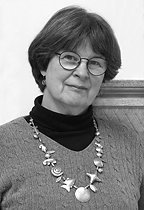
Robin Atkins, bead artist, teacher, author
Me, celebrating 41 years in business as Artist - Teacher - Author
On the other hand, my business has pretty much been my "identity" since 1975. That's 41 years - more than half of my life. What am I now? How will I respond when somebody asks, "What do you do?" Will I say, "Oh, I'm retired now?" Will I say, "I'm an artist?" It feels a little like I'm walking around 3/4 naked, the clothes of the past 41 years gone, the remaining artist clothes not enough to cover my nakedness.

But, we will not have any crying over spilled milk; the deed is done; the authorities officially notified. And, with respect, I thought it might be fun to share a few photos here, photos of the business me, and the story in more-or-less chronological order.

It all started when I met Liz Chenoweth, who is still my closest friend, and who at the time was studying metalsmithing at the University of Washington and I think working for a commercial jewelry manufacturing business in Seattle. I got the bug from her. After taking a short class in soldering sterling silver to make jewelry, I bought a workbench and all the tools, getting into it full-tilt-boogie! Liz helped me, teaching me all that she knew, and helping me to realize the design ideas I had.
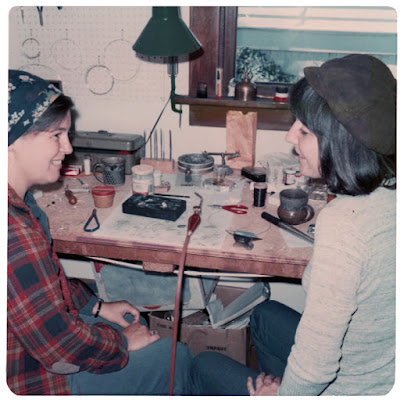
Robin Atkins and Liz Chenoweth, metalsmithing studio
Liz (on the right) and me in our metalsmithing shop, The Fort
I don't recall the exact date that I drove to the Department of Licensing to get my business license, but on that day, I named my business Atkins Creations, because I intended to make and sell sterling silver (and a little later, gold) jewelry. I bought a handsome, red, ledger book, and began the 41 year process of keeping track of all expenses and all income, mostly for tax purposes.

Robin Atkins, sterling silver, man's ring
Sterling silver ring, commissioned by a male customer
New-beginnings.... in the spring of 1975, Liz and I decided to set up a metalsmithing shop in the spare bedroom in my little home in Ballard. Removing all other furniture, we put in side-by-side workbenches, and installed a polishing table/motor. We called our shop the Fort, because we were just like kids in the summer, when we couldn't wait to be in our "fort," our hideaway, our own special place. We both had day jobs, but we lived for spending time in the Fort. My job was 5 days on, followed by 5 days off, which was great because I could work with metal for 5 consecutive days at a time.

Robin Atkins - sterling silver necklace with jasper stone and leather
Jasper stone set in sterling silver, sterling clasp, leather cord - this is a man's necklace
We sold our work at some of the craft fairs of the time, but mostly we held "open studio" days at my home, slowly building a fairly decent client list. Eventually we made most of our money doing commissions. It was a marvelous, fun time in my life. That's for sure!

Robin Atkins, metalsmithing, selling at open studio
This is the display of my silver and gold creations at our second "open studio," 1977
Three years later, in 1978, I started a new "day job," one which quickly turned into something much more demanding of both my time and creative energies than had been my previous job. Soon, I could no longer continue making and selling jewelry at the previous pace. And, by the early 1980s my jewelry tools and supplies were lonely and dust covered. But, I didn't close the business officially.

Robin Atkins, beaded multiple strand necklace
Multiple strand necklace in style taught by Carol Berry
The hook was still set, because in 1987, I took a 2-day class from Carol Berry on making multiple-strand beaded necklaces. BEADS! In those two short days, I fell absolutely bonkers in love with beads, and within a few months, I was back in business again.

Robin Atkins, beaded multiple strand necklace
Multiple strand necklace I made as a "project" for Margie Deeb's book, The Beader's Color Palette
This time, I added the name Beads Indeed! to the official license, making it Atkins Creations - Beads Indeed!  Nice, huh?! Plus I quit my day job, deciding to support myself somehow with beads. Not easy. Especially for the first few years. Hard work and lots of rice for dinner. Since the selling part of making gold/silver jewelry was never fun for me, I decided to make my living this time by selling beads (just the "raw" beads, not made into jewelry) and teaching classes. If I sold a few pieces of beaded jewelry, that would be fine, but there would be no pressure to pay the bills by promoting my own creations. On the other hand, selling beads WAS fun; and buying beads to sell was even more fun!

 By 1988, I sold my metalsmithing equipment, and turned my garage into a studio/store for both selling beads and teaching beading workshops. For 10 years, that was my life, my identity... Beads Indeed!, open every Wednesday of the year, classes most weekends, open for your beading needs at any time by appointment.

It worked! I could have my cake (beading/beadwork) and eat it (selling beads and teaching classes) at the same time. You have to know that back then I did not in any way consider myself an artist. I knew I was a pretty good craftsman, making jewelry that would last and that looked great technically. But I did not think of myself as a creative person.

Robin Atkins, improvational bead embroidery
Generations, a small pouch, my first improvisational bead embroidery piece
The discovery (made mostly by Carol Berry, with some input by me) of "improvisational bead embroidery" in 1991 caused a shift, both in my sense of identity and my business. Gradually, stitching beads on fabric without a plan, letting a piece develop bit by bit without trying to control it, and thankfully with no intention of ever selling it, altered my perceptions about myself as a craftsman, turning me into an artist.

This was such a huge alteration of identity. It made me feel more sure of myself as a teacher, and gave me the confidence to promote my beading workshops far beyond the walls of my studio/shop. I traveled to many states, teaching at conferences, for bead shops and guilds, branching out to teach beading to quilters and fiber artists, eventually even teaching at art schools. All in all, Beads Indeed!, in Seattle turned into a pretty decent business. I could afford to eat out now and then, plus travel to far away places, like China, Germany, and Eastern Europe, on bead-buying trips.

Those 10 years, immersed in beads, with a growing sense of myself as an artist, gave me the confidence to begin writing books about beading, which in turn, provided another source of income, income I would need after moving from Seattle to San Juan Island, where I could no longer depend on selling beads to support myself because the population base was so small.

Robin Atkins, improvisational bead embroidery
Marriage Bag, a small purse I made while deciding if I should marry Robert
That move, in 1998, was because I met Robert Demar, who a few years later became my husband. He already lived on San Juan Island, which was a plus for me, because I love it here, much more than living in a big city, even though Seattle is quite nice as cities go. After we married, I still traveled widely and fairly frequently to teach beading workshops, but I needed to fill the time when I was home and also needed to earn more money. The answer came easily... write books about beading! My first book, One Bead at a Time, was published in 2000, and was re-printed 3 times. Including two small booklets, there are currently nine books with my name as the author.

book by Robin Atkins
My first book, published in 2000

book by Robin Atkins
My most recent book, published in 2013
I guess my business identity, for the past 41 years, can be summarized as: "teacher-artist-author." But, in the last two years, it's been mostly "artist," with much less teaching and no further book writing. Business income has dwindled to a pittance, I'm 74 years old, and I don't enjoy the record-keeping. Even my accountant agreed. So today I pulled the plug on Atkins Creations - Beads Indeed!

Already there are new questions facing me, questions such as:
  1. What shall I do with the remaining inventory of my book, Heart to Hands Bead Embroidery?
  2. Shall I keep paying for my website (my domain name and web service), which includes my primary email address, and which badly needs to be updated?
  3. Shall I continue teaching now and then, maintaining the necessary supplies to do so?
  4. Can I immerse myself in creating things (quilts, art, bookmaking, beading, etc.), with no intention of doing anything with the things I create, not using them as examples when I teach, and not selling them?
  5. And, of course, there's the question at the top of this post.... who am I now?
Robin Atkins, improvisational bead embroidery
Home, one in a series of bead embroidery pieces about gratitude

Saturday, February 11, 2017

I'm Back to Painting! Decorative Painted Papers for Bookmaking and Paper Arts

I learned to create decorative painted papers from Paulus Berensohn, Albie Smith, Lynne Perrella, Anne Bagby, and others by taking wonderful workshops from them in the 1990s, and soon adapted their techniques to making books with beadwork inserted into the covers, like the one below. I use my painted papers on the book covers and for signature covers, which look great with this type of binding.

But after moving to the island where I've lived for 20 years now, I gradually got into quilting and textile arts, kept the beadwork going, and cut way back on painting. Until now!

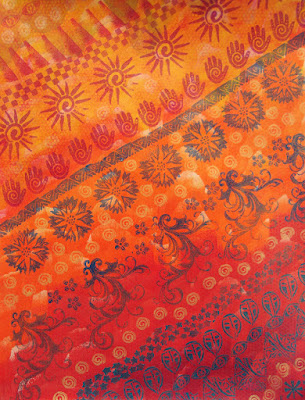
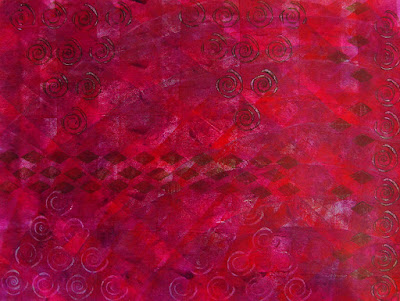
Inspired, cajoled, and arm-twisted by one of the Textile Guild members, who wants to learn how to paint papers and make books like mine, I agreed to teach a workshop (2 days of painting and 2 days of bookmaking) for the guild members. Of course, since I hadn't painted for many years, I first had to get back into practice. Yay! What fun I've been having, painting in my shed (thankfully heated). The paper below is my favorite of about 20 painted in the last two weeks. The size is 18 x 24 inches. (Please click to see the details!)

Robin Atkins, decorative painted paper, paint stamp stencil with acrylics
And below are two more to go with it.  The paper above will be used for a book cover, even though it will be hard for me to cut it up. The two papers below will be cut (horizontally) into thirds, and used as signature covers. For those unfamiliar with bookmaking, a signature is a section of papers within a book. Each of the six signatures in my book will be covered with this decorative paper.

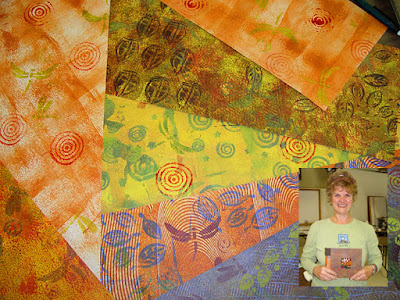
Robin Atkins, decorative painted paper, paint stamp stencil with acrylics

Robin Atkins, decorative painted paper, paint stamp stencil with acrylics
It's a fun, playful, and experimental process to paint like this, easier for me than it would be to paint figuratively (landscape, still life, or people). With this type of painting, I just mix matte medium with a color or two of acrylic paint, and apply it by rolling, stamping, stenciling in layers. I keep adding layers until I like it, at which point it's a finished paper. There is always at least part of each paper that pleases me enough to use it for bookmaking and paper arts.

Robin Atkins, tools and supplies for painting decorative papers
These are the basic supplies and tools I use to paint the papers:

1.) Although acrylic paints and this method can be used to paint on almost any surface or paper, I usually paint on 80-90# drawing paper to make decorative papers.

2.) I prefer using a roller to apply background colors or glazes, rather than a brush. My favorite, purchased online from Dick Blick Art Supplies, is a 2.2"  dense foam roller.

3.) Assorted stamps and stencils. I carve a lot of my own stamps, as you will see below, but sometimes also use commercial stamps. Note that commercial rubber stamps with fine detail for stamping with inks do not work well with acrylics, as the paint clogs the fine lines, ruining the stamp.

4.) Assorted materials, such as a notched adhesive-spreader, coarse sea-sponge, webbed food packaging materials, and bubble wrap are useful to print, texture, and stencil.

5.) Acrylic paints. I use heavy-body paint (rather than fluid acrylics) of student-grade or better quality.

6.) Matte medium and glazing medium (slow drying) are added to extend the paint.

I know, maybe you're thinking I should do a video tutorial. OK. You set it up, and I'll do it. In the meantime, I'd rather be painting...  Here are three more recently painted papers for your viewing pleasure (I hope).

Robin Atkins, decorative painted paper, paint stamp stencil with acrylics

Robin Atkins, decorative painted paper, paint stamp stencil with acrylics

Robin Atkins, decorative painted paper, paint stamp stencil with acrylics
The one directly above is my attempt to emulate batik fabric from India. I had a bedspread back in the hippy 60s with a burgundy design on a mustard yellow background, the memory of which was the inspiration for this paper. I carved all of the stamps used to make it.

I love to carve my own stamps, and sometimes cut my own stencils as well. Let's take a look at that process. It's quite easy really, requiring only a block of Speedy-Carve (or other high-density rubber carving block), and a Speed-Ball Carving tool. Designs can be free cut, drawn right on the carving block, or transferred from a tracing. Here's a fairly decent tutorial on the stamp carving process.

Designs? Well, everywhere I look I see possibilities for carving more stamps! Recently, visiting a fabric store with my quilting buddies, I spied a fat quarter of batik fabric with a luscious design. Here is the fabric:

cotton batik fabric, design inspiration for carving a rubber stamp
And here is the stamp I carved from a tracing I made of the central flower. The stamp is the same size as on the fabric, about 3" in diameter.

Robin Atkins, hand carved rubber stamp for painting decorative papers
I also cut a stencil, which you can see below. A friend had a commercial stencil of these three leaves, which I really liked. After borrowing her stencil to use on one of my papers, I traced the painted image, and cut out my own stencil. The tool in this image is a Speed-Ball cutter, which I use to carve the rubber to make stamps.

Robin Atkins, hand cut rubber stamp and stencil for painting decorative papers
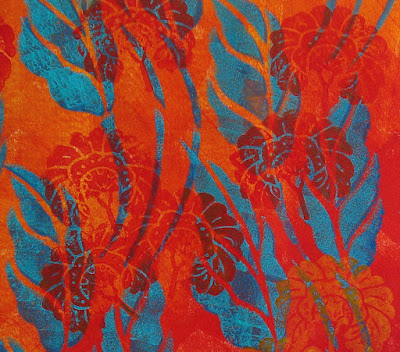
You've already seen (way above) the whole sheet of paper I painted using just this stamp and stencil, but here's a detail. If you click to enlarge, you can see more about how I paint in layers, first the background colors, next the leaves, then a different color over-stencil on the leaves, and last the flowers.

Robin Atkins, decorative painted paper detail, paint stamp stencil with acrylics
If you like to play with paint, you might want to give it a try! Here are just a few more of my recently painted papers to tempt you...

Robin Atkins, decorative painted paper, paint stamp stencil with acrylics

Robin Atkins, decorative painted paper, paint stamp stencil with acrylics

Robin Atkins, decorative painted paper, paint stamp stencil with acrylics

Robin Atkins, decorative painted paper, paint stamp stencil with acrylics

I'll be teaching a 2-day bookmaking workshop in mid-May using papers like these to create three different books. There may still be a spot or two available in the class. If you are interested, you can contact me for more information.

You may want to visit my website to see more about my handmade books and painted papers. And there are several earlier posts here on Beadlust with pictures of books made with painted decorative papers and beading by my students, as well as other related topics. Here are a few of them:

  1. Wedding book
  2. Lisa's book (from a workshop I taught in Wisconsin); her fabulous website is here.
  3. Susan's book (from a workshop I taught in Wisconsin)
  4. painting papers for making Christmas cards
  5. Using symbols in our art and symbols in acrylic painting  
  6. Using these techniques to paint with dyes on fabric and more fabric paint/dye examples
Susan Anderson, decorative painted papers, handmade book

Susan Anderson took my bookmaking/painting/beading workshop twice at the Coupeville Art Center. These are the papers for her first book, and if you click to enlarge, you can also see her finished book.

And, to close this post, here is a photo of some of the handmade books I've created over the years... most of them utilize decorative painted papers and bead embroidery.

Robin Atkins, handmade books, decorative painted papers, bead embroidery
Thanks for sticking with me to the end of this long post :)!