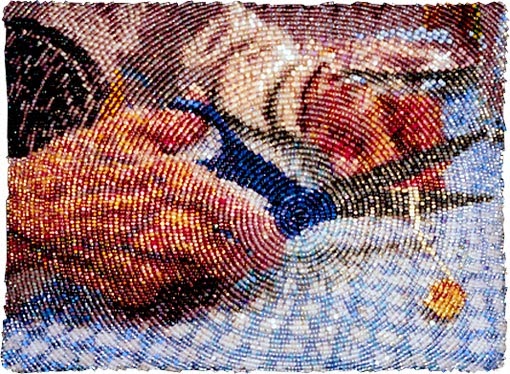
The master at this technique is Amy Clarke Moore, former editor of Spin Off magazine and co-author with me of Beaded Embellishment. Here is one of her pieces.
At the time we were writing Beaded Embellishment, I was too busy doing my own style of bead embroidery with lots of surface texture to try Amy's technique. But I admire it greatly. In our book, she explains how she manipulates a photo (or drawing), prints it on paper, puts the paper on top of fabric, and beads directly onto the paper, following the shapes and colors of the print with her beads. She suggests starting the circle somewhere in a highlighted area, a place where she wants the viewer's attention to go. Then she builds circle after circle, selecting uniformly shaped beads (all size 15) in a color and finish that compliment the picture she is beading. Watching her work several times, I marveled at how many different size 15 beads she has and how carefully she selects each bead, especially mindful of the finish of the bead (shiny, matte, opaque, transparent, color lined) and the affect it will have on her "bead painting."
Here's a link to Amy's blog post where she tells how to get started, to make the design for an ornament such as "Little Star" shown below.
If I were going to make an entire bead painting using her method, I would probably try printing the picture on fabric, and beading as usual on the printed fabric with paper on the back as a stabilizer. Truth be known, I've always thought I might get bored beading a pre-printed picture, so I've never tried the technique on a full-sized piece.
However, it is a useful method for making beaded circles, and in my most recent piece, I more-or-less used Amy's method, following the sun-dyed print on the fabric to make the background world to my message. Here is the piece:
The title is "Message to Citizens of the World", and you can find out more about the meaning of it here. Basically it takes a look at voluntary population control as a means to save the earth and our species. Notice the background? It represents the world. It needed to be concentric circles. Here's how I did it.
First, I chose a point to be the center. Turning to the paper backing on my beadwork, and using a compass, I placed the anchor at my chosen center point, and drew concentric circles outward, spaced about 3/8 inches apart. Next, using a fine sewing thread in a color that shows up well on the front (fabric side), I basted a line of stitches along each circle. These stitches, visible on the front are my guide, the marks that help me keep the circle round. In the picture above, I've already started beading the circle, but you can see the pencil marks and stitches in the unbeaded areas.
Here's how it looks on the right side:
In this case, the circle started as a spiral. But next time, I'll begin with a single bead at the center point, and then start making rounds of circles around that single bead.
I use only back stitch and size 15 beads. When the circles are small (the first 2 - 4 rings out from the center), I stitch 4 beads at a time, back stitching through the last 2 beads. After the circle gets larger, I stitch 5 beads at a time, back stitching through the last 2.
Tips
- When I get to an isolated area, as shown above, I bead along the stitched guide line first, then smooth the line by sewing back through the whole line of beads a couple of times. From there, I bead inward to meet the rough edges of the figure as closely as possible. This method keeps the circle round and the visual lines connected.
- When the outside edge of the circle is not visible on the piece, it works best to start in the center and work outward. When the outside edge is visible, it is sometimes better to start at the outside edge and work inward (see below).
- Every 4 or 5 rounds, I stitch back through the entire round of beads to smooth it out.
- Although I try to select against beads that are a little larger, fatter, smaller, or skinnier than average, or beads that have an irregular shape, I'm not very patient. Therefore, when you click to enlarge the picture, you can see a few gaps and/or larger beads. On the actual piece, which is only 2.5 inches wide, I don't notice these irregularities (thankfully).
- This method will work with larger beads, size 11, and possibly size 10. But the detail will not be as great unless the finished piece is fairly large.
- Sometimes a line of beads will seem a bit crowded, some of the beads popping up a bit, or slipping under other beads. When this happens, if it bothers me, I take out the lines of beads back to the problem, and re-stitch the line allowing more space for the beads. I've tried going back to couch down the beads which are popping up. Unfortunately, forcing beads down on the surface in one area, generally makes other beads pop up somewhere else. So my rule of thumb is to always be vigilant about not crowding the beads, allowing a little of the under fabric to show in places, allowing the sewing thread to show a bit. Nobody ever notices it when the piece is finished.
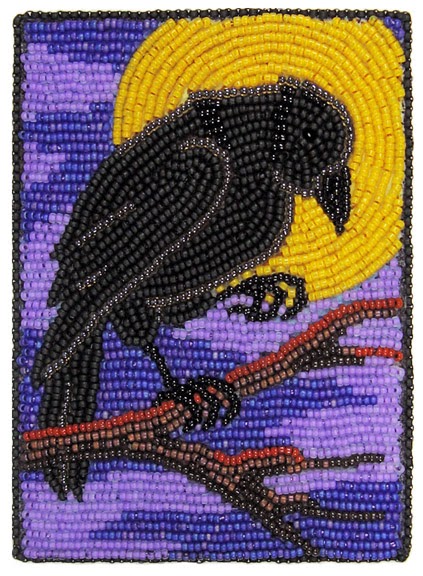
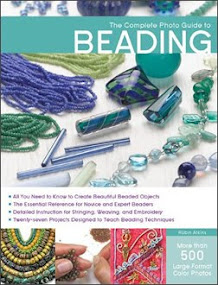
Here is a picture from my recently published book, The Complete Photo Guide to Beading. "Raven Moon" is one of the projects in the book (pages 188-191). In this case, I beaded the moon after finishing the raven, in order to make it appear that the raven is in front of the moon. Because I wanted the outside edge of the moon to be a sharp and accurate circle, I beaded the moon from the outside inward. Working in back stitch, trying to weed out oddly shaped beads, I first beaded the outside ring of beads in the places where it is visible. I stitched back through these beads several times, until the circle was smooth. Then I worked inward, ring by ring until the lines met and the moon was complete. If the inside rings aren't quite round, or don't quite match up from section to section, it doesn't matter, because the viewer's eye will always perceive the round shape as defined by the outside ring of beads.


Thanks, Robin! That helps a ton.
ReplyDeletethanks for sharing Robin. You have been a great resource for me for quite some time.
ReplyDeleteThank you, Robin, for going into such detail. I might try some circling (but only some) during the current BJP year, because the technique could come in handy with the motto I finally decided on - you will see what I mean once I get going with my first piece. I like the way you circle bead: A good mix of circles and other shapes.
ReplyDeleteI'm very new to beading and have limited myself to flat and peyote stitch pieces, but after viewing your lovely circular pieces I'm going to give it a try--best to start off with a very small photo I'm thinking. Must go through my small fabric stash and see what I can find to use as background. Thanks Robin for the inspiration, again!
ReplyDelete